
This post may contain affiliate links. If you use these links to make a purchase, we may earn a small commission. As an Amazon Associate, All Garage Floors earns from qualifying purchases. You can read our full disclaimer here.
Are you planning a DIY garage floor epoxy installation? If so, consider this a “must read” if you want to avoid the most common errors that people make when applying a garage floor coating. From peeling epoxy floors to bad finishes, these 5 mistakes will cover 95% of all problems associated with either epoxy floor failure or appearance issues.
Day after day people install their own garage floor coatings and with great success. After the anticipation of creating a nicely coated garage floor however, nobody wants to go through the headaches and heartaches created when your floor doesn’t turn out like you expected.
So take a few moments to look over our list of common epoxy installation mistakes in order to insure a successful floor coating for your garage.
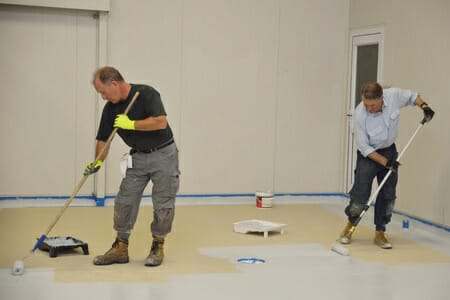
1. Poor floor preparation
This is the most common reason by far for epoxy floor failures and/or bad finishes. Many times when doing an epoxy garage floor coating for the first time, people underestimate how important it is to prep the concrete properly. It involves much more than making sure it is clean. Epoxy will not adhere to a smooth surface.
Not only does the surface have to be free of all oils, waxes, and other contaminants, the pores at the surface of the concrete need to be opened up properly. This usually involves acid etching at a minimum. Grinding the concrete in preparation for epoxy is even better, but it isn’t always feasible for the average homeowner. You can learn more about which method is best for you here.
The most common problem associated with poor floor prep is peeling or delamination of the epoxy.
Fisheyes is another problem. This is created by contaminants in the floor, such as grease or oil that causes the epoxy to pull away from the concrete while curing. It forms a circle in the finish resembling a fisheye.
2. Moisture in the concrete
This common mistake usually happens from not allowing the concrete to dry sufficiently after acid etching. Depending on temperature and humidity, you need to allow for a minimum of 24 hours, sometimes longer, for the concrete to dry. If not, moisture that is still trapped in the pores of the slab will rise to the surface and create bubbles in the finish.
Some water based epoxies and primers allow for application to concrete that may still be damp however. Contact the manufacturer for further information if you are unsure.
Not performing a moisture test is another mistake. Moisture under the slab can create hydrostatic pressure that will actually cause the epoxy to separate from the surface, sometimes taking pieces of concrete with it. You can avoid this problem by doing a simple moisture test first to determine if your floor is suitable or not for an epoxy coating.
3. Stretching out the epoxy
Stretching the epoxy out in order to cover the entire floor when you are running low will result in areas with a much less glossy surface and a distinct difference in color appearance. It also creates a weaker coating. This is a common mistake that is made with the single coat epoxy paint kits such as those from Rust-Oleum and Quikrete, but can also happen with premium epoxy products as well.
If you have a 400sf² garage floor for example and purchase a kit that has a coverage rate of 300-400sf², you will not have enough epoxy. A properly prepared floor is porous and will absorb some of the coating. You will run short.
Many manufacturers state in the fine print that you can expect up to a 15% material loss due to product left in the container and first coat applications. Most DIY installers are not aware of this. You can avoid this problem by making sure not to underestimate the amount of epoxy that you need.
Also, when pouring the freshly mixed batch of epoxy onto the floor or paint tray, do not scrape or try to get every last drop from the mixing container in an attempt to get the best coverage rate. The very bottom and sides of the container are never fully mixed properly. Doing so may result in spotty areas of the coating that will remain soft and not harden.
4. Faulty mixing of the epoxy
There are many problems associated with improper mixing. The most common of these issues is mixing too fast with a paddle mixer and trapping air in the epoxy. If this happens, you will get air bubbles in the surface during application. You can easily avoid this by not pumping the paddle mixer up and down or running the mixer too fast near the surface creating a vortex and sucking in air.
Other issues are not mixing the Part A resin and Part B hardener correctly or getting the ratios incorrect. Pay close attention to the mixing instructions. Some epoxies require the newly mixed batch to sit for a specific time before application. This is called induction time. If you don’t allow for this then the epoxy may not cure and harden properly.
5. Not following temperature and/or humidity restrictions
Be sure to follow the manufacturer’s recommended instructions for temperature and humidity. Epoxy applied at low temperatures or below those recommended may not cure and harden correctly.
If applying epoxy in high temperatures the pot life (time available to apply the epoxy) can be reduced by half or more. This can make the epoxy unworkable before you get it all applied as well as create bubbles from outgassing due to the warm temperatures.
High humidity levels can create a microscopic layer of moisture at the surface of the concrete that you cannot see. This will cause adhesion issues resulting in delamination or peeling of the epoxy. High humidity can cause some epoxies to blush at the surface as well.
Final thoughts
Achieving a successful floor coating isn’t that difficult. Many of these epoxy application errors can easily be avoided by thoroughly reading the manufacturer’s instructions. If ever you are in doubt, contact the manufacturer for clarification. Most problems could have been avoided this way. Also keep in mind that a bad batch of epoxy is extremely rare. The majority of problems associated with epoxy coated garage floors are due to these 5 common mistakes.
If you take the time to research your project, prepare your surface correctly, and make yourself familiar with the manufacturer’s instructions, you should be able to avoid these common mistakes and enjoy a successful garage floor coating that you can be proud of.
I applied Rust Oleum Epoxy in my garage floor last Thursday. Now I saw bare concrete in some areas cross half of the floor. When I applied the epoxy, I recall all were covered. how it could happen and what should I do?
Hello Richard. Has the epoxy peeled up or do these areas look like they have less coverage?
Hello Shea,
not peeled up, these areas look like less coverage.
Thanks,
Richard
OK then, that means one of two things has occurred. Most likely it was applied too thin from trying to stretch the coverage rate. When this is done, the epoxy cures much thinner and can take on an almost transparent look. The other possibility is that the concrete is very porous and the epoxy soaked in well in areas. This is not a bad thing, it just means that is has a real good mechanical bond with the concrete. When this happens you get a patchy look similar to trying to stretch the coverage rate. Epoxy primers often take on this look. The solution is to apply another coat. Since you are outside the recoat window for a chemical bond, you will first need to rough up the surface with 150 grit sandpaper before applying a second coat. A pole sander works well for this and can usually cover a standard 2-car garage in a little over an hour.
Hi, how long is a typical re coat window please?
It depends on the product Cathy. Some can be very short, such as polyurea, and some can be up to 7 days. Typically though it’s between 10 and 24 hours based on temperature. However, always check with the manufacturer get the accurate recoat window.
Hi! Applied epoxy shield to my shop floor on Saturday. Pressure washed and etched floor like instructed. Had to make 3 batches to make the 1200 square ft. 2/3 of the floor turned out great. The other 1/3 for some reason will not set up. Really tacky. I’ve used this product on numerous floors for other people and have never had this problem. From reading the other comments I’m assuming I have to scrape it off? Is there anyway one of the kits was bad? It was the first batch I mixed up. Help!!
Since you’ve applied many of these before Bryan, we are assuming you paid close attention to the induction times (how long to sit after mixing before using) based on temperature. Have you checked the box on the first batch to determine the age? Sometimes these kits sit for long periods of time on store shelves. Rust-Oleum lists a shelf life of 5 years, though we feel that is a bit long. A bad batch is rare since each batch is a huge volume. Each batch is generally tested as well before packaged. If it doesn’t set up in the next day or two then you will have to scrape it up off the floor. After you do that you will need to wipe down the concrete with MEK or denatured alcohol to remove any remaining residue before applying a new batch.
We have applied epoxy flooring as per standard procedure but after 48 hrs the epoxy flooring show same pink colours patches
How it happened
Kindly guide me
Hello deepak. You haven’t provided enough information to try and help you out. What same pink color patches are you referring to? What surface did you apply it to and what kind of prep did you do?
We had followed normal application procedures. The color applied was RAL 1015. But however after drying of 48 hrs pinkish patches started appearing . The same when applied in our lab, there was no pink patches shown after curing for 48 hrs. Also kindly note that when applied in airconditioned room, there was no pinkish patch observed.
The pinkish colored patches were seen only on 20% of the total area applied. Also this color is not so dark and not so predominant, yet when observed very closely, then it shows.
Kindly explain why this color appears
Based on the color it sounds like you had the epoxy tinted. Our best guess Deepak without knowing all the facts is that the coating was subject to high humidity during the curing process. Moisture in the air can react with the hardener causing the coating to blush. This would explain why it didn’t get the pinkish color in an air conditioned environment. Other than that we suggest contacting the manufacturer by phone to explain the conditions of application in order to get a more satisfactory answer.
Dear Shea I am hereby giving you more information of application area. The ambient temperature at the site was high may be around 40 degree celcius and humidity was very high, The labours involved in application were sweating a lot.
We suggest that you read the TDS sheets for your epoxy closely Deepak as they should give you application parameters in terms of temperature and humidity restrictions. You can also call the manufacturer to verify as well. Most epoxy has an application window of 60 degrees F or 15 C to 85 degrees F or 30 C. Epoxy generally has a humidity limit as well that varies from 70-80%. Sweat is a liquid that should not be exposed to curing epoxy as well. All of these factors can lead to the issues you were having.
My garage floor had been previously painted with an epoxy based specific paint for garage floors. Recently I observed in some area that the concrete starts to show up (mostly in the areas where the car tires are).
Instead of patch repair work here & there, I intend to paint again entire garage floor over the existing layer. There are no oil drops, no dirt, therefore I assume that a good proper power soap-water wash would be sufficient as preparation.
Any comments ?
A lot depends on the material that was applied originally, Ion, as well as the material being applied over it. If the original is paint and not a 2-Part epoxy coating, and the material you are planning to apply is the same, then a good cleaning is all that is required. However, if what was applied originally was a 2-Part epoxy paint, then you will need to rough up the surface first with 100 grit sandpaper before applying paint. If you are applying a 2-Part epoxy over paint, then you really should be removing the paint first since it’s an inferior coating. If you aren’t sure what the difference is between epoxy paint and actual epoxy coatings, then we suggest reading this first.
Hi Shea,
I read a lot of your answers to other people comments: this is a free painting school, very, very informative. Thank you !!
\Well, in my particular case I don’t have the slightest idea what is on the garage floor aside that is “something looking good” covering the concrete. One can see here and there also the brush trace. And, as I mention, in some areas due to tires traffic the “something” worn-out.
Was a 2-part epoxy paint ? Was just (like I intend to use) 1-part epoxy paint ?
After reading all other material as you suggested, + all the other people comments, I’m inclined to change a bit the plan:
Step 1:
after a good pressure water + soap of entire garage area, to the worn-out patches only to apply a Cleaner & Etcher substance and then, just in these places, to use 1-part epoxy paint (I already have).
Step 2:
To apply to the entire garage over the existing “something” an epoxy coating for a better (and longer) protection.
Again, after reading all other material available at this location I believe that for Step 2 I would need to help the bonding between the “something” and the new epoxy.
Rough up the surface first (to the bare concrete ?) and then applying the coating ? Any other method less physically demanding ?
Any comments ? Advise ?
If brush strokes are showing Ion, then most likely it’s paint of some sort. You can test for paint by using a strong solvent such as MEK on it. If it softens up and bleeds, then it’s paint. Epoxy may discolor some, but it won’t soften up.
Step 1 is fine if indeed what you have on the floor is paint. However, you do not want to proceed with Step 2 if that’s the case. Paint does not adhere nearly as well to concrete as a 2-Part epoxy coating. If you apply epoxy over paint, the weak link of the coating is the paint. In other words, you nice epoxy coating is just going to peel up because it’s attached to the paint, not the concrete. So we suggest either painting over it with more paint, or remove it entirely by grinding and then apply an epoxy.
Shea,
Thank you. Simple answer and very clear.
For now, I’ll go for:
– test for paint
– IF painted, to go for Step 1 (clean and paint over the worn-out “heavy traffic” areas )
Later (next year or so) I’ll implement Step 2:
– remove all paint by grinding and then
– applying an epoxy on clean bare concrete.
Your advice and (obvious) experience were very helpful, Shea. Thank you again
Ion
You are welcome Ion.
We used epoxy with the flakes and it looked great. We decided to put a clear epoxy sealer on top of that. Well we didn’t have enough for some reason and had to stretch it resulting in the finish not being even. Are we okay to go over just the thin spots or should we do the whole floor and how soon should we do either? It’s been 12 hours.
Hi Jill. The amount of flakes applied can reduce the coverage rate of epoxy. As long as you are within 24 hours, go ahead and apply a full coat again, making sure you pay attention to the area that was thin. Touching up epoxy does not work. Unlike regular paint, it really stands out, showing overlap lines and a different looking finish.
Thank you. So even though it says not to walk on it in less than 24 hrs we are okay to re-coat?
That’s for regular foot traffic Jill. It’s fine to walk on earlier for a recoat. Just make sure your shoes are clean.
I applied the epoxy and flakes on a 3 car garage. It looks great but I am disappointed in the lines that show. In most areas, the lines of each section are visible. It looks like I did not not spread the epoxy evenly. What did I do wrong and will a sealer make it look better?
Hello Mark. Are you saying that you have lines from roller marks or do you have lines where one coating ended and another began? Epoxy is a sealer so I’m not sure what you mean by applying a sealer to the surface. Do you mean a clear coating? If so, it will only makes the lines look more glossy.
I have an outside patio that I painted with H&C solid stain about 15 yrs ago. Over time about a third of it has flaked up. What’s my best way to repaint it?
Hello Randy. H&C stain is usually a solvent based acrylic coating. Many times you can reapply right over it since the solvent usually emulsifies and blends with older coating. Of course it would require cleaning the current concrete and coating first to make sure all the loose coating is up. We suggest contacting H&C , however, to get their exact recommendation.
Hi there,
I have a newly built concrete 2 car garage floor. The contractor cut at the middle with 2 crossed weather contract lines prevents from cracking in temperature change. i’m planning a coat with EpoxyMaster. My question,
1) will the cut gives problem for coating? Do i need some kind of fill-in before coating?
2) secondly, the garage floor has a little slope from inside towards to garage door, will that also affect the coating flow towards the lower side during curing?
Thanks in advance!
The saw cuts are not an issue Allan. You can leave them as is or fill them with the appropriate material for contraction joints if you want a seamless looking floor. The slope will not affect how the coating is applied either. It would have to be close to a 45 degree angle before you had to worry about it.
Thanks Shea for quick response.
If 45 degree slope doesn’t work well, it isn’t feasible for kickboard around the floor, right?
I guess the point I was trying to make Allan is that the slope shouldn’t affect the epoxy at all. A 45 degree angle is excessively steep and wouldn’t be used at the front of a garage. Technically most epoxy for floor coatings can be applied to vertical surfaces (think stem walls along perimeter of the garage floor), it just requires that it not be applied too thick or it can run.
Got it. Thanks Shea!
Got a white epoxy floor with speckles done in my business. The floor didn’t come out as I’d hoped. But regardless of that I cannot get it clean! It’s likeit just traps dirt no matter how hard it gets mopped. Had a spill n cleaned it up with clorox wipe n now that one spot sparkles. Why is this? And any tips on getting it clean?
Hello Amanda. We recommend starting with a vinegar and water solution. We have an article on how to clean epoxy floors here.
The article actually recommends that you don’t use vinegar.
Hi Dan. Can you elaborate a little bit? I’m not sure what you are stating exactly. Mistakes are sometimes made and if there is one somewhere that we are not aware of, we are happy to know about it.
I painted a side walk with a 2 Part Epoxy with flakes. It has been 17 hours. I don’t like the color. How do I repaint it with the flakes on it? Can I take and pressure wash to remove them?
Hi Rick. No, you can’t pressure wash flakes off of epoxy. If you are within the recoat window of the product you used, you would just apply another coat of the color you like. If you are outside the recoat window it will require roughing up the surface with 120 grit sandpaper first in order to recoat. The big issue though is that epoxy should not be used for outdoors. It is not U.V. stable. Exposure to the sun will cause it to turn yellow shortly and eventually chalk up and deteriorate. This article here explains why. You need to use an actual concrete paint (not epoxy) or a 1-part epoxy paint. These are U.V. stable. 1-part epoxy paint is not epoxy. It’s acrylic latex paint with a little bit of epoxy resin added. If you want to use an actual resinous coating, then it would need to be something that is U.V. stable and tested for outdoors. One such example would be Rust Bullet DuraGrade Concrete.
Applied gray epoxy to my basement floor. did the appropriate prep work ahead of time. The day was cool with very low humidity. During application black smears appeared on my roller as well as then on the floor. There also was black smears in the bottom of the can. What would have caused this to happen?
Hello Mary. If you were using a 2-Part epoxy, the black on the bottom of the can most likely is from the colored resin. This is why it’s important to mix each can thoroughly before mixing them together. Coloring agents can settle. It can also possibly be from old product that has expired. You may want to check the manufacturing date on the can.
I just had my garage professionally done, one full day of grinding old surface, then two coats of epoxy and two applications of chips, then the finish top coat, it’s now been 3 weeks and the floor is still tacky, the contractor has offered to return my money but I don’t want to be stuck with this tacky floor. He has also offerd to reapply topcoat. What should I do and what do you think happened?
Hello Dave. It’s hard to say without knowing exactly what materials were used. Generally, a tacky coating after a few days is a sign of improper mixing or temperatures too low for the coating which will not allow it to cure. Adding another top coat may cause the tacky coat to react and cure, but it’s a crap shoot to be honest. A true professional contractor would fix the problem, not offer money back and leave the mess up to you to take care of. I would press the issue for them to correct the problem. It they would rather give your money back, tell them that they need to remove the entire coating as well. That way it won’t cost extra for you to hire someone else to remove it and then coat the floor correctly.
Hi Shea.
Getting ready to prep our garage floor to apply R-O epoxy shield. There is one crack, a chipped out spot, the size of a bit bigger than a quarter, I think from where a hammer was dropped & saw marks. How necessary is it that they are filled before coating if I’m worried about it causing the epoxy to chip & peel? I did read the where you said that saw marks don’t need filled…but wondering
Hello Heather. If you are referring to the “saw cuts” that divide the slab and serve as contraction joints, those do not need to be filled. You do not have to fill the chipped out area either as long as there is no loose material within it. If there is, you need to remove any loose material by tapping it firmly with a chisel and hammer. What you can do, however, is fill the chipped out area with EpoxyShield Concrete Patch and Repair. Once is cures, after about 12 hours you can sand it smooth with the rest of the concrete and then apply your coating.
Hi Shea.
Is thinners ok to use to remove existing paint (acrylic and oil based enamel) from the garage floor surface prior to using my epoxy based rustoleum floor product. Of course I will be etching with the citric acid etch provided prior to applying epoxy (1 coat kit) thank you
You can use solvents, paint strippers, or grind Micheal.
Hello, I don’t have anywhere to store the stuff in my garage while I lay down the coating. I’m wondering if I can do half, move the stuff over after it’s cured and then finish the other half.
Hello Kendal. You can do that providing that you have joints or saw cuts in the concrete that can act as natural borders. If you don’t have these, then the area where you overlap the two coatings will be highly visible and not attractive. Epoxy does not blend like paint does. You will also need to be using a product that will allow you to mix half of the part-A and part-B components together separately. One thing to consider is renting a moving van. Many companies rent them for as little as $19 a day plus mileage. Since you won’t be driving it, it works as a cheap temporary storage unit.
I painted my basement floor with rust oleum epoxy paint with flecks added,after that dried it looked great,then I applied epoxy clear coat and it will not harden. any suggestions.would it be possible there was no hardenerin the batch.followed the prep directions to a t
Hello John. If it is an epoxy clear coat you would have had to mix a part-A clear resin and part-B hardener before application. Did you do that?
About 6 months ago, we had a local floor company apply metallic epoxy on our floors (kitchen, dining, living room, office, and hallways) after they had removed tile (and us removing carpet few years ago which had left tack strip divets in the concrete), I’ve noticed areas where the divets and cracks that they had filled in are beginning to show through the epoxy, as well as, bubbles coming up through some of the cracks. There’s also the kitchen/dining area that the epoxy looks totally dull compared to the rest of the floors. They also had to cut out chunks of epoxy where dry wall pieces came loose and spiders that had crawled into the epoxy during the curing phase. Should I have them etch the current layer and have them reapply a new coat of this two-color metallic epoxy? Is there anyway I send you some pics of our floors? Thank you…MIKE
Also, after they had cut out chunks of epoxy to remove pieces of dry wall and the spiders, they did attempt to fill them back in, but, of course, it doesn’t match and looks terrible.
Hello Mike. Did they use a dark epoxy primer before applying the metallic coat? If not, that would be why the crack repairs are telegraphing through the coating. As far as the bubbles go, epoxy cures harder than concrete and can only form bubbles within the first 12 hours or so after it is applied. After that the epoxy is too hard for bubbles to form. Therefore, the bubbles you now see could have only formed when the epoxy was first applied and you now are just noticing them. Also, how are you cleaning the surface in the kitchen area where the coating is dull? Did they apply a high performance polyurethane or polyurea clear coat?
Recoating is not a problem as it just requires deglossing and roughing up the surface with sandpaper or a sanding screen first. You cannot etch epoxy. A new metallic coat will hide all these discrepancies (providing it is done correctly) and it should be topped with a high performance clear coat for protection and to keep the surface looking glossy.
We had a floor installed yesterday and it looks like we now have bubbles or dimples on top, what can we do? Should we screen/grind the top, apply a clear epoxy to even it out or start over?
Hello Jean. Was an anti-slip granule applied to the final coat? If so, sometimes this can give the appearance of dimples or bubbles. If not, then what you do depends on which coat the bubbles are in. If you did a color coat with no clear, then you will need to sand the top and apply another color coat. If the bubbles are in the clear coat, then you can sand the surface and apply another coat of clear. Bubbles are an application error and be caused from a variety of things. It can be from applying the first coat to concrete that has not dried completely, it can be from a mixing error, applying the coating to fast and introducing air with the roller, humidity too high, and etc. We suggest contacting the installer to have them fix the problem.
Looking for some guidance on a issues with my newly painted garage floor.
The attached garage was built in 1963 when the house was constructed, in 1995 the Garage was extended 13ft during some renovations. So 1/2 the garage slab is from 1963 and the 2nd 1/2 from 1995.
Some details:
– Single Car Garage @ approx. 300 Sq. Ft.
– Used Rustoluem Professions Expos Shield with paint chips already laid down, Applied 20 hours ago
– Have NOT yet applied the Epoxy Shield Premium clear coat
– Concreate was unpainted, but did use a floor grinder across the entire surface to smooth out where the old slab met the new. Pressure washed and let dry 5 days.
– Used the Rustoleum epoxy crack filler to fill in the crack between the old and new slabs and fill in some miner cracks in the new slab. Did this before the floor grinding,
The Problem:
– The Epoxy went on fine yesterday, looked good until this morning
– The areas in the new part of the floor (1995) has absorbed the epoxy much more than other and appears lighter in color than others. Very spotty looking.
– The old part of the slab (1963) looks PERFECT.
What are the next Steps:
– The Professional EpoxySheild was not available locally (Tampa/St.Pete 33713) so I ordered it from Summit Racing with a quick 3 day delivery. So it will be at least 3-4 days before I could possibly apply another color coat.
– Once I’m past the 24hrs from when the original Epoxy coat, when are my options to correct this?
– I dampened a small spot when the its lighted in color and it seemed to darken up a slit bit, do you think applying the Clear Coat will make the light areas less visible?
– With the color chips already applied, wo these need to be removed before attempting a 2nd color coat or just paint over them?
– Any other ideas?
Many thanks
Tom
Hello Tom. Sometimes the surface of old concrete can get polished smoother from use. The grinding opened up pores, but nearly as much as the newer slab. That explains the difference you are seeing. Adding a clear will only highlight the difference. Applying a second color coat, however, will even out the color tone much better since the first coat is acting more or less like a primer coat.
Rust-Oleum actually states that you have a 72 hour window to recoat. If you can source more epoxy within that time you will be good. If not, what you will need to do is degloss and rough up the surface with some 100 grit sandpaper. It doesn’t require too much effort to do this. A pole sander should do your floor in about an hours time. Don’t worry about the color flakes. You will loose some in the process and the others you can coat over. If you purchase some additional flake and go a little heavier, everything will blend well. Once the floor is roughed up and swept clean we recommend wiping it down with denatured alcohol on a lint free or microfiber cloth. This will remove the rest of the fine dust. You can apply the coating immediately after that.
Hello. I applied 2nd coat epoxy 85 percent solids to concrete floor 36 hrs ago. I have a couple of unsightly roller marks. Can I smooth them back using light sanding or with the reduce/thinner that I used at 10 percent in my coat, without needing to re coat the spots afterwards with epoxy as I used all the epoxy in the second coat. Thanks for any assistance!
Thinner will not remove the marks Ross. You will need to sand them down or sand them out. Doing this, however, will remove the gloss and make those areas stand out even more. You have two choices if you elect to sand out the marks. You can either apply another color coat over the entire floor or you can apply a clear coat over the entire floor. Epoxy is not like paint and cannot be touched up. It will always look different and stand out. Either way, it will require deglossing the rest of the floor by sanding in order to rough it up for another coat.
We applied Epoxy 7 years ago. We need to fix a few cracks in our concrete and would like to redo the Epoxy floors. Can we Epoxy over old Epoxy?
Yes you can Casey. We have an article that describes the process here.
I’m planning to coat my garage floor with an epoxy coating. The floor is about 30 years old and is absolutely covered with oil drips and various other spills of what I am guessing is transmission fluid or some other oil-based product. I’m in the process of trying various oil removers (e.g. Chomp Pull It Out, Valspar oil stain remover, Terminator HSD, etc.) to get rid of all of this oil. There are also various paint marks I’m trying to remove that appear to be spray paint, as if someone spray painted something they set on the garage floor.
Is it impossible for me to get the concrete prepared well enough to apply a coat of epoxy? I wish I could upload pictures of the garage floor because it is so spotted with black oil stains. Any suggestions to get the floor prepared well enough?
Thank you so much for your help
Hello Brett. When dealing with concrete that has as much oil as yours seems to have, the best way to prep is first clean it with degreasers as you have been doing. After that you will then need to grind the surface. Grinding will help to open up the pores of the concrete and provide the proper surface profile. Acid etching does not work since the oils within the concrete prevent the acid from reacting with the free lime in order to provide a proper etch. Once you grind, you can check the various ares where the oil staining is with a water drop test. Drops of water should immediately turn the surface darker and get absorbed fairly quickly into the concrete. Don’t be surprised if you have many areas that do not pass the test or are questionable. When this is the issue, most professional installers first apply an oil stop primer that is designed to adhere to concrete with oil issues. We would highly using such a primer. You can see an example of an oil stop primer here and you read about the advantage of using an epoxy primer here.
We just applied our primer coat. It was approx. 8 hrs when the hot water pipe leaked water on it. I was able to walk on it to wipe it up. The floor color is lighter in this area. Is this going to cause an issue with the applying the 2nd coat as log as it is dry? Also will this cause the apoxy to peal? I covered the pipes so they will not drip anymore.
Hello Tami. The epoxy may have blushed in the area where water came in contact with the surface while it was curing. Blush is a fine waxy layer that may not allow the second coat to adhere well. Scrub the area with water and green scrub pad. After you do this, sand the same area with 80 grit sandpaper to rough up the surface and you will be good to go. The water will not cause the primer coat to peel.
I just installed a metallic Epoxy cleaned with concrete cleaner, grinded the floor, etched the floor, then mopped with water two or three times to get acid removed. Most of the floor turned out just what we wanted but there are spots some the size of quarters some smaller throughout that looks like the concrete pushed the Epoxy away from the spot. I saw some of this while applying and rolled back over area until they disappeared but they came back. We are at 48hrs now from install. If I sand and recoat am I going to get those to cover? Or are the going to do the same thing?
Hello Jon. Fisheyes are caused from some sort of contamination at the surface. It can be oil, silicone, wax, or some other type of petroleum product. When the epoxy comes into contact with this contamination, it reacts by separating from it. If the bare concrete is still exposed, recoating will produce the same results. The contamination needs to be removed from the concrete. If there is a thin layer of epoxy over the concrete within the crater of the fisheye, then repairs can usually be made. Sand the fisheyes with 100 grit sandpaper to rough up the surface within the fisheye and surrounding area. Next, apply epoxy to those areas like you would a skim coat in order to fill the holes. Once it has cured properly you can rough up the surface of the entire coating and apply a new coat.
Hello, looking for some help!
We applied Resincoat HB 2 part mix to a floor in our kitchen. We followed the instructions but- mixed by hand (instead of mechanically as was suggested). However we did this vigorously with a wicked and wood spoon. At the time we thought all the mix was mixed thoroughly. We used two 10kg can and applied this thick throughout due to uneven concrete surface.
This was applied directly on a clean concrete floor.
We also had to open the only window in the kitchen for ventilation but accept this may have been too cold for the application (outside temperature was below 4deg. on tuesday). We left the window open overnight so assume temperature fell below the recommended 7deg. which in retrospect was a silly thing to do.
Since then we have closed the window and put in a fan heater at times and think this had made a bit of a difference (there is also an Aga in the room which is on constantly). But…
Two days later and some parts have hardened and some parts are still not dry!
I accept there are two potential problems (i.e mixing by hand and temperature), but my question is:
If the parts that are not dry due to bad mixture or temperature, will they ever dry? is there a correct way to rectify this?
Can I spread the remaining wet parts thin with a roller and and apply a new fresh coat properly mixed on top of still wet areas?
Do I have to scrape all and start again? if so, what is the best way to do this as it seems quite laborious to do and potentially a much bigger sticky mess?
I would appreciate any help you can provide as we desperately need our kitchen back. (What we thought would be a day or two without a kitchen is now turning into a long week!)
Thanks for your time in advance.
Chemo B.
Hello Chemo. Yes, you may be right on one or both counts. Colder temperatures will slow the curing process immensely and sometimes stop it all together. Warming the area and waiting a few days will sometimes work if it didn’t get too cold. If the curing process stopped from being too cold, it cannot be restarted. If mixing was the problem, sometimes applying an additional coat will introduce enough of the hardener to the softer areas to induce a final cure of the coating. We suggest contacting the manufacturer and explain the situation. If it can’t be rectified, then unfortunately the only solution is to scrape it up off the floor, wipe it down with denatured alcohol and apply a new coating under better conditions.
Thanks for the comments!.. we reapplied over the areas and luckily there was enough on the mix to start the chemical reaction. We have our kitchen back! Thank you for the advice.
C
Great! We are glad it worked out for you Chemo.