
When RockSolid introduced its new line of Polycuramine garage floor and interior coatings, we were left scratching our heads at first. After all, what in the heck is Polycuramine? We admit we had never heard of it before. Moreover, what happened to the old RockSolid Polyurea garage floor coating, and why the change? Furthermore, why is Rust-Oleum’s name on RockSolid’s product?
After being asked by more than one reader, we decided it was time to see what the Polycuramine fuss was about. We wanted to know if it’s better than garage floor epoxy as RockSolid claims. In addition, we wanted to know why Rust-Oleum is involved.
Lastly, we wanted to determine if the Polycuramine garage floor coating is better than the older Polyurea coating that it has replaced. As a result, we have done a deep dive into RockSolid to get a better understanding of what this coating is and if we recommend it.
This article was first published in July 2014 and has been updated to reflect the latest information. Please read the latest update near the end. It reveals the most common complaints and issues over the years that you need to be aware of.
What is Polycuramine?
To best describe what Polycuramine is, we need a brief history of RockSolid Floors. This will help explain why Polycuramine was developed and how Rust-Oleum became involved.
RockSolid Floors was established in 2007 as an affiliate of Citadel Floor Finishing Systems. Citadel is a well-established, 40-year-old plus industrial floor finishing manufacturer that specializes in polyaspartic and polyurea technologies.
Realizing that there was a DIY demand for polyurea coatings, RockSolid Floors was born to provide a friendlier DIY version of the commercial quality Citadel polyurea. The RockSolid brand is probably best known for providing the A and B components in ready-to-mix sealed burst pouches that do not require a mixing bucket.
In January 2014, Rust-Oleum acquired Citadel and thus inherited the RockSolid line of floor coating products. As a result, all RockSolid products now come with Rust-Oleum branding. All customer service inquiries for RockSolid go directly to Rust-Oleum as well.
Polycuramine is a newly trademarked product that was developed the previous year by Citadel and found its way into the RockSolid lineup. It’s a proprietary blend that is alleged to combine the best benefits of Polyurea, Polyurethane, and Epoxy.
The following is a quote from a RockSolid sales page:
RockSolid Polycuramine™ is the best of Polyurea, Urethane, and Epoxy chemistries. It combines these three chemistries and their key attributes into ONE indestructible, self-leveling, flexible, fast curing, high gloss coating system.
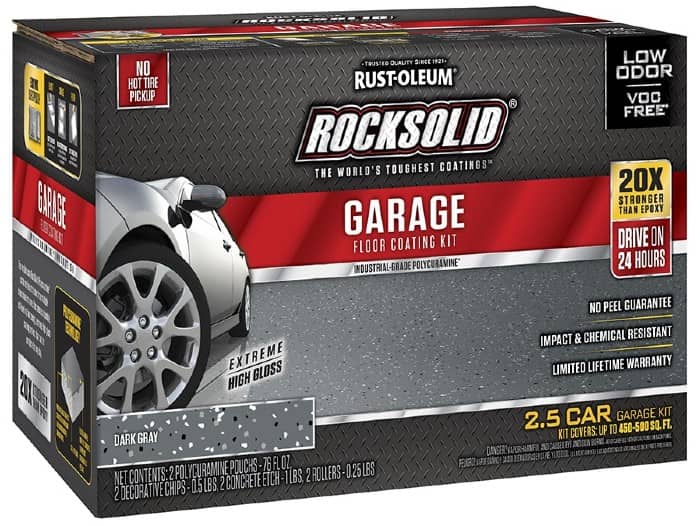
RockSolid states that its Polycuramine garage floor coating is 20 times stronger than epoxy paint. It has a 96% solids content, a high gloss finish, and is impervious to all chemicals. The coating can be installed in one day, walked on in 8 – 10 hours, and driven on within 24 hours.
It also has the added advantage of an installation temperature range of 40°F – 90°F. In addition, RockSolid has a low VOC content with minimal odor and a limited lifetime warranty as well.
Each Polycuramine Garage Floor Coating kit consists of one burst pouch of colored Polycuramine to cover up to 250 ft². Included are decorative color flakes, the required foam roller, concrete etch solution, and of course instructions. There are six colors to choose from as well – Black, Dark Grey, Grey, Tan, Mocha, and Modern Griege.
You can view their information page and color chart here.
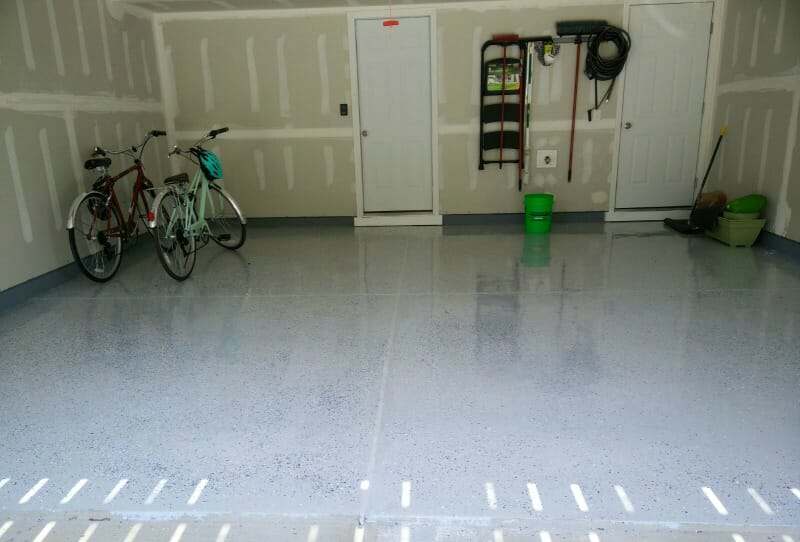
Our evaluation of RockSolid Polycuramine Garage Floor Coating
We feel that this new lineup for RockSolid couldn’t have come at a better time. Though the Polyurea garage coat kit that it replaced was a fairly good product, many of the reviews for it by the average DIY installer were less than great.
There are many benefits to a polyurea garage floor coating, but the pitfalls for the old RockSolid polyurea DIY coating was is in the installation. As a result, there were numerous complaints about delamination and finish issues.
Many if not most of these issues were due in part to the limited application time available. Polyurea cures fairly quickly. If it wasn’t applied in 20 to 30 minutes, it would begin to thicken up and problems ensued. It just wasn’t that DIY-friendly.
For example, it would not have enough time to seep into the pores of dense concrete that was prepped by etching and not by grinding. This led to delamination issues of the coating. Secondly, if you didn’t get the product down fast enough, the finish would not be very glossy and could get bumpy or lose its smooth texture among other issues.
After doing a bit of research, we learned that these problems should be solved with the new RockSolid Polycuramine coating.
First, we called the Rust-Oleum tech line. They stated that the new RockSolid Polycuramine formula has superior wetting characteristics (similar to epoxy). As a result, it allows the coating to penetrate the concrete much better for superior adhesion. This is a big help for concrete that is etched instead of prepped by grinding.
In addition, we learned that you have 45 minutes to one hour to apply the Polycuramine. This should be more than enough time to apply up to 250 ft² of product. The longer pot life should alleviate many of the finish issues that resulted from the short installation window of before.
However, we do have to question some of RockSolid’s marketing methods. They claim that their new Polycuramine formulation is 20 times stronger than epoxy paint. Really? Their older polyurea product claimed it was only 4 times stronger.
Try as we might, we could not find an actual 2-part epoxy floor coating with only a 33% solids content as RockSolid compares it to. After digging a bit deeper, we discovered that what they are comparing it to is paint – 1 part epoxy paint that is (link). That is like comparing apples to oranges.
1-part epoxy paint is not an epoxy coating and the only product available with such a low solids content. We feel that this is misleading if not deceiving. They should be comparing it to a true 2-part epoxy. It’s tactics like this that create ruined expectations of garage floor coatings.
They also claim that the new Polycuramine blend combines the best of Polyurea, Polyurethane, and Epoxy. That isn’t necessarily true either. History has shown time and again for sealers and coatings that by combining the best of everything you will not get the best attributes of each ingredient.
Polyurethane for example is known for being very resistant to chemicals, has high abrasion resistance, and is U.V. stable. Though RockSolid Polycuramine has good chemical resistance, it is not U.V. stable and can yellow if exposed to direct sunlight for lengths of time – just as epoxy does.
It’s also not nearly as resistant to abrasion as most polyurethane or polyurea coatings. For example, the abrasion rate for Polycuramine is 40 mg. That’s about equivalent to a high solids epoxy and better than the inexpensive epoxy garage kits. However, a typical abrasion rating for polyurea is approximately 8 – 12 mg. You can find the RockSolid datasheets here.
This means that a polyurea coating would last much longer or wear many times slower than Polycuramine. We suggest reviewing how to read datasheets for coatings to learn more.
Another concern is that RockSolid Polycuramine is a thin coating. It has a dry film thickness of only 3 mils. That’s about half as thick as a typical polyurea coating. A high solids epoxy is approximately 8 – 10 mils thick for a DIY kit. Our guess is they need the coating to be thinner to get the coverage rate they require to keep the price point competitive.
As a result of the thin mil color coat, we recommend a second coat of clear Polycuramine to provide for an overall thicker coating. This will protect the color coat, and provide a deeper glossy look.
Would we recommend RockSolid Polycuramine?
With all that said, initial responses from consumers have been positive. Reports are that the new RockSolid Polycuramine garage coating formula is easier to apply DIY than the previous polyurea formula.
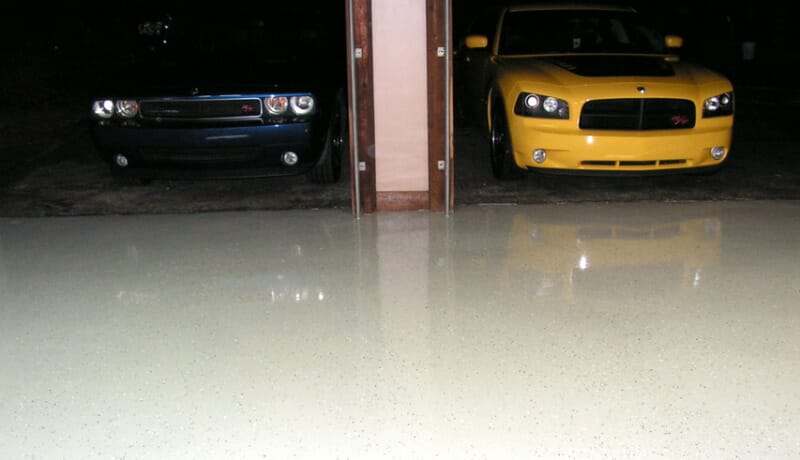
Few issues about the finish have been raised so far that we are aware of. In fact, it’s one of the most glossy coatings you can apply. Plus, the added benefit of being able to apply it in a wider range of temperature extremes is something you cannot do with epoxy garage floor coatings.
One nice advantage to the Polycuramine garage coat that we failed to mention is that it has a 7-day recoat window. This means that you can wait up to 7 days to apply another coat to the floor without having to prep it first. All that is required is to make sure it is clean.
This can be a great advantage to the average DIY installer who may only have a limited time to work on their floor. Most coating products have a recoat window of 24 hours or less.
Though the new RockSolid Polycuramine Garage Coat is only 3 mils thick, we feel this formulation is superior to that of comparable DIY coatings such as Rust-Oleum’s 2-part EpoxyShield product, Quikrete Epoxy garage floor coatings, or Valspar Epoxy Coatings as an example.
Yes, RockSolid Polycuramine is more expensive than these traditional DIY garage coat kits. However, the warranty is much better. Plus, it fills a void for the consumer who wants a quality DIY product that is easy to apply but may be intimidated by the cost and application of the thicker and more expensive multi-coat garage floor coatings.
RockSolid also has an easy-to-apply metallic garage floor coating which is now gaining some attention. It goes down twice as thick and has a very nice appearance.
This post may contain affiliate links. If you use these links to make a purchase, we may earn a small commission. As an Amazon Associate, All Garage Floors earns from qualifying purchases. You can read our full disclaimer here.
Where to purchase RockSolid Polycuramine products
We’ve had to update this section on multiple occasions since we first posted this article in early 2014. Rust-Oleum has since expanded the distribution of RockSolid and it is now available from most home improvement centers and online.

If you don’t have one of these stores near you, we suggest purchasing RockSolid Garage Floor Coatings here at Amazon. We have found that on many occasions it is available at a cheaper price.
In addition, you can find the optional RockSolid Clear Coat here.
Final thoughts
It’s too soon to know if RockSolid Polycuramine is the DIY wave of the future in garage floor coatings. However, it does appear to have much better performance and wear than the traditional DIY epoxy garage floor kits found at your local home improvement centers and auto stores.
Reviews so far have been positive and you can bet we will be keeping a close eye on the developments of this new product.
———- 2023 UPDATE ———-
It’s been over 8 years now since we first evaluated and wrote about the new RockSolid Polycuramine garage floor coating. To date, we have heard very few issues relating to the actual performance of the coating in terms of adhesion, hot tire pickup, and wear.
This is a strong indicator that it performs and lasts longer than the traditional low solids DIY garage floor coating kits such as EpoxyShield.
However, we have found that there is one primary flaw with RockSolid. Simply put, RockSolid does not provide enough coating material for the coverage rates they list. And this creates a couple of irritating issues that people are not happy about. The first is color uniformity and finish.
If you scroll down you will see that we have well over 900 comments for this article. A good percentage of these are questions or complaints regarding cosmetic problems with single-color coat applications.
These people have been reporting patchy areas or sections of the coating that appear less glossy and/or slightly different in color. Some have also complained about small spider cracks showing through.
The source of these issues is due to the coating being too thin in those areas. As with all coatings, if a single coat application on bare concrete is too thin, the appearance of the coating will not be good. The color tone and finish will change and lose gloss. It can even look slightly transparent with the concrete color showing through.
There is a reason why this happens with RockSolid.
As we originally stated, Polycuramine penetrates properly prepared concrete well – as it should. In addition, the density and porosity of a concrete slab can vary. This means that some areas of the concrete will absorb more coating than others. This is normal.
When RockSolid Polycuramine is applied to slabs that are less dense and/or more porous in areas, the limited amount of material (90 oz) provided in one burst pouch mix does not provide enough thickness at the recommended coverage rates to counteract the additional penetration and absorption of the material. As a result, the coating is too thin in those areas after it cures.
This isn’t necessarily a bad thing in terms of performance. You achieve a very good bond when the concrete absorbs the coating. However, this means you need to purchase and apply a second color coat to achieve the rich color, glossy finish, and durability that it should have. The first coat essentially acts as a primer coat.
The reason spider cracks tend to show through is due to the good penetration qualities of Polycuramine. It allows the thin cracks to absorb more material as it cures. As a result, the cracks show through and look dark. This can be avoided by properly filling spider cracks in the concrete (link) beforehand or by the application of a second coat.
The 250 ft² maximum coverage rate is only possible under ideal conditions consisting of newer concrete that is smooth, consistently dense throughout, and with no cosmetic defects. It can be obtained, however, when being applied as a second coat or over a previously coated floor that will not absorb the Polycuramine.
If you purchase RockSolid, we recommend a maximum coverage rate of no more than 200 ft² when applied to bare concrete. Slightly less is preferable. This should help provide for a thicker application. When it cures, it should be thick enough to provide a consistent color and glossy finish.
If you prep your garage floor concrete via grinding, then you will require a minimum of two color coats – period. The first acts as the primer coat and the second provides the required thickness to obtain the proper color and gloss.
There is something else to be aware of as well. RockSolid Clear Coat states that a single-car kit can be applied over the color coat of a 2.5-car kit – up to 500 ft². This makes the clear coat especially thin. Though consumers like the way the clear coat performs and looks, the number one complaint is that you need to use more than what Rust-Oleum RockSolid recommends.
The second big issue with RockSolid Polycuramine garage floor coatings is that it is more expensive than epoxy, particularly for what you get. And this is why we believe that Rust-Oleum RockSolid recommends the overly generous coverage rates. We are guessing that this was a decision that was made to try and keep the cost down to compete against epoxy kits.
To make things worse, Polycuramine has become even more expensive in the past few years. At the time of this update, you can purchase a much better commercial-quality single-part polyurea floor coating with the same coverage rates for less money.
These polyurea coatings are almost twice as thick as RockSolid. They have a very long pot life for easy application, they are U.V. stable, and have far superior abrasion ratings. Here is an example of a single color coat of AWF Polyurea that costs less for the same coverage.
The one consideration with these commercial quality polyurea coatings is that they are not low VOC coatings as RockSolid is. They should only be applied in a garage or similar environment and not inside a home such as a basement.
Our goal with this update is not to talk you out of purchasing a RockSolid Garage Floor Coating kit. However, what we are trying to do is inform and educate you about the issues you need to be aware of before making that decision.
Do we still think RockSolid is a good-performing DIY garage floor coating? Yes – if you follow our recommendations about coverage rates. However, there are now better performing easy-to-apply commercial-quality polyurea coatings that can be purchased for similar pricing.
I spoke with citidel, the industrial side of rocksolid. I had just put down a topcoat and wanted to add another coat and was in the 7 day window. They said no way, after 12-24 hours, you have to sand and acetone/mek wipe the floor.
Your comment caught our attention and we immediately put in a call to Citadel as well. From our conversation, they insist that polycuramine has up to a 7 day re-coat window. It is stated here for their commercial product as well as in the actual installation guide here for their garage coat system. When we talked with technical support at Citadel, they did mention that some people are still applying the remaining older RockSolid Garage Coat systems that consist of polyurea, not polycuramine. If you have one of the older polyurea coatings then yes, you do need to re-coat within 24 hours. If you miss the 24 hour window then you will need to prep the surface as you described.
Shea, honestly I too spoke with someone on that team. I am also speaking about polycuramine. I had a very detail conversation, and asked that question specifically as I needed the 7 day (wanted another topcoat on my floor). Did you speak with Eric?
I believe it was Eric. I told him specifically that someone (you) was told by their customer service that it had to be re-coated within 24 hours. I also pointed out that their industrial Polycuramine states 7 days in their TDS. He reassured me that the 7 day window was correct unless it’s unusually warm and dry. What’s interesting is that the sales page for the garage coating that stated the 7 day recoat window has changed. It now states: “20 day test results also show long re-coat windows” which is rather vague. It no longer says 7 days. Rust-Oleum controls that segment of marketing, so we are not sure why they changed it.
By the way, they have the best customer service, ever. I love my new floor, I had their old polyurea that held up fine but had some UV damage, they sent me all new flooring at no cost.
I upload some pictures tomorrow.
Glad to hear that. This is information that is good for our readers to know. We are putting together a gallery of garage floors. If you want to upload some pics to our contact page we will be sure to include them in the gallery!
After $600 in product and another $100 to rent a floor grinder, what a waste of money, the clear coat applied over the base of tan color 24 hours later… bubbled, made large hard clear bubbles everywhere, now i have a disgusting rough sharp in areas crappy floor, 3 days of busting my ass and all that money for nothing…. buyers beware, as a general contractor, my skills are advanced and even I could not get the product to turn out on my own home.
Hi Shea,
After pouring over this site and many others to research how to do this properly, I recently installed the Rock Solid Garage Coat system. It looks great. However, to my dismay, I already have quarter size delaminations happening. At this point, it’s only three small spots, and only under where the driver’s side front tire rests when my truck is parked in the garage. I’m frustrated, as I was soooooo careful to follow every step (especially prepping the concrete) to the tee, after reading…and reading…and reading how important preparation is. As I wasn’t sure if the floor had been sealed at some point in the past (water absorbed in most places, but less so in some areas), I opted to rent a floor grinder from HomeDepot and use the concrete prep tool. I cleaned the floor very thoroughly (washing, scrubbing, vacuuming, rinse & repeat), and let it dry for days. I then followed the installation instructions to the letter too. I waited days before parking my truck in the garage. I sure hope that I won’t have issues all over the floor at some point.
So, I guess I’m wondering two things…1)What caused this? Does this just happen sometimes, not matter how perfectly you prep the concrete and apply the product? 2)What is the best thing to do to repair the areas that have delaminated?
Thanks!
Chris
Hi Chris. We’re sorry to hear about your delamination issue, especially after all the prep work. Coatings delaminate or peel for a reason. If it happened randomly no matter what you did, then coating contractors would be out of work. Did you ever spray tire dressing on the sides of your tires? With all the prep work you did, we think its possible that you had tire dressing that deposited over time where you parked your truck (tire dressing has silicone in it) or possible plasticizer migration (oily residue in tires) that transferred to the concrete and wasn’t completely removed.
The best method for repairing it is to grind the area where it has delaminated to remove the coating. You will know where it has adhered well and where it hasn’t when you grind it. After you grind do a water test. If the water absorbs you are good to go. If it doesn’t, then there may still be silicone from the tire dressing or plasticizers still in the concrete. Grind some more and check it again. Hopefully RockSolid has a touch up kit they can sell you. Contact them and tell them your dilemma. Apply the RockSolid to the area as usual. The new repair might be more shiny than the rest of the coating. If it remains that way after a few weeks, you can try lightly rubbing the area with some MEK on a rag to dull the finish some.
Thanks Shea. I never used tire dressing in the garage, but I’m not sure if the prior homeowner ever did. I rarely used it on the tires (applied while parked in the driveway outside of the garage), but probably did a handful of times over the years. After I had ground the concrete with the concrete prep tool, then cleaned it again with water & diluted SimpleGreen, the water appeared to soak in the concrete well everywhere (it turned dark). Is it obvious if there is tire dressing present? I’m assuming that it wouldn’t be as obvious as water beading on a freshly waxed car. Is it subtle differences in the color of the concrete (when water is applied) that gives it away? How much grinding do you typically need to do in order to remove any contaminants? I made several passes with the prep tool (done wet), and overlapped quite a bit, so I thought I’d be good to go.
Thanks again for your advice.
Chris
Usually spots that are repelling water due to tire dressing is lighter in color and tend to stand out. Since the delamination spots are small, it’s possible you missed it or it may not be that at all. In terms of grinding it may not take much based on the small spots. It may also be an area that didn’t cure 100% yet and a warm tire caused it to delaminate. Most coatings cure about 85% after the first few days and take a full 7 days to achieve full hardness. Really bad spots that have tire dressing need to be treated with an epoxy oil stop primer before hand, but these become very obvious when prepping the concrete.
Hi,
First of all, thank you for hosting a great site with a wealth of information.
I am planning to “paint” my basement floor. It’s pretty much a new basement; and I would like to know if this RockSolid product will do the job, or just primer/paint. It is mainly used for storage, as it’s more of a crawlspace. It’s about 200 sq ft, below grade, no windows. Any advice for a quick DIY job would be appreciated.
Thanks, Wayne
Hello Wayne. The first thing you want to do is a simple moisture test since it’s below grade. If all is good, it sounds like “floor paint” would be the the easiest and quickest DIY job for your floor since it’s just for storage with little foot traffic and no vehicles. You can do the primer and acrylic paint option or 1-part epoxy paint paint option.
I have a new 7×18 enclosed trailer. It has a 3/4″ floor. I will be driving 4 wheeler’s, riding lawn mower’s, (small equipment) into this trailer. It also has a drop down door to load and unload the equipment.
Can I put the RockSolid Polyurea Garage Floor product down on this plywood floor? The floor is new and not dirty. I thought of putting down the Chip System so that it won’t show all the dirt from the machine’s.
Hello Eric. The short answer is yes. You will need to sand the wood with 80 grit sandpaper to create a good surface for the coating to mechanically bond to. One thing to consider however; Coatings such as these (including epoxy) are very hard and do not flex well. If the wood floor in your trailer or ramp flexes too much, it can cause the coating to crack.
I’m going to try calling them tomorrow but I figured id ask here.
Would it be possible to apply the rock solid clear over the rustoleum 2 part epoxy? You can buy 2 gallons of the 2 part for the same price as the rock solid coating. I figured the clear would coat and protect the base.
Hello Brandon. We are not sure if those two products are compatible. The best practice is to always call the manufacturer when using different products as you had mentioned. Did you know however that Rust-Oleum makes a solvent based 2-part clear epoxy? It’s designed to work in conjunction with the colored base coat that you are applying.
Thanks,
I did see the 2 part clear. I used the 2 part water based kit in my current garage and it looked really nice but after 3 years its showing some wear.
That’s why I was trying to figure out if the rock solid topcoat was compatible.
We are building a house and i’m going to do those floors too. After my initial post I started to read up on the coatings and actually looked into the solids ratio etc. I was thinking of using the cheaper base and flake then if could coat it with the Rock solid clear I would get the same durability with less cost. But in the end this would only save me $100and probably not worth the risk to save such little.
But now the decision is to buy the rocksolid or go with http://www.originalcolorchips.com for a tad more.
Brandon, your house is only as strong as the foundation it is built on – no matter how great the roof is. If you use a lower quality base, you will have a lower quality coating. The base (and sometimes primer coat) is what adheres to the concrete and determines how well it will resist peeling, hot tire lift, and etc. The Original Color Chips system is better than a combination of the previous two products you mention.
I got a reply from rocksolid. You can use their clear over the rustoleum professional. But you have to wait 5 days then scuf with 80grit. Not going to do that.
What they are saying is that the two products are not compatible in terms of bonding chemically, but it can be applied once the Rust-Oleum cures enough to be sanded for a mechanical bond.
Why not a clear polyurethane? Better wear resistance.
https://www.discountindustrialcoatings.com/
That’s a good point. Most polyurethanes are compatible with the Rust-Oleum products and will offer better chemical resistance as well as wear resistance.
I am putting down the floor tomorrow. I just realized the topcoat needs to be down within 6-8 hours of the the floor. This would be difficult for me. I also have about 600 square feet, so I would need to buy 3 of them. Does polyurethane need to be down within a day, or can I put it down a few days later? Could you suggest an exact polyurethane product to use as a top coat, so I don’t get the wrong thing and mess up my week of work prepping the floor.
Hi Josh. If you are putting down the RockSolid polycuramine you have a recoat window of up to 7 days if the temps are not too high. We’re not sure where you are getting the 6-8 hours unless you are possibly confusing that with the minimum time you need to wait before applying another coat. Waiting 3 days should not be a problem as long as you don’t drive on the floor and keep it clean before application of the top coat.
Thanks much. I swear the website said “within” 6-8 hours, but I must have misunderstood. What is your take on the polyurethane instead of the rocksolid topcoat? I just talked to the rustoleum product support folks, and they said no to that idea. I don’t know if I need to trust that or if that is just the party line.
What you need to remember Josh is that the RockSolid product is a special proprietary blend of epoxy, polyurethane, and polyurea. This blend is what allows a chemical bond of the two coats with such a long recoat window. Product does need to be compatible and since theirs is not quite like anything else in the garage flooring market right now, there is a chance that the polyurethane would not chemically bond well with their product. If you really want to use polyurethane you could always wait past the 7 day window and then rough up the coating to achieve a mechanical bond instead, but that will require more work. We talk about that process here.
I appreciate all the effort and explanations you have with regard to the coating. I am having a new garage built this spring and would like to protect the concrete before anything gets onto it. I have read all the information I can find about the product but am not able to find anything about new concrete application. Is there a wait time before applying this product? If so, what is that time? Are there any other special considerations I need to know?
I tried several times to contact the company using the “rocksolidfloors” web site but kept getting a “404 page not found” error.
Thank you for your help with these questions.
Hi Dave. Whenever you apply a topical coating to freshly poured concrete you need to wait a minimum of 30 days before application and preferably up to 60. As concrete cures it releases moisture from within the slab that can cause the coating to delaminate if it is applied to soon. You still need to prep the concrete before application via grinding or etching even though it is new.
We’re not sure about the 404 errors you were getting. When we check their contact link it comes right up. You can also call their toll free number to get any additional information from them as well.
I used the Rock Solid Diamond coat on the floor in a new 1800 sq foot shop. It had cured for two months. We etched it jasco green solution washed it back down 2 times then scrubed it all with a brush then let it dry. A week later I have 50 cent size delamination spots all over. Not happy at all with it.
Hi Bill. Sorry to hear about your delamination issues – especially with such a large floor. One thing you want to keep in mind is that when a floor coating (even the cheap ones) starts to peel in chunks like that immediately after application, it’s generally an indication that something went wrong with the floor prep. From our experience with people we have talked to, RockSolid customer service has been good in the past with working with customer’s who have had issues with their coating. You may want to give them a call and explain what happened.
Good luck!
We just put Rocksolid down on our garage floor. The first coat went down and cured nicely. The second went down with ease but did not cure in spots. Where did we go wrong?
Hi Chris. It’s possible that it did not get mixed properly while in the bag. When this happens you get areas of the floor that doesn’t want to cure or can take longer to cure. We suggest calling RockSolid customer service and tell them what you are dealing with. They used to be very good with their customer service before they were sold to Rust-Oleum. It’s worth giving them a call to find out.
Disaster for me. I rolled the first bag to mix it per the instructions and it would not mix. Squeezed a little harder and the bag burst. All over the wall, door and floor. Since it went everywhere I tried to mix it on the floor but after 24 hours it’s still stickey. The second bag worked fine. Something wrong with the first bag.
Hi Steve. That’s why we aren’t the biggest fan about these bags. They are a great concept to keep the average DIY person from mixing product incorrectly (which is one of the bigger contributors to failed coatings) but accidents like this can happen. We recommend that you contact RockSolid customer service. They are usually good about taking care of their customers.
Hello. I stripped old paint off a concrete floor, ground it down, and prepped it. I want to lay down a water-based concrete stain in a stencil/pattern over the bare concrete and then finish with the polycuramine top coat. I’ve called Rustoleum 4 times and have gotten 2 “that’s fine to do”s and 2 “no go”s. What do you think?
Hi Kerri. Unfortunately, Rust-Oleum customer service is not always the best. That is one of the draw backs to RockSolid being bought by them.
What you want to do however is very common. Epoxy and polyurethane clear coats are used all the time as a very durable top coat to stained concrete. As long as your project is indoors, the polycuramine clear should work just fine. Plus, it will make your stain “pop” with color.
I am currently redoing my garage floors and have a few questions.
I am trying to decide between the RockSolid system or the 2 part Rustoleum Epoxy Shield system. Cost is a factor, but I care more about choosing the product that will last longer and be more durable. It is a typical 2 car garage that is only used for parking cars and storing a few things- nothing heavy duty, but we do have harsh winters around here. On one hand the RockSolid system seems like the obvious choice, but then again, I think it may be overkill for my purposes. I just don’t know how well the Epoxy Shield system holds up.
The questions…
Would you recommend a primer with either one? Is a primer typically used with any system? I certainly want to avoid extra cost and work as they are both quickly adding up with this project, but want the best outcome.
If I decide to use the 2 part Epoxy Shield, is it possible or is there any benefit (harder, more resistant) in using the polycuramine diamond coat as a top coat instead of the Rustoleum Premium Clear Floor Coating?
I know with the RockSolid system, you must etch the concrete and it is included in the kit. For a typical garage floor, after grinding ( which I’ve already done), would you recommend etching if I were to use the Epoxy Shield or just for the RockSolid system?
I know both of these systems are designed for one coat, is that dependent upon using a primer or even without a primer, are they still intended to be durable with one coat and a top coat?
My garage is about 550 sq ft so I will (unfortunately) need to buy 3 kits of whichever one I choose. I will obviously have a lot of left over since 3 kits are supposed to cover up to 750 sq ft, since I will have so much left over is it advisable to apply a “heavier” coating as I go? I guess that would be done by rolling it on thicker.
Hopefully your answers can guide me in the right direction. Thanks for your time.
Hello John. Since you already prepped your concrete with grinding (the best way to prep – good job) you do not need to acid etch. Grinding is not always something the DIY’er likes to do, so most DIY kits say to acid etch. You do not need a primer with either of these products as they are low solids, like a primer, and will penetrate well into the concrete. These kits are designed to be applied in one application, but you can do multiple coats as with any other resinous coating.
The lesser expensive water based EpoxyShield kits are inferior to the RockSolid Polycuramine. However, the solvent based Professional series EpoxyShield kits, color and clear, are going to be similar in quality. In terms of putting the RockSolid on thicker, you might get a thicker application using a quality 3/8″ roller instead of using their foam roller. You would not build a house on a poor foundation, so don’t try to save money by putting a better clear coat (polycuramine) on and inferior color coat (WB EpoxyShield).
Because you are stuck in that no-man’s-land between a 2-car and 3-car garage in terms of square footage, you will unfortunately have to purchase three kits with these products. Our math tells us you would be spending around $600. For that kind of money you can get a similar quality water based multi-coat kit that includes primer, color coat, chips, and high performance polyurethane (HPU) clear coat from the Original Color Chips. Better yet, you can purchase a 100% solids epoxy kit for 600 square feet that would include their HD356 high performance urethane for around the same price from Legacy Industrial. If it’s in the budget, we would recommend getting the primer with this kit for the ultimate system, but it’s not a requirement.
Thank You, Shea. I didn’t even know there was a water-based Epoxy, but have double checked and the one I would be getting from my home improvement store is the Professional, solvent-based kit so we’re on the same page with that one. If there isn’t much difference between the Rock Solid Polycuramine and the Professional Epoxy Shield then I suppose it makes more sense to go with the more budget-friendly Professional Epoxy Shield by Rustoleum.
Your estimated cost is about right which definitely has me rethinking the coating I will choose and I may look at some staining options to see if I will like the end look and if it’s more affordable. When I started this project I planned on spending around $350 and am not prepared to spend over $700 all said and done.
I do have a question about repairs and patching using either the Professional Epoxy or the Rock Solid options. After I apply the repair material, made by the respective companies, do I have to etch or grind over the patch before applying the coating? I certainly hope I don’t have to rent the grinder again not to mention I would be left with a dusty mess again.
At this point my floors have been grinded and I actually also used the Rock Solid Safe Etch, though I realize now it wasn’t necessary. The next step is to repair all the cracks and finally pick a coating!
You have such an informative site. Thanks for your quick response.
The patch work you do John needs to be flush with the floor and have an even transition or it will telegraph right through the coating. Sometimes you can get away with using an orbital sander and 40 grit sandpaper on the patchwork if it’s not too large.
I also wanted to ask if I were to decide to stain the concrete instead of an epoxy or polycuramine coating, should the type of repair material I use be different? For example, should I use a concrete patch over an epoxy patch? At this point, I would most likely buy it from my local store and I remember seeing bags of vinyl cement patch so I wonder if that’s the type of product I should be looking for if I do go with staining.
What you need to remember about staining concrete is that the stain will highlight every imperfection, patch, and discoloration of your concrete. An epoxy patch will not stain while a polymer-modified concrete patch will. The concrete patch however will always accept the stain differently than the surrounding concrete. An acetone dye would be the way to go. You will still need to seal the surface with a clear sealer.
Hi I was getting ready to work on my garage and was wondering if I should use the Rocksolid Polycuramine or regular Epoxy. Price is a factor but I would rather go for Polycuramine if it has longer life. Per your article, the claim that Rocksolid makes of Polycuramine being longer lasting than Epoxy is not true. I have a regular three car garage and don’t do anything fancy besides parking two cars and tools. Please comment on whether Pulycuramine is better for me than regular Epoxy from Rustoleum? If not, then I would go for Epoxy since it’s much cheaper. Thanks.
Hi Suti. Between the two, we feel the RockSolid polycuramine coating is going to be a longer lasting coating than the EpoxyShield product. We’re curious as to what you mean about our statement of polycuramine lasting longer than epoxy paint not being true however. Were you referring to our concerns that RockSolid compares their product to a 1-Part epoxy paint vs. a true 2-Part epoxy coating?
Yes Shea. I was actually referring to the comments from the manufacturer and not yours. Sorry for the confusion. Thanks a lot for the article and your feedback. I will repost after a week with feedback on how it went.
Fantastic Suti. I’m sure other readers here will be anxious to hear about your project.
Hi Shea, so my wife wants the concrete patio space to be done with a vinyl chip coating like my garage and even though it’s covered by roof it still gets a fair amount of sun exposure so epoxy is unfortunately not an option. Looking at going with polyaspartic for bed and top coat instead and even though I’m no expert at installing these, I am at least confident I’m experienced enough to take this on myself with some additional helping hands despite the rapid cure time as it’s a relatively small space. My number one problem is just finding somewhere to purchase polyaspartics, do you have any recommendations of where I could purchase a quality polyaspartic product.
Also, what about the solids contents of these. If I’m understanding everything correctly the less solids the slower the cure time but which bonds better with the prepped concrete high solids or lower solids? I’d think it should be the higher the solids the better but I’m not sure with polyaspartics. Thanks for any advice you can kick my way.
Hello Luke. How well polyapartic bonds depends on how well the surface is profiled and how quickly the product cures. The quicker it cures, the less time is has to soak into the open pores, thus, the more important it is that the surface profile be done correctly. The solids content does not always dictate how fast it cures.
As far as purchasing it, contact Scotty at Legacy Industrial. They have a couple of polyaspartic kits designed for someone like you. One of them is a slower curing product which will allow a little more time for application. You can find them here. However, you may be a great candidate for their new Nohr-S polyurea coatings. It’s a single component (no mixing A and B parts) aliphatic coating which is 100% U.V. stable. It also has a very long pot life which makes for much easier application. You can find it here. Either way you go, we highly recommend adding some anti-slip additive in the last coat for slip resistance since it’s an outdoor patio space. Scotty is great with the DIY crowd and can help you make a decision that is best for you.
Hi Shea,
I was looking through your excellent website (thanks!). Do you have a page devoted to the Nohr-S polyurea coating you mentioned? I didn’t happen to see one. If so, can you please provide the URL?
I went to Legacy’s website. They even have a product video on this product at http://www.legacyindustrial.net/nohr-s-polyurea-coating-product-video.html. I just heard about it tonight and have been trying to find out more about it.
Hi Bryan. We are actually in the process of writing up an article for the Nohr-S polyurea coating that Legacy Industrial is now selling. We did some preliminary tests for pot life and application and have to say that we were impressed. This is a great DIY product that provides for fantastic protection against chemicals, staining, and abrasion. Stay tuned as we hope to have the article up shortly.
Hi there! First of all thank you so much for all the info you are giving us, epoxymaster 3 gal normal kit with tools or rocksolid is my question, also i would need 3 batch of rocksolid and was wondering the best way to acheive color matching, thank you!
Hi Serge. EpoxyMaster would be a tougher flooring. The dry film thickness is 3 times that of the RockSolid polycuramine. EpoxyMaster can also custom color match which is very difficult to find from an epoxy vendor. RockSolid cannot.
Thanks for the response, i still went with rocksolid this morning, as i would have had to order another kit for my 520ft garage (epoxymaster-480ft) i used all 3 rocksolid (250ft) each, it went really well the only hickup is, they call for rain starting right now (4hours after the application) for 5-6 days … Since it has been really nice with no rain for the last 4-5 days and i used a fan and dehumificator constant, the ciment was really dry and the weather was nice and warm this morning, i went hahead and did it..i really didnt want to wait another week and more without a garage, my stuff is everywhere…i just hope now with humid temperature for a while it will become rocksolid, i have an electric heater and the dehumidificator going till tomorow morning (24h), :/
Keep it going Serge for at least 24 hours if you can and you should be alright. Let us know how it performs for you.!
I tried this Rock Solid system recently and had a major polymerization fail. I prepped the floor extensively so that is not the issue. I have worked with 2-part epoxies for more than 30 years in my work so I know how to mix 2-part systems. I had islands of material that failed to polymerize in the middle of well polymerized regions. After many days, the islands of material were a gooey mess that had to be scraped off and cleaned with MEK. Rustoleum says they will refund price, but they have not answered my question on how to fix the problem. Can I coat over polycuramine with an epoxy and how do I prep? Help.
Hello John. This is one of the few occasional problems that RockSolid has had with the bag mix system. Sometimes it does not mix well due to settling of the materials or some other issue from within the bags. Yes, you can coat over polycurmine after it has cured. Because they have up to a 7 day window for re-application, be sure to wait that long before you do so as not to have any chemical incompatibility issues with the epoxy.
After it has cured you will need to degloss the surface of the polycuramine in order to provide a mechanical bond. A 100 grit sanding screen on a floor buffer works well. The key is to rough up the surface, not remove it. Once you do, vacuum and then wipe down with denatured alcohol. After that you are ready to go. We discuss the process more here. Just beware that if you are using a low solids epoxy that the boundaries of the RockSolid coating may telegraph through.
I stumbled upon this website last week before i coated my garage, and found some useful information. Just wanted to share my experience with the site in case there is someone else on the fence about using the rocksolid product.
My house is only 10 years old and the garage floor had never been coated. Both me and my wife park our cars in the garage, so tires and chemicals have been exposed to floor. I started with a power wash, followed by acid etch. I let the floor dry for a few days, then used Behr masonry bonding primer on the floor and let that dry for 24 hrs. I then applied the Rocksolid color shot 2 color system, followed by a top coat of the same product but without the color, 24 hrs later. This is my first time coating a garage floor and this product was very easy to use, and looks amazing. Super high shine and it appears to have grabbed very well to the garage floor. It dries quickly, making it great for a start to finish weekend project. Havent pulled my car in yet, wanted to give it a few days, but so far it looks like a nice alternative to the standard flake epoxy floor all my buddies have.
We’re glad you like your new RockSolid coating so far Majesstik. Our only concern is your use of the Behr Masonry Bonding Primer. The RockSolid product is designed to adhere to bare concrete for the best adhesion. Because you applied a bonding primer, the RockSolid coating is now adhering to that, not the concrete. The polycuramine coating creates a much better bond to the concrete than the water based primer treatment. The Behr product is designed as primer for latex paint and 1-part epoxy paint, not 2-part resinous coatings. Hopefully you won’t have any issues with the coating wanting to peel at a later date.
Hi Shea,
I installed the older (polyurea) rocksolid product base and topcoat in September 2013. Some areas are de laminating . The bigger issue is the topcoat seems to have failed. Rustoleum is offering a touch up kit but as I have noted and provided warranty documentation the topcoat needs to be redone .
After grinding and patching the base areas , should I sand with 100/150 , sweep/vacuum , wipe with MEk and then reapply the polycuramine topcoat ?
Hello Chris. Your on the right track. Any part of the old or new coating that has cured will need to be sanded. Try to use denatured alcohol instead of the MEK if you can. It evaporates faster, isn’t as harsh on the coating, and is great for removing the remaining dust.
Hello Shea, great feedback by the way. Thank you. I have applied one coat of rock solid 7 days ago and decided today to apply another coat ( 2boxes). My garage floor definitely looks a lot better then it did before but not quite the shine and look I was going for. At the end of the first bag, when I did my last ribbon the product had already started to cure and left a visible thicker/glossy ribbon on my floor. Unfortunately the rest of the floor is not as thick or glossy.( wet look) . Will adding another coat over make it visibly shinier and what about going over the decorative chips, will that affect the durability? I will be using 60 grit sandpaper to ruff up the floor and I imagine that will free up the somewhat loose chips. Am I going into the right direction and can I expect a second coat to fix my issue and make a fair difference ? Thank you for your time.
Hello Luc. Because the RockSolid goes down thin it can sometimes create some issues. This is true for all thin coatings. If your floor is fairly porous in certain areas the coating will penetrate deeper and not leave as much left on the surface. This is great for adhesion but it can leave those areas looking less shiny, creating a matte look. A second coat would make a big difference in terms of the gloss as well as the durability. 60 grit sandpaper is a bit aggressive for what you are going to do. 80 to 100 grit should get it done. You are only trying to degloss the surface and just rough it up a bit. You aren’t trying to remove any of the existing coating. Just be sure to wipe it down with some denatured alcohol on a rag to remove all the fine dust that you couldn’t vacuum up.
I had applied polyuramine 6 weeks back. It looks good. But 2 probs – 1) it has chipped in some spots 2) the shade for half of the garage is slightly different ( they have 2 pouches).
Cust service was very nice and they sent me replacement boxes. Now they also told me that if I have to reprint the existing area, I need to first clean it and then use MEA to thin it out and apply the polyuramine over it. Has anyone tried this process again? Wld like to hear from experts what’s the best way to do a second coating. First time I called, they said do etching but second time I called they said don’t etch just use MEA and then sand it down. Then apply the polyuramine. Little confused on the best process. Help wld be much appreciated .
Hi Suti. We’ve heard more stories now about the great customer service people have been getting with the RockSolid product. Unfortunately they can give conflicting information about proper recoating procedures or repair however. We don’t know why they would want to thin the coating out. It would make the new coat thinner and not fill in the chipped areas very well. Also, you can’t prep a floor for a recoat by etching. Etching only works on bare concrete, not a coating.
The easiest way to recoat is to clean it real well first and then sand the floor with 100 grit sandpaper. You are just deglossing the surface and giving it a texture for the new coating to create a mechanical bond. You are not trying to remove any of the coating. Sweep and vacuum up the dust and then wipe down the whole floor with denatured alcohol on a clean towel. This will remove the rest of the fine dust. After that you are ready to recoat. It would also be a good idea to check the chipped areas first to make sure that the coating is not trying to peel up in those spots.
Hi,
All the comments here are quite helpful, thank you.
We’ve just patched our garage floor with FloCoat. How long should we wait before we apply Rock Solid? I read one comment that you should wait 30-60 days, but I believe that could have been for a brand new pad?
Thank you.
Hello Brian. According to the Flo-Coat technical data sheet, you need to wait 28 days for it to fully cure before painting or applying a coating.
Hey, was curious if you had seen this product: http://www.rustoleum.com/product-catalog/consumer-brands/restore/metallic-garage-coat-kit
It’s labeled as Rustoleum Restore, but it’s not the same as the 2X/4X/10X deck/garage paint they advertise. This Rustoleum Restore (also sold at Lowes) is described as polycuramine, so I’m wondering if it’s the same product, but they’ve taken the RockSolid name off.
Hi Jason. Yes, this is the RockSolid product. Rust-Oleum is just rebranding it.
I had the same question as Jason. One thing I noticed while reading all this helpful info is that you keep mentioning that the kit you show covers up to 250 sqft, while the product at Lowes indicate coverage up to 100-125 sq ft for the same price ($119). So if they are really the same product with different rebranding, it seems like a good deal of product and coverage was lost in the process. I am in dire need of a new flooring solution for our basement. I love the look of this finish, but I need to be sure it is the right solution because it would be a good deal of DIY effort for our 850 sq ft space. And I’m guessing it can’t go over previous VCT? If I have to scrape up the tiles and sand away all the glue, I don’t know if I’d ever get it clear enough for a nice application? The VCT is in good shape (not peeling or anything), just stained and outdated. ((And thank you for the moisture test link and information))
Hi Bethany. The difference is that the kit in this post is a standard garage floor coating. The kit Jason is referring to is a metallic floor coating by RockSolid that is re-branded as Rust-Oleum. Metallic coatings go down thicker, hence your coverage rate is less for the same amount of product. This is why metallic epoxy coatings in general are more expensive than standard epoxy systems.
You are correct, you would need to remove the VCT first and then grind the floor in order to remove the old glue and prep the surface properly for a resinous coating. And yes, this will properly clean and remove everything from the surface. With the proper vacuum equipment and grinder you can really keep the dust down. You also have the option of stripping the finish on the existing VCT tile and apply new VCT over it.
We hope this helps!
Several years ago I had a contractor apply Rustoleum’s patch and repair epoxy to some minor, normal, settling cracks. Now I’m considering DIY installing the Rocksolid Polycuramine product.
Are the two compatible? Is it ok to apply Polycuramine over epoxy patch and repair?
If so, I plan on sanding down the repair areas with rough sand paper in order to create a rough profiled surface and also to smooth things out with the rest of the floor. The contractor didn’t do any sanding after applying. I’m also concerned about the repair areas “showing through”.
Thanks.
Yes, they are compatible Bryan. Sanding or grinding down the patch repair to be flush with the concrete is important or it will show through. If sanding, try to use 40 grit paper or lower if you can find it. A mechanical sander will work better than hand sanding with a block as epoxy patch material is extremely tough. A small hand grinder with a 4″ diamond cup is even better if you have a lot of patch work to smooth out.
I’ve skimmed through this blog and i may have overlooked it; but I never seen mentioned here the necessity of a calcium chloride test being preformed before coating concrete.
Hello GM. We have a complete article about moisture testing before applying epoxy. It’s found under the Concrete Prep menu and Application in the Epoxy menu. We talk about the advantage of a calcium chloride test as well as where you can find them.
Two days ago we put down rock solid metallic silver on my garage floor after thorough cleaning, etching and drying. Along the perimeter walls, where a brush was used, the coating is shiny and smooth. The rest of the garage floor, all of which was small bumpy concrete, was covered using a roller, but still looks bumpy, We’re going to put a second coat of metallic in three days. Would we get a better, thicker result by using a brush throughout, although more labor intensive, should we use light pressure if we use a roller, should we try a different roller, or ??? Is it possible that no matter what we do the surface will still not be the smooth, shiny surface that their marketing materials show?
Please try to answer soon so we can hear your advice before we start the second coat.
By the way, your responses are both thoughtful and articulate. Thank you and have a good holiday weekend.
Hello Richard. One of the main reasons you are having issues is because of your bumpy concrete. RockSolid is not a thick coating. Though the metallic coating is designed to be twice as thick as RockSolid’s standard floor coating, it’s still only 6 mils. If you would have prepped the floor by grinding instead of etching, including patching any small holes or divits, you would have created a much smoother finish and achieved the results you are looking for. Unfortunately, RockSolid does not do the best job of explaining the importance of prepping the concrete correctly, especially for metallic coatings. If your concrete was smoother to begin with, you most likely would have had much better results.
Do not attempt to apply it with a brush. The pot life is too short to attempt that. Plus, it would apply it thicker and your coverage rate would be much less.
The reason it looks smoother where you used a brush is because the brush applied it thicker. That and the fact that your floor is most likely smoother around the perimeter due to lack of exposure to traffic and the elements. A typical epoxy metallic floor coating is well over 10 mils thick, not including the primer coats that goes down first and the multiple coats of protective clear on top. Plus it’s always applied to a properly applied surface.
At this point applying a second coat will help somewhat, but it’s not going to make the problem go away. You will be creating a more durable coating however.