
One of the more common questions about garage floors is how to fill contraction and expansion joints. In particular, many want to know if you can fill the joints on the garage floor before applying an epoxy coating. Still, others want to know if you can fill the joints before or after a sealer is applied. What about sealing the expansion joint between the garage floor and the driveway?
We will answer all these questions and more, as well as discuss how to fill expansion and contraction joints in your garage floor. But first, you need to understand the difference between these two joints. It determines exactly which type of joint filling materials you can use and why.
Difference between expansion and contraction joints
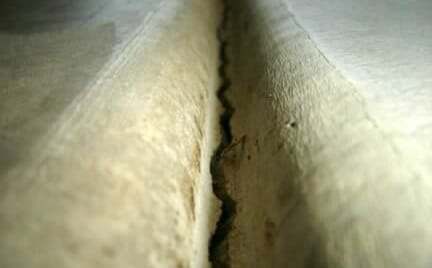
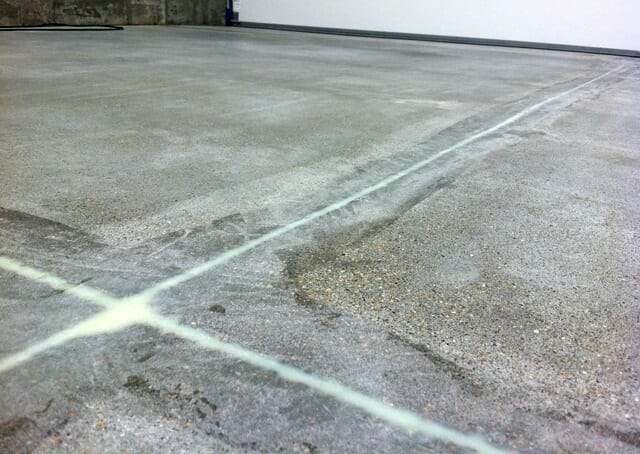
In a typical 2-car garage, contraction joints usually look like a big plus sign that divides your garage floor into what appears to be four separate slabs. These joints (sometimes called control joints) are the deep V-shaped grooves that run from one end of your garage floor to the other.
Some concrete floors may have saw cuts as a contraction joint instead. Saw cuts are usually a minimum of 3/16” wide and 1” deep.
Because concrete slabs will crack with expansion and contraction, these joints create a weakened line in the concrete that encourages cracks to follow the line within the joint. This helps by discouraging cracks from following a more resistant line across the surface of your garage floor.
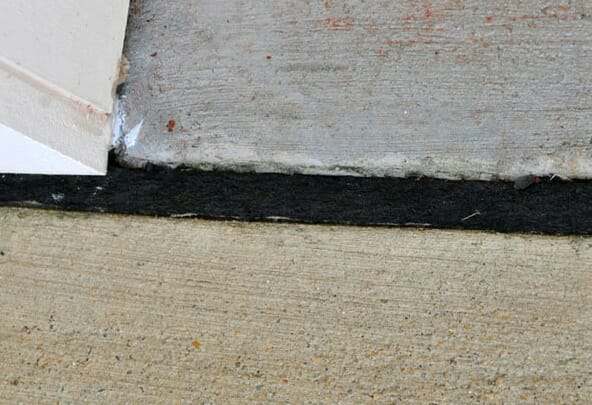
Expansion joints (sometimes called isolation joints) are joints that separate one slab of concrete from another. They are typically a minimum of 1/2” in width.
In simple terms, expansion joints help prevent adjoining slabs from damaging each other when they expand and contract.
They are commonly filled with compressible fiberboard or similar material. The joint between your garage floor and driveway is a good example of an expansion joint.
Garage floors are typically poured independently of the home foundation. When this is done, there is an expansion joint that will run at the perimeter of where the garage floor meets the house foundation.
Filling contraction joints before epoxy coatings
When the time comes to paint or epoxy coat the garage floor, many people want to fill their contraction joints in order to have a seamless-looking floor. So, is this advisable to do? Well, the answer depends on what material you use.
When your garage floor expands and contracts with temperature changes, it can create movement (very slight) within the contraction joint. This is why there are cracks within the joint in the first place.
If the joint is filled with a solid material that does not flex and is then covered with a coating, you have just created the potential for the crack to telegraph up through the material and the coating.
If you want to fill your contraction joints, the key is to use the proper joint filler.
This happens because you have a solid seamless coating that does not flex (epoxy) and is bonded to both sides of a surface joint that can move. As a result, you can create a break in the surface of the epoxy right above these joints if they are filled.
Though the chance of this happening is not great, many professional contractors will not warranty an epoxy coating for cracks where the owner has asked to have the joints filled. Most contractors will fill the joints if asked, but they will warn you about the possible problems.
The best material to use is a 100% solids epoxy or polyurea filler with an elongation rate (flex %) that is higher than that of the coating you are using. It will cure to a hard solid that is sandable, yet will flex slightly (relative to the concrete) underneath your epoxy coating to prevent cracking.
This flexibility also prevents the filler from pulling away from the concrete as the floor expands and contracts. These qualities help tremendously to keep the paint or epoxy coating in one piece and not crack.
This post may contain affiliate links. If you use these links to make a purchase, we may earn a small commission. As an Amazon Associate, All Garage Floors earns from qualifying purchases. You can read our full disclaimer here.
product recommendations
Many of these special joint filling compounds can be found online from concrete floor coating vendors Home improvement centers do not carry them. They work well, but they are not inexpensive like a typical crack filler. There are a few different products we can recommend.
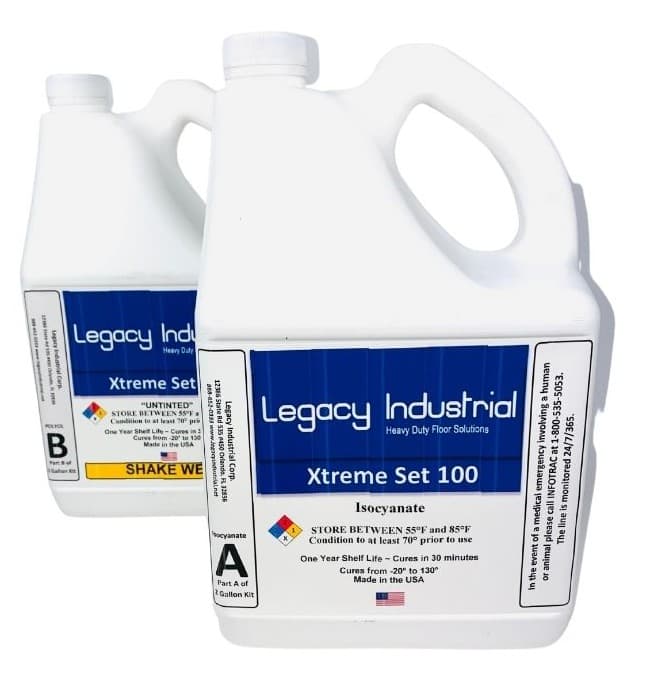
The first is a fast setting, 2-part 100% solids polyurea gel called Xtreme-Set 100 by Legacy Industrial. You can read our review here.
It works very well for filling contraction joints as well as filling cracks.
The big benefit of Xtreme Set 100 is how fast it works. You can fill the joint and grind it flush 20 minutes later. You can purchase Xtreme-Set 100 here.
Another good source is Garage Flooring LLC. They have two different 100% solids products that will work well. The first is TL-821 epoxy gel. The second is their new TL-831 pourable joint filler. You can find them here.
An epoxy gel like this is less expensive than some other contraction joint fillers and works well. It’s a better value if you don’t need a fast-setting product. Just be aware that you will need to wait a minimum of 8 hours before grinding it flush.
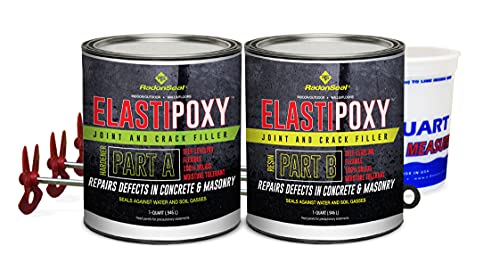
ElastiPoxy is yet another product that works well for filling joints. Because the epoxy has a less viscous consistency, it helps to mix a little bit of clean sand to stiffen it up and increase the coverage.
You can price the 2-quart version here at Amazon. Make sure to estimate the correct amount. Many have found that they needed the larger 2-Gallon kit instead.
Application of these joint fillers is not hard and requires little preparation of the joint other than making sure it is clean.
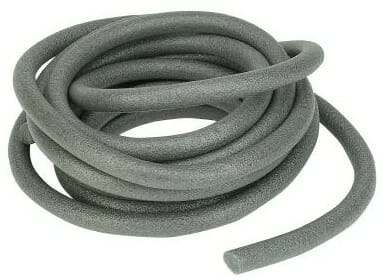
If you have saw cut contraction joints, we recommend that you fill them first with a foam backer rod or silica sand so you don’t use as much filler. You want to leave approximately 3/8″-1/2″ from the surface.
If you have “V” shaped contraction joints, the foam backer rod will not work well. Silica sand is a better choice.
Both the silica sand and foam backer rods can usually be purchased from your local home improvement center.
When using a foam backer rod, make sure it’s approximately 1/8” wider than the joint. If you choose to use sand, it will prevent the filler from slowly sinking into the cracks at the bottom of the joint and creating low spots as it cures.
Once the joint is prepped, follow the instructions of your product of choice and fill the joints. Make sure you don’t have any low spots or you will have to go over them again. It helps to use a putty knife to force out air pockets and to remove excess material.
Once the joint filler has cured, you will need to grind the joint flush to create a seamless surface to paint or epoxy coat over.
The grinding of the joint is important. If you apply the filler but don’t grind it flush with the surrounding surface, your joints will telegraph through the coating and become visible due to the irregular shape.
It’s not unusual for garage floor surfaces with the troweled “V” groove to be lifted slightly at the edges of the joint. This happens as the surface of the slab cures and contracts quicker than the rest of the concrete, thus slightly pulling the rounded edges up.
Use a level or straight edge to check for this. It may require a bit more grinding to get the floor flush so that you don’t have a visible hump.
Contrary to what you may have read somewhere, do not use latex caulk or self-leveling joint sealers if you plan to coat over the joint.
Caulk and self-leveling joint sealers cannot be ground flush. In addition, they are too soft and will flex under weight causing the coating to crack.
Furthermore, caulk will slowly shrink. As a result, you will end up with slight depressions that outline where your contraction joints are.
Filling contraction and expansion joints after epoxy coatings or sealers
Sometimes the contraction joints in a garage floor and the expansion joints around the perimeter of the floor can be very wide and collect a lot of dirt and debris.
This can create an eyesore for some people plus make it more difficult to clean them out. The same can be said for the expansion joint between the driveway and garage floor.
You can always fill these joints in your garage floor after an epoxy coating is applied. It can also be done after clear sealers, stains, or other floor treatments are applied as well. Not before.
DO NOT fill expansion joints with the same products used for contraction joints. Epoxy and polyurea are stronger than concrete once cured and will not flex nearly enough. This can cause crumbling and cracking of the slab edges.
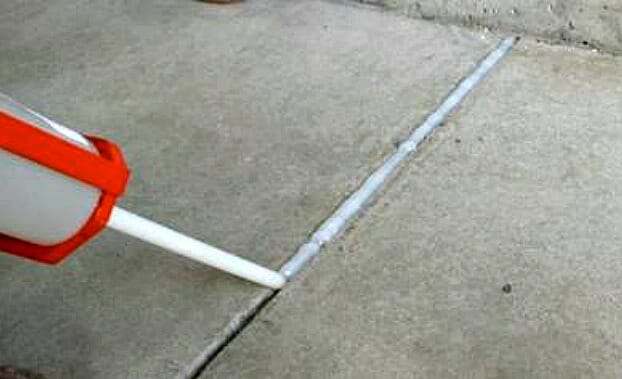
The easiest solution is to fill these joints with a self-leveling polyurethane joint sealer/filler. Most are 100% solids polyurethane. This means that it will not shrink as it cures. They are gray in color and applied with a calking gun.
These types of joint fillers are inexpensive and can last for years. They also do an excellent job of sealing the joint from moisture. The material is flexible and feels somewhat spongy under pressure, yet is strong enough to drive vehicles over. Most are not paintable.
We personally like SikaFlex SL for these types of projects. You can find it at your local home improvement centers for less than $20 for a 10 oz. tube.

The best deal is the 29 oz. tube, but you will need to purchase the larger caulking gun to use it. If a home improvement center isn’t nearby, you can also find SikaFlex here from Amazon.
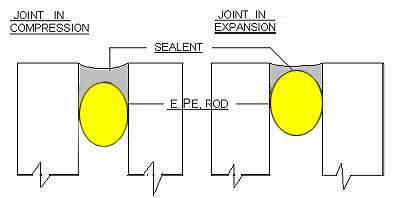
This is a good example of how to fill an expansion joint when using a foam backer rod
Prep of the joint is the same as before, however, do not use sand to fill up an expansion joint. Expansion joints need the material within the joint to be compressible and sand is not.
One exception is if you are applying a thin layer of sand over old fiberboard to prevent sealant from leaking through.
It is also extremely important that the concrete is bone dry before application. If not, it will not adhere well. For expansion joints, it’s important to remove any old filler using a utility knife or grinding wheel.
If the joint is filled with fiberboard or felt, be sure to remove any of the material in the joint that is protruding past the surface of the concrete.
If the fiberboard in an expansion joint is missing or deteriorated, you will want to clean out the joint and use a backer rod within the joint before you apply the joint sealer. Do not place it more than 1/2″ deep from the surface.
Because these joint fillers are self-leveling, the viscosity is similar to honey. As a result, they will seek out any low spots along the joint. So be prepared ahead of time for any areas where the filler may want to run out of the joint.
Once applied, it skins over in an hour or two and completely cures within 3 to 5 days. You need to wait at least 24 hours before driving over a freshly filled joint.
Final points
Sealing and filling your contraction and expansion joints for a garage floor is not difficult. The key is to use the proper sealer or filler depending on the intended purpose and what type of joint it is.
Just remember that expansion joints should always be sealed and filled with a flexible joint sealer and never epoxied or coated over. Contraction joints can be filled in the same manner after a coating or sealer is applied if you desire.
If you want a seamless-looking epoxy or garage floor coating, contraction joints must be filled with a specialized epoxy or polyurea joint filler that cures hard and with a higher elongation rate than the coating. This provides the required flexibility to help prevent the garage floor coating from cracking at the joints.
I recently had my floor done and the joints were not filled. There are now large chunks of paint/epoxy still in the cracks. Any suggestions on how to get this fixed? It doesn’t look good …
Hi KP. A typical installation allows for the epoxy and optional color flakes and clear coating to flow over the edges of the joint and into the bottom of it. How neatly this is done is dependent upon the actual joint and the installer. If you don’t like the way it looks, you can always fill the joint with a self-leveling polyurethane joint sealer such as Sikaflex SL.
I am in a similar position. My garage was epoxied and they did not do a good job with the cracks – there are places where they are (kind of) filled in and places where they tried to remove the flakes/epoxy. If I wanted to fill them in with the joint sealer, would I need to clean out the joints first? Thanks for the help.
Hi Nick. I’m assuming you are referring to the contraction joints in the slab and not actual cracks? If so, you can fill them with a self-leveling polyurethane sealant such as SikaFlex or similar. Just make sure the joints are clean from dirt. The joint filler can lay right over the coating and flakes in the joint.
Yeah, I should have said joints, not cracks. Thanks!
I’m trying to level a garage floor with expansion joints and control joints in it. If I go through this process of filling the joints with a sealant, can I then pour a self leveling compound over the whole floor? Meaning these joints would then be covered up. Or do I need to somehow continue those joints up through the leveling compound? Thank you for any insight!
Hi Will. You need to honor the joints when using a self-leveling polymer-modified concrete. If you cover them up with it, cracks will form over the joints at some point. If applying a coating afterwards, the joints can be filled with the correct epoxy or polyurea fillers that provides some elongation as we describe in the article. Self-leveling concrete does not provide any elongation or flex.
Hi there I have a quick question I am thinking about getting a Polyaspartic floor down in my garage I am being told that the joint between my concrete garage and the stemwall can be filled in with some thing and then covered up with the polyaspartic over it to make a smooth transition I always thought you weren’t supposed to cover up that expansion joint any thoughts on this?
Hi Mihir. You are correct. Expansion joints expand and contract, particularly if you live in a climate with large swings between summer and winter temps. If the joint is filled with a material that will not flex enough, it can cause the edges of the floor slab to crack and break when under pressure. If the filler material has the required amount of flexion then the joint will be fine. However, even polyurea and polyaspartic coatings will not flex enough in most cases for an expansion joint and will crack or tear over the joint. We recommend filling the joint with a self-leveling polyurea sealant after the coating is applied. These types of fillers have plenty of flexion and some are available in multiple colors.
Do you etch the concrete first then apply the sealant to a contracting joint or apply sealant then etch ready for paint
Hi Callum. Do the etching first.
What if I did the Sikaflex SL first? How to etch now? I assume it will ruin the sealant….
On the other hand, the concrete is pretty new (2 years), and it does not have relevant dirt stains or oil marks. I believe it is more cleaning.
If I apply the etch, is there a way to wash it out without ruining the sealant?
It is absolutely necessary to properly prep concrete for a coating – especially new concrete. This article here explains more. An etching solution may discolor the sealant, but it won’t damage it. We would recommend taping over the sealant when etching to keep most of the etch solution off the surface of the sealant to prevent any possible discoloring.
Thank you Shea. I will tape it, my concern is not related to the color because I plan to coat over it, but ruining its properties, becoming sticky or something like that.
Hello Shea. I want to fill the expansion joint on my driveway with Sikaflex, the part that touches the street with the bottom piece on a slight angle. Two questions. 1) Some parts of the bottom slanted slab that touch the expansion joint are broken. How do you prevent the Sikaflex from dripping down from overflowing and dripping down from these spots? 2) There are other perpendicular joints that connect to the joint I want to fill, also on a downward angle. How do I prevent the Sika from getting in there? I have pics but don’t see an option to share.
Hello Deniz. For any applications that do involve a horizontal surface (slant), we recommend using SikaFlex 1A. It does not self-level and will require that you trowel or tool the filler into the joint. It will not sag or run. We suggest using tape on the edges to create a clean line and to avoid smearing it on the surface.
Thanks for the reply. I can’t imagine doing this job and tooling it myself… it’s such a long strip. I do have a bag of polymeric sand on hand. Would it cause any harm to fill the joint with backer rods and then just sand it to the top? This approach will save lots of time.
The sand will just wash out, Deniz.
Yeah I can imagine play sand or silica washing out, but you think poly sand will wash out as well? It hardens with water and the one I have is said to hold strong for up to 10 years. They say it expands and contracts without breaking its form. Also, does it make a difference if I fill that joint with anything in the first place? Will there be any increased damage to the concrete with that joint empty? This used to be filled with some black stuff that came apart over time. It already cracked a bit, and that was with that black stuff in it.
Hi Deniz. I read that too quick and assumed you were speaking of silica sand. Polymeric sand will work, but not for as long as you may think due to the location. The tires from vehicle traffic in conjunction with the sloped angle is going to cause the sand to wear due to repeated impacts. It’s essentially acting as a ramp. It’s one thing for it to be a flat surface, but it’s another when you are asking it to absorb repeated impact from tires. Proper sealants have the right amount of flex to stand up to such impacts. Joints such as that are filled for a few reasons. The first and primary is to prevent soil erosion in the joints which could possibly lead to bigger problems if left unchecked. Aesthetics and ease of cleaning is popular reason as well. The third is to protect the concrete from spalling due to freeze thaw (if your winters are cold enough). It prevents water from seeping into the sides of the concretes so that it can’t freeze and cause chunks to pop of the edges or crack.
I’m hoping to epoxy the floor and the stem wall. Is the gap/crack between the concrete pad and the concrete stem wall an expansion joint, contraction joint, or neither? Can/should I fill it with specialty epoxy before doing the floors? I’m hoping to have a seamless/clean transition from floor to wall. Thanks!
Hi Brett. The joint between the stem walls and the slab is an expansion joint. The garage slab is always placed separate from the house slab. The recommended method is to coat your floor and stem walls first. After it has cured, then you can go back and fill the expansion joints with a self-leveling polyurethane sealant. SikaFlex is an example. There are companies that offer a variety of colors as well if you want something that would be close to matching the color of the coating.
I am wanting to paint the concrete floor of a small guest room in my basement and cover most of it with a decorative area rug. I am thinking I might be able to get away with not filling in the joints at all. Does this sound advisable?
Hi Ellen. Filling in contraction joints is for aesthetics only. You don’t have to fill the joints if you don’t want to.
Hello, we need advice! My husband and I have a structural, suspended oversized 3 car garage (with another 3 car garage below it). The house is about 3 years old. We live in Colorado and snow melt in winter causes small leaks to the lower garage. We stopped parking inside in the winter until we figure out a plan 🙁
The floor is sloped to garage door, no drain. We have v groove contraction joints, which is obviously where the cracks are and leaks get through. We’ve known we need to waterproof but have been overwhelmed by the different opinions. We plan to hire someone to do the upper garage, then try the lower one on our own to save money.
I’m an interior designer and have asked multiple builders, they all have different opinions. Even hiring a pro we are getting different advice on if/how to seal the control joints, and whether to use a sealer, densifier, poly/epoxy coating . No welding or anything like that. Upper garage is just for cars, lower garage is truck, tools, lawn mower, ATV, etc. Since waterproofing is the biggest key, what would you recommend?
Hi Kim. Yes, there are varying opinions on how to do this. The biggest reason is that there are many places water can get through and no one type of application is 100% successful every time. What we can tell you is that penetrating sealers or densifiers are not going to work. They resist water penetration, but they don’t block it. Only a film forming coating can do that. Typically, the most successful outcomes involve applying a commercial quality coating system to the concrete surface first. This will block any water from passing through to the concrete. All joints need to be honored and should not be filled flush with the coating. After the coating has cured, a commercial quality flexible joint sealer should be used for the perimeter expansion joints. These joints will expand and contract with the weather and is why such a sealer is needed. We recommend using the same product for the contraction joints. Some of fillers come in custom colors so they will match the coating somewhat. There are special fillers that can be used in the contraction joints and ground flush before the coating is applied in order to get a seamless look, but in our experience and talking with coating contractors, these don’t always work with suspended slabs. Though these fillers have some flex, they still need to cure very hard. And with suspended slabs, they sometimes will not flex enough, particularly in climates with big temperature extremes over the seasons. As a result, small cracks can develop and water allowed to seep in.
I am about to apply HD6600-MMA (acrylic sealer) onto my new garage floor (20×20). It was poured in November 2020. I’m going to do an acid etch first. Should I fill the expansion joints after the etch? Legacy Industrial recommended I use a product called XtremeSet100, but it is very expensive and would need ground down. Is there a flexible product like SikaFlex that can use instead? My expansion joints have already cracked and look just like one of the first photos in this article (v shape groove). Thank you.
Hi David. Yes, you can use SikaFlex instead of Xtreme-Set 100. Though SikaFlex is self-leveling, it’s not going to give you the flush or completely flat look if that is what you are after. Also, make sure to apply it after the HD6600 is applied and cured. You can’t apply coatings over SikaFlex. It’s too flexible (coatings will crack under weight) and they don’t adhere well. Use tape if you want a nice delineation.
Thank you! Do you know if there is a flexible sealant like SikaFlex that is a darker grey color? The light grey of SikaFlex will stand out against my sealed garage floor.
Most self-leveling polyurethane sealants are the lighter gray color in order to closely resemble bare concrete, David. Aluminum Gray is the standard SikaFlex color. They have a slightly darker gray, but it’s not available in a self-leveling sealant designed for floor traffic. Here is their color chart. Medium Bronze is the next darkest color.
There are polyurea joint fillers offered in a myriad of colors, but they are much more expensive and would require similar application to Xtreme Set. You fill the joint first and then grind them flush before application of the coating.
Could I sprinkle grey polymeric sand over Sikaflex SL sealer to give it more of a textured look?
Hello David. Yes, you could do that. It will require pressing the sand into the SikaFlex. It’s too thick and viscous for the sand to sink in on its own.
Hello! I have deep V-Shaped contraction joints in my garage that are making it difficult to roll any tools with casters over. I’m looking for some advice to level off these joints so that my tools can move smoothly around my garage. In this case is it best to use the epoxy filler or polyurea filler, or would something like Sikaflex work just fine. Also should I use some sort of sand to fill the majority of the void prior to using the filler? Thank you for your time!
Hi Aaron. The easiest and least expensive method would be to fill the joints with a self-leveling polyurethane filler such as SikaFlex. You can fill the joints partway with clean play sand ($6 per 50lb bag). You will need to leave yourself approximately 3/8″ – 1/2″ of depth for the filler. Though the joint filler is self-leveling, it will not feather flush with the surface. There will still be a slight bump when transitioning over the joint with smaller wheels. If the small wheels are under very heavy weight, there will be some give to the filler (it’s flexible for joints) with a large gap like that which may cause a slight hang up.
If you want a nice smooth transition as if the joint was not there, then it will require filling the joint with an epoxy or polyurea sand slurry. Once it cures, you grind it flush with the rest of the concrete. This product here is an example.
So glad that I found your website. I have a 3 car garage that I want to epoxy on the floor. Due to the control joints, there are 6 sections. The joints were done with a 3/4 jointer tool so they are round. Most of them have some separation due to its age (19 years).
I don’t care to have the joints completely disappear, and filling them with something that hardens would I think cause problems down the line.
SikaFlex seems like a good solution where I could fill the cracks with some fine sand, and apply the SikaFlex and get some clean lines by taping before applying.
My question is that it would look better for color matching if I applied it first and did the Epoxy over the top, but it seems that since this is not paintable, that it would also apply to Epoxy. Would your recommendation be to apply over the top of the Epoxy after the floor is done?
Hi Dean. Apply the SikaFlex to the joints after the floor has cured. If you apply epoxy over SikaFlex, the epoxy will crack and peel when pressure is applied.
Dean, did you end up taping off the SikaFlex after epoxy? How did it turn out? Thanks,Tim
HI My old house has 1.5 inch gap between two concrete slabs in the patio currently its floose illed with 2 x 4 wood lumber which i can lift it up easily I want to remove it and fill with polyeutathine can you please guide me as a lot of derbis go in the gap. My guess is its total of 50 ft long 1.5 inch wide and 4 to 5 inch deep it may take a lot of polyeutathene.
Hello Tushar. You will need to clean out the gap and then fill it with clean sand. Filling a 1.5″ gap with SikaFlex or similar self-leveling polyurethane sealant will require a depth of 1/2″. So fill the gap to 1/2″ from the top with sand. The coverage rate of SikaFlex for a 1.5″ gap that is 1/2″ deep is 2 linear feet per 10 oz. So, for 50′ you will require a minimum of 250 oz.
Hi! I am about to coat my floor and there is one very shallow crack that is outside of the control joints. I had the floor grinded, and it still shows the crack. Should this crack be filled before painting on the epoxy? Or will the epoxy paint fill it in for the most part? What would you recommend?
Hi Ryan. Unless you are using a 100% solids epoxy, the crack will show right through the coating. Your local home improvement center should have some Rust-Oleum Concrete Patch and Repair. Use that to fill the crack. Make sure to sand it flush before you apply the epoxy.
Thank you! I prepped that part. The only other part I’m having major confusion on is the deep V control joints through out my garage. The prions owners had stained the floor brown. I had the floor diamond grinded but the V’s still have a brown tint. I have the polycuramine floor kit and I’m so confused on if I can paint the V joint. I see tons of pictures where the finished garage floors have this joint painted same as the floor, but on the PREP instructions it says don’t coat or roll over control joints. Any insight?
What they don’t want you to do is try and fill the joint full with the coating. You can run a roller up to and slightly over the edges of the “V” shaped contraction joint. The coating will run a little bit into the joint. Use a chip brush or paintbrush to spread the coating out in the joint so that all the concrete has the coating applied. When you toss the color flakes, some will land in the joint and adhere just like the rest of the floor. Do the same for the clear coat.
Sir,
So I just found your website and think i made a mistake when I applied my epoxy kit. I did not repair the surface cracks and now they are very noticeable. Can I simply poly caulk them before I put on the clear coat or do I need to grind/cut them and then fill? I am good on expansion cuts as I read earlier posts and have all the right materials now! Thanks for the feedback and epoxy has been on for 36 hours.
Hello Jake. You cannot use a type of caulk or self-leveling crack sealer. It needs to be an epoxy or polyurea crack repair filler. We discuss the type of products to use here. If you can easily get a fingernail in the crack, then the edges should be chased first. Keep in mind that it will require that you recoat the floor with another color coat if you don’t want the repairs to show. If you are using standard epoxy (not polycuramine), then you are past the recoat window for chemical adhesion and it will require that you degloss and rough up the current coat with 120 grit sandpaper before you can apply any additional coats.
Awesome thanks so much for the info. Looks like I’ll be sanding down before I apply the clear shine and they’ll show. Thanks for the quick response.
I am putting poly backer rod underneath a self leveling filler/sealant in my concrete driveway expansion joints. Below the rod should I fill free space or leave it hollow?
Hello Dennis. No, you can leave the space underneath empty. The self-leveling sealant will adhere well to the sides of the joint and stay put.
Hello. I am doing a garage and applying a koala grey solid colour epoxy coating, it has thin joins through the floor,
what should I fill the joins with??
and should I fill the joins before the coating or after???
if i fill before, with the epoxy bind to the filler ?
Hello Matt. If you fill the joints beforehand, then you need to use a polyurea or epoxy joint filler. We have a few products that we recommend listed in the article. Make sure to grind filled joints flush afterward. The coating will adhere nicely to it. If you are going to fill the joints afterward, use a self-leveling polyurethane joint sealant.
Hi Shea thank you for the response I am responding to this comment
My question is some of the quotes I have gotten have said they can fill the expansion joints with polyurea or something then go over the whole thing with more polyurea flakes etc, does this sound like it would work? or should I just have them go up to the expansion joint and then fill it in after the coating is applied? thank you again.
Hello Mihir. Let’s make sure there is no confusion of terminology. An expansion joint, sometimes called a “control joint”, is a gap between two or more separate slabs. It is there to allow for expansion and contraction of the slabs without any physical contact. For most garage floors, the expansion joint runs the perimeter of the slab. The garage floor is typically separate from the house foundation slab or stem walls. A contraction joint is a saw cut or “V” shaped troweled joint in a large slab. They are cut or troweled to a depth that is approximately 25% of the slab thickness. They are there to encourage cracking in the bottom of the joint instead of across the surface. Expansion joints should not be filled and then covered with a coating. Contraction joints can be filled with the proper material, ground flush, and then coated over to create a seamless-looking floor. Expansion joints can be filled with self-leveling sealant after a coating, but never before.
Hi
I tried to get my 2 car garage epoxy coated. However, the painter just painted the floor and threw some flakes on it and never came back. I was at work when they were doing the job and on returning home I found out that they have not filled the + line with anything and made that same mark on top of the painted surface as well. I wanted the lines to be filled for a more aesthetic look. Can i fill the gap with Sika self-leveling polyurea sealant and then coat the painted as well as the indent with the shiny substance, i believe is called epoxy. How much time would i have to wait for the sealant to dry before pouring epoxy over the whole surface. Would i have to sand the sealant after drying before pouring the shiny layer cause i think if i tried to sand the indent i will end up damaging already painted area in my garage. Please help.
Thank you
Hello Jaspreet. If you want a coating with a seamless look (filled contraction joints +) that will not peel up from car tires, then you need to remove all the paint via grinding and start over from scratch. Paint is not a coating and will last approximately 6 months to one year before it needs to be redone. Car tires will begin to cause it to peel within weeks. Painters are not garage floor coating experts and many times use the wrong product – paint. Their involvement in garage floors almost always ends up with an unhappy outcome.
You should never apply an actual epoxy coating over paint. The reason is that how well the epoxy stays adhered to the surface is dependent on what it is adhered to. If it’s adhered to paint, the epoxy will peel up with the paint stuck to the bottom of it. If it’s adhered to properly prepared bare concrete, then it will not peel. I would suggest reading a few articles on our website so that you can get a better understanding of what is required for an actual garage floor coating. Just picking something up off the shelf from your local home improvement center without much knowledge of coatings has created more than one unhappy person.
I would start by reading our article on the difference between paint and epoxy. Also, you cannot epoxy over a self-leveling polyurethane sealant such as SikaFlex. Here is our article on how to fill contraction joints. Lastly, you might want to look over our article an how to apply a garage floor coating. This will give you a better idea of what’s involved.
I applied this weekend the Sikaflex SL in the expansion joints between the garage and driveway, which I believe is fine, but I got excited with the final output and also filled the contraction joints inside my garage to have a smoother finish and avoid winter humidity with snow melting etc.
The problem is that I was planning to coat it with epoxy or polycuramine (rocksolid), but I read in your TIPS FOR FILLING CONTRACTION AND EXPANSION JOINTS article that I should have used another (harder but still flex) epoxy based filler to avoid future cracks.
What is your recommendation? Remove the sealant and do it again, or do you have an epoxy recommendation that can cover the Sikaflex SL?
Hello Rod. Though SikaFlex is paintable, coatings (which are not paint) do not adhere very well. If your joints are saw cut, you can get away with coating over them since there is very little of the SikaFlex that the coating will come in contact with. You will just have a shallow outline through the coating of where the joints are since SikaFlex is not sandable and can’t be ground flush with the concrete. If you have wider “V” troweled joints, then we recommend grinding out the SikaFlex to fill and grind the joint with the appropriate type of materials we listed above. SikaFlex is far too flexible for a wide joint to be coated over. If vehicles roll over the joint or small wheels from a heavy toolbox or floor jack under load, the sealant below the coating will flex and cause the coating to crack. Once it cracks, it will begin flaking away since it does not adhere well to SikaFlex to begin with.
Hi Shea, I am so happy I found your website, there is almost no content with this detail level on the web. Thank you for keeping this up and running!
Yes, my joints are 1/4 saw cut, and in general, the SikaFlex is 1mm below concrete level with very few spots 1mm above concrete level. Should I use a blade and cut it to try to level it before I move on with the etching and prep for the epoxy?
I am actually considering switching from epoxy to rocksolid/rust oleum. I read sun might ruin epoxy and my garage remains open many hours during the day. Any recommendation between the two (or another product)?
Hi Rod. We are glad you found us. Yes, use a blade to cut it level if you can. What epoxy were you considering? There are large differences in performance and quality. We have an article about RockSolid here. RockSolid is not U.V. stable and can amber just as epoxy can. We have an article about yellowing from the sun here. Lastly, if it’s within your budget, single-part polyurea is one of the best DIY coatings available. We discuss the reasons why here.
I was considering rocksolid. I didnt find polyurea easy to shop. Any shop recommendations?
Hi Rod. We list three companies/vendors with links to their websites in our article about single-part polyurea. You can shop all three. You are not going to find such products from home improvement centers and paint stores. They only carry thin film residential coatings. Commercial-quality coatings such as polyurea are usually only available from vendors online who specialize in concrete coatings. If you like the idea of a full color flake option, Roll On Rock is another good option. It is an epoxy and polyurea system.
Hi! I was just wondering if the TL-821 is the most recommended filler from Garage Flooring LLC to fill the contraction joint in my garage. When I contacted them via email, they recommended the TL-829 (No Grind Flex Joint Fill). Then at the top of their page, they mention some other products they offer. So I’m just not sure which one to use in my garage.
Then, do I do the joint filling before or after the chemical etching?
Hi Jesse. We prefer the TL-821 for the simple reason that you need to grind the joint down flush with the rest of the concrete. It is the best type of filler to use if don’t want any of the joints to telegraph through the coating. This is particularly true for thinner coatings or those that will not be a heavy or full flake coverage. The TL-829 is easier to use since you cut it flush instead of grinding. It negates the need of acquiring a grinder if you don’t have one. It works fine for full flake coverage, but it may or may not show some of the joints for flake coverage that is less. Think of filling the joint as the same as filling a dent in a car or a crack in a piece of furniture. The filled-in space is always sanded smooth with the surrounding area so that it will not be noticed when refinished or painted. If you are etching, fill the joints afterward.
Awesome, thanks!
Hello Shea
Can I use Sikaflex to fill in contraction joints (not expansion joints) before putting VCT tiles on it?
VCT tiles would also require glue so not sure if that will work?
Your article is focused on expansion joints so I’m not sure if I’m doing this right?
Hi Sal. SikaFlex shouldn’t be used. The material has too much flex and the glue will not adhere properly. You need to use something that cures much more firmly or hard. Epoxy or polyurea joint fillers will work. This is one case where you can use a self-leveling underlayment if installing VCT. It will eventually form a small crack down the middle, but it will be covered and not be a problem.
Regarding cracking:
“Though the chance of this happening is not great, many professional contractors will not warranty an epoxy coating for cracks where the owner has asked to have the joints filled. Most contractors will fill the joints if asked, but they will warn you about the possible problems.”
Is there a way to assess the risk? My preference would be for a seamless finish but not if it means repairs needed before the end of life for the coating.
(Amazing site btw – incredibly comprehensive! I’ve spent hours reading articles and comments. Thanks for all your work.)
Hi Arthur. If it’s an older slab without any further cracking within the joints or anywhere else across the slab, then the risk is low. If it’s a newer slab (less than 2 years), then there is still a chance of very slight settling, movement, etc. that could possibly cause more cracking within the joints. Due to garage floor coatings becoming more popular than ever and competition among professional installers even greater, you may find a company that will warranty their work against cosmetic cracking of the coating over a joint if you have them filled. Typically, when the right materials are used, it’s rarely a problem with older slabs.
Still mulling this over because my slab is just over a year since poured but the contraction joints are ugly and a nuisance with debris.
Would you personally fill the joints in your garage (approx 14 months old)?
Tangentially, I chased and filled some small cracks with the Rustoleum Patch and Repair. Considering these repairs, is there a window within which I need to apply the Versatile 4195 so that it adheres to the patched product?
Once the coating is applied the joints tend to be easier to clean. They will be less deep once all those flakes are applied everywhere. However, we would not have a problem filling them for our own garage since it’s one less thing to worry about cleaning. All you need to do for the epoxy crack repairs is sand the surface so that the epoxy will bond.
Can I apply Rustoleum EpoxyShield over the garage floor and then Silka Flex over the control joints?
Hi Rica. Yes, you can do that. If you lay some tape along the edges first, you can get a real clean line with the SikaFlex. Just pull the tape about an hour after the joint is filled.
Hey, I am in the process of installing epoxy to my garage floor. The floor in my garage has a foam expansion joint between the floor and the sidewalls. I would greatly appreciate any advice or guidance on the correct method to deal with this. Thank you in advance for your help.
Hi Nick. Don’t coat over the expansion joint. It’s OK if the coating runs over the edge into it. Once it has fully cured, many people like to fill the joint with a self-leveling joint sealant such as SikaFlex SL.