
VCT tiled garage floors require regular maintenance that includes waxing and the occasional stripping. However, homeowners who love their VCT but not the regular maintenance of the floor have been asking; Can you apply a clear epoxy coating over VCT tiles? The short answer is yes, you can apply an epoxy coating over VCT tiles.
Applying the proper type of clear epoxy over VCT tiles completely eliminates the waxing of the floor. In addition, it provides many of the same benefits in protection as an epoxy-coated floor.
One important consideration before attempting this is that applying epoxy over VCT can sometimes be a tenuous project. Not everyone who has done it has been successful.
The reasons vary from poor tile prep, using the wrong epoxy products, and installation errors. Another is moisture in the concrete. Older VCT tiled garage floors that stood up to moisture vapor transmission between the tiles can suffer epoxy failure when completely sealed.
However, those who have paid attention to the details, including doing a moisture test first, have had the best success with this increasingly popular procedure. If you haven’t installed epoxy before, you may want to read up on how to apply epoxy coatings to get a better idea of the task ahead.
Applying epoxy over VCT tile that is loose or not adhered properly will not fix the floor. If the VCT has not adhered properly, it will still pull up with and take the epoxy coating with it.
Preparing VCT for an epoxy coating
In order for epoxy to adhere properly to vinyl composite tiles, it needs to be roughed up with 60 to 80-grit sandpaper. If you have an existing VCT floor, you will first need to strip the floor of all the wax that has been built up on the surface before you sand.
If you haven’t laid your floor yet, you will still need to sand the tiles. Most new tiles come with a thin protective coating from the factory that you can sand right through so it doesn’t need to be stripped first.
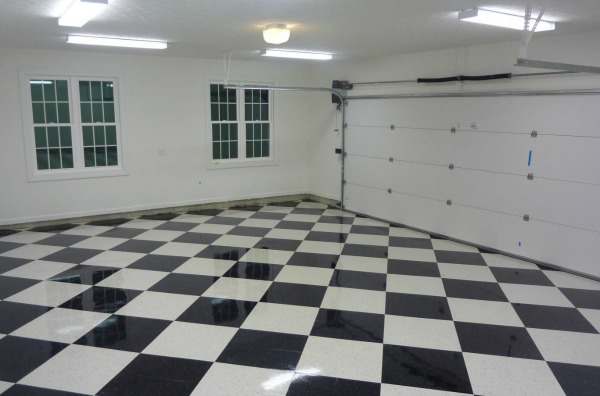
One note to make about sanding: If you have a floor with contrasting colors such as a black and white checkered floor, you need to be careful about the black bleeding or transferring into the white tiles when you sand. This is usually caused by excessive pressure on the sander, clogged-up sandpaper, or a combination of both. It doesn’t take much sanding at all to rough up the tile properly.
Sanding tiles individually before laying the floor is not a good idea either. It can create small chips in the edges of the tile which will show when tightly butting them up together as you lay the tile down.
The quickest way to create the rough finish that you need for the epoxy coating is to rent a lighter-weight 13” floor buffer along with some 60 – 80 grit sanding screens.
The sanding screen allows buildup to pass through the screen thus reducing the chance of color transfer to lighter-colored tiles. The smaller buffer is also easier to control and does not create as much down pressure.
Dual-action orbital sanders also work well as do most other hand sanders; they just require more time to finish the floor. Remember to change the paper often to reduce buildup and always test a small area first. Do not use a belt sander.
Once you have finished sanding you need to make sure the tile is clean and dry before applying the epoxy. Vacuum the surface with a shop vac and then wipe it down with denatured alcohol applied liberally to a microfiber mop pad. This will provide a clean and contaminant-free surface for the epoxy to adhere to.
Applying the epoxy coating to VCT
100% solids epoxy is the best product to use for this application. It will fill any voids or small gaps between the tiles. Be sure to check with the epoxy manufacturer first about compatibility before using their product on vinyl composite tile. Not checking for compatibility is one of the biggest reasons for floor failures.
There are a couple of companies that now have their own approved VCT epoxy coating kits. The first is Alpha Garage. Their kit consists of a 100% solids clear coat and hybrid polyurethane clear coat. This is an extremely durable combination. You can find the Alpha Garage VCT kit here.
The other company is Armor Garage. Their kit consists of an epoxy primer coat and an epoxy clear coat. They require that you call them first for the proper instructions and materials before purchasing their kit for VCT tile. You can find the Armor Garage VCT kit here.
If using any of the above kits, make sure to follow the vendor’s instructions. The application instructions we provide below are a general guide. They can be used to supplement any vendor’s instructions.
In order to ensure the best application of the epoxy, we recommend that you apply it in two coats. The first coat is applied thinly using a squeegee to pull the epoxy tightly across the tile at a 45-degree angle. It is a similar process to grouting tile. In fact, it’s sometimes referred to as the grout coat. The objective here is to just fill any small gaps between the tiles (similar to grouting) and prevent outgassing.
Outgassing is trapped air bubbles and/or small craters in the epoxy. This happens when air can’t escape a thicker coating. When it does escape, the epoxy can cure to a point that it won’t fill itself back in, thus creating a crater where the air was trapped.
It doesn’t take much epoxy for the grout coat. Figure approximately 1 quart for every 150 – 200 square feet or so. Less if the tiles are tight. You can always mix it 1 quart at a time and mix more as you need it. Once mixed, pour the epoxy out in a ribbon on the floor and start pulling it tight across the tiles with the squeegee. It’s OK if you leave a thin layer on the tile.
The second coat can be applied as normal. Use a squeegee to help spread it out if you like after pouring the ribbon and then back roll the epoxy with a 3/8” lint-free nap roller. Follow the manufacturer’s directions when applying the second coat. The first coat usually needs to feel tack free to the touch before applying the second coat. This is usually within 8 – 10 hours. The second coat should be applied within 24 hours of the first coat.
One thing to keep in mind is that epoxy can yellow (amber) over time when exposed to sunlight. It is more noticeable if you have any white tiles. We recommend for best results that you follow up the epoxy coat with a top coat of polyurethane.
The polyurethane won’t stop the yellowing process, but it will slow it down. In addition, it will also improve the abrasion and chemical resistance of the floor.
Once you’ve coated your vinyl composite tile with epoxy, you should have a long-lasting and very durable finish to your floor for years to come. The extended effort will pay off in spades when you don’t have to strip and re-wax your floor on a regular basis.
I have a vinyl floor which glue and moisture is coming up between the tile I was wondering if The Epoxly will seal the floor and stop the glue and moisture from coming out between the joints
No, that won’t work Steve. Moisture from concrete can cause epoxy to delaminate. It’s why moisture testing is recommended if it’s ever in question when applying a coating. Unfortunately, the only way to tackle your moisture problem is to pull the floor up and apply the proper sealer to mitigate it.
Everyone is saying there is no clear product I can epoxy over my VCT tiles. Even the recommended companies listed above. Any other ideas?
Hi Mike. Did you check with Alpha Garage?
Can I use a colored epoxy over the 1st clear coat?
Hi Nan. Are you trying to cover up the tiles? If so, it will require at least two color coats of 100% solids epoxy to do that. Otherwise, the colors of the tile will bleed through the coating.
Yes, I want to cover old vct in my basement with epoxy. The tiles are old but all intact. I would rather not pull them up and would like to epoxy over them for a smooth finished look. Do I need clear coat first and then a second coat of my color of choice?
It will require a minimum of an epoxy primer coat and 100% solids base color coat, Nan. Assuming these are not asbestos tiles, you would first need to rough up the surface of the tiles with 60-80 grit sandpaper. You can use a floor maintainer with a few 60 grit sanding screens to get it done quicker and then manually sand the edges where the floor maintainer could not reach. After a sweep and vacuum, you would need to apply an epoxy primer that is colored the same color as the 100% solids base color coat. The 100% solids epoxy coat would need to be applied with a squeegee or gauge rake first, followed by proper back rolling. This allows the epoxy to fill all the small little seams and gaps that vinyl tile flooring has. If 100% solids epoxy is not used and applied in this manner, then all the little gaps and seams are going to be exposed and show through. It will be obvious that you coated floor tiles. You won’t find any of these needed materials from a home improvement center. It will require purchasing from floor coating vendors who carry commercial quality product.
I want to lay down old magazine ads, vinyl records, burlap sacks, etc and make a huge floor collage to cover with epoxy. I did this to a bar once. Is it the same technique? Can I use a torch for the bubbles?
Hello Shannon. Are you looking to do this for a garage floor?
No. A VCT floor in a basement. It’s like tiles that schools had/have. Pretty rough as it’s never been waxed nut not peeling up or anything.
OK. The issue is that it would take multiple gallons of epoxy to do something like that. We aren’t saying it can’t be done, but it would be a daunting and expensive task that would require a small team of people to do. This also assuming that the tiles are not asbestos.
The average vinyl record is 6mm thick. Some are thicker. That converts to just shy of 24 mils. Mils is what coating thickness is measured in. You would first need to lay down a minimum 8mil coat of epoxy to lightly press the items into in order for them to adhere properly. It’s important that it is done within minutes of the epoxy being applied or it will be too tacky. This will require multiple people wearing spiked shoes. The burlap will be tougher because it needs to soak in somewhat. 8mils will cover about 220 square feet per gallon. Then you would need to apply a second coat at a minimum of 30 mils in order to cover the vinyl records sufficiently. That would be a coverage rate of 53 square feet per gallon. Of course this will require multiple containers being mixed back to back and then poured out onto the floor in small 50 square foot sections and then back rolled with a spiked roller. This requires a team of people to do. You can’t just mix it all up in one shot or it will get smoking hot before you are done mixing. Of course, this does not take into account how much more will need to be applied in order to increase the thickness of the coating if some of the encapsulated items created some high spots. Assuming you did not need to make the floor thicker due to items poking through and factoring in waste, you would need a minimum of 14 gallons for a 400 square foot room.
No, you should not take a torch to it for bubbles. Epoxy for concrete is formulated differently than table top epoxy and art epoxy. It’s an actual wear surface for traffic where as table top epoxy and art resin epoxy is not walked or driven on. The spiked rollers are used in order to prevent bubbles.
I am just trying to do my kitchen floor it’s 14 by 23 mostly cabinets I really only have a couple of options put down new stick down tiles or one hole peice or this kit I already bought I just trying to find out it I can ripe up the stick down tile and sand original tiles it’s all one piece I am just trying to see if this will work thanks for any advice in advance
Hello Ronald. What kit did you buy and put down one whole piece of what exactly? Also, what do you mean when you say sand the original tiles that are all one piece?
Hello! Thank you for this post, it is very helpful. My kitchen has black Armstrong VCT tiles. The tile is brand new, out of the box and I love it, but it has a dull matte finish. I’d like it to be very shiny and have that “wet” look. Is a clear high gloss epoxy coat/layer a good idea for this space? Would a clear epoxy poured on top create that look of shiny, freshly polished floors?
Hello Sunny. You can’t just pour epoxy onto the tile. It requires the steps we outline above. You may also want to review how to wax and maintain VCT tile in order to get the shine you want.
Thank you for the reply. “Pour” was just my shorthand for applying an epoxy layer over the VCT. Is it your belief the shine will only be achieved through wax and polish, or could an appropriately applied gloss epoxy create this as well?
The shine can be achieve both ways. Epoxy would be the most durable by far and the easiest to keep looking clean. However, it takes the proper prep and materials to do it. You will not find the correct coating materials at your local home improvement center. I suggest reading the article closely as we cover some of the possible pit falls of using epoxy.
Do I need to prime first after the sanding and cleaning?
Hi Carolyn. No, you don’t need an epoxy primer for the VCT. Just makes sure it’s a 100% solids epoxy.
I have a basement floor covered with old vinyl tiles. Probably contain asbestos. ( Armstrong product I think) want to seal off the tile and cover with an epoxy product that wears well. Maybe add some color flakes and is not slippery. Will use area for home gym. Need advice about what product. Thank you for your help.I have someone to apply the products.
Hello Chris. The issue with coating asbestos tiles is the proper prep that is required. They typically need to be sanded first in order for paint or epoxy to adhere properly. Sanding is a big no-no since it can make the asbestos fibers airborne. Another possible issue is moisture vapor. Basements are typically notorious for this. Epoxy is not breathable and can trap moisture vapor underneath which will cause the epoxy to lift. Have you conducted a moisture test?
I have a floor that had a carpet ,I took out the carpet sanded the floor now I want to put floor wallpaper seen down then put epoxy over it is this possible?
Hi Ravenna. No, that is not possible. Epoxy will not adhere well to wallpaper. We know this is a popular trend right now, but epoxy is the wrong product to use. A water-based or oil-based polyurethane for wood floors will work. Which one you use is dependent on the type of paper used. Epoxy is used over vinyl graphics that are designed for floor coatings.
Hi
I have limited money and bought vinyl tiles but sadly have a double incontinent elderly dog with dementia and literally weeping and pooing everywhere. I won’t laminate as not staying in the property for long so bought vinyl tiles. Can I use epoxy to make it dog fluid repellant as getting out of control now
Hello Nichola. We would recommend returning the vinyl tiles and purchase an inexpensive DIY epoxy flooring kit from your local home improvement center to apply to the concrete instead. It will make cleanup easy and will not allow urine to penetrate into the concrete.
I put VCT tiles in my shuttle bus conversion and I personally can’t stand the color, it’s beige and totally what you would find in a school. Is there a way that we could epoxy the floor in a bus? It’s about 7×10
Hi Cas. The same method as explained above can be implemented. It doesn’t really matter whether tile is affixed to concrete or a bus floor.
We are interested in doing this in a basement. Does this come in colors to cover the old design of the preexisting floor?
Hi Selina. Yes, you can use colors instead. We recommend contacting Alpha Garage for more information. They are the ones who have developed epoxy for this purpose.