
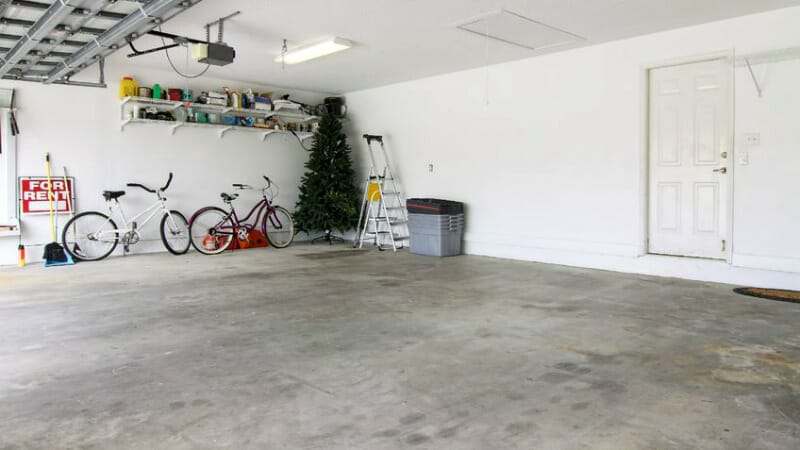
Do you sweep or clean the concrete of your garage floor only to have it feel gritty and dusty the next day? Even after washing it down, can you run your fingers over the concrete once it is dry and get a white, dusty film on your fingertips? If so, you may have a problem with concrete dusting.
For many, it’s a distinctive concrete floor repair issue that can lead to frustration. The good news is that dusting of a garage floor can be reduced. In some cases, it can be stopped completely depending on the severity and the solutions that are applied.
What is concrete dusting and what causes it?
Dusting is the white chalking or powdering of concrete at the surface. It is primarily caused by the slow disintegration of a weak top layer of concrete. Foot traffic, cars, and even cleaning can enhance the problem.
There are many reasons for this weakened layer of concrete. It can range from a poor mix at the concrete plant, excess clay or silt in the concrete mix, old age of the concrete, or even insufficient curing.
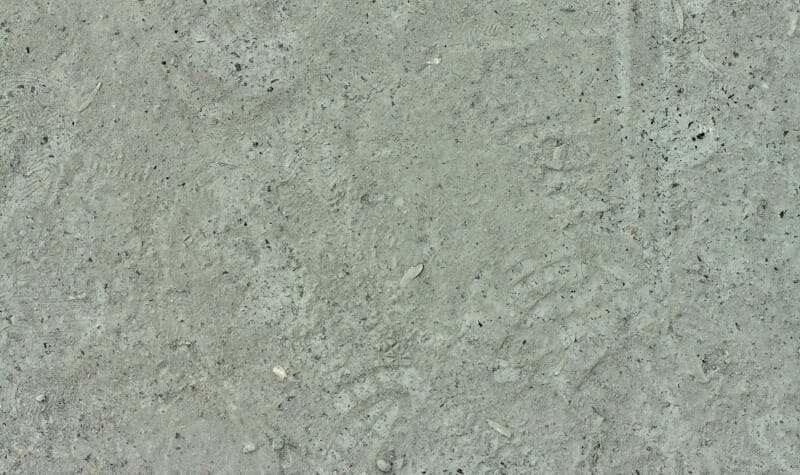
The most common reason is excess bleed water at the surface. If there is too much water in the concrete mix, this water will rise to the surface during the finishing process (troweling). The excess bleed water carries fine particles and cement to the surface that form a weak layer of concrete at the uppermost top of the slab.
Also known as concrete laitance, it is a porous layer of softer concrete that slowly breaks down, creating a white powdery surface. In some cases, the surface can be so soft that it can easily be gouged with a sharp screwdriver or nail.
In addition, this same condition can be caused when water is added to the surface during the finishing process. This is commonly done by less experienced and DIY concrete finishers in a last-ditch effort to create a smooth troweled surface.
Unfortunately, sweeping and even pressure washing the concrete never seems to get it completely clean. This is because the surface is in a constant state of disintegration.
If left untreated, this fine concrete dust can become extremely annoying as it finds its way onto the surface of cars, workbenches, laundry machines, and anything else kept in the garage. It can also be tracked into the house on the bottom of your shoes.
This post may contain affiliate links. If you use these links to make a purchase, we may earn a small commission. As an Amazon Associate, All Garage Floors earns from qualifying purchases. You can read our full disclaimer here.
How to stop a dusting garage floor
There are a few solutions for stopping or reducing the dusting of your garage floor. However, how effective they are is dependent upon the severity of the dusting.
For light dusting, the easiest solution in many cases is to apply a quality concrete densifier. Typically used for warehouse floors and polishing concrete, they have other uses as well. This includes the reduction of concrete dusting.
Densifiers are non-film forming and do not change the look of concrete. They work by penetrating into the upper layers of the concrete surface to create a chemical reaction with the minerals. This reaction forms a hard substance called calcium silicate hydrate (CHS) which fills many of the open pores and capillaries at the concrete surface.
The resulting reaction is reported by various manufacturers to increase the surface strength of concrete by 20% – 40%, depending on the initial condition of the concrete – and that is the odd paradox of a densifier.
The best way to explain it is like this. Densifiers tend to be most effective the better a concrete surface is and less effective the worse a concrete surface is. As a result, the worse the concrete dusting, the less effective a densifier will be. That is why they work best at reducing or stopping light dusting only.
Lithium-based densifiers are the easiest to apply and typically the most effective. They are relatively inexpensive and the only preparation required is to clean the concrete before application.
One product that we highly recommend is PS104 by Concrete Sealers USA. It’s a lithium densifier with a siliconate sealer added.
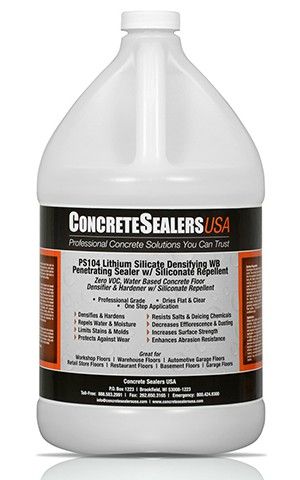
Not only will it densify your garage floor to reduce or stop dusting, the added siliconate sealer will seal the surface to protect it from water and salt damage as well.
You can check the latest price of PS104 here.
Check Price of PS104 – 1 Gallon
Check Price of PS104 – 5 Gallon
Another option for light to moderate dusting would be the application of an acrylic topical sealer.
Acrylic sealers are film-forming and create a protective coating on top of the surface. This thin coating layer acts as a barrier on the concrete, sealing in and stopping the dusting.

If the garage will encounter vehicle traffic, then our recommendation would be an MMA acrylic sealer.
This type of acrylic sealer is the most durable and will not suffer from hot tire pickup. Additionally, it will resist staining and chemicals much better than water-based and standard solvent-based acrylic sealers.
An epoxy floor coating or similar is another option to stop the dusting of a garage floor. However, grinding of the concrete surface would be the required concrete prep when dusting is an issue.
The reason why grinding is required is that it will remove the excess laitance and thin layer of soft concrete at the surface. Acid etching will not.
If epoxy or a similar coating is applied to dusting concrete that was prepped only with acid etching, the epoxy will peel up at a later date and expose a thin layer of concrete dust on the bottom of the epoxy.
Stopping moderate to severe concrete dusting
If the dusting is more severe or the surface of your concrete is soft enough to easily gouge with a screwdriver, then aggressive grinding or shot blasting of the concrete surface will be required.
This type of aggressive mechanical process effectively removes the soft upper layers of concrete to expose the harder surface underneath. It also leaves the concrete with a very rough finish.
This leaves you with a couple of options. The first is to coat over the rougher finish with a thick, multi-layer commercial epoxy coating system.
The second option is to smooth out the surface of the concrete with less aggressive grinding stones. After that, you can then properly seal the concrete.
Final thoughts
Though concrete dusting can be a real nuisance in your garage, it doesn’t mean that you can’t tackle the issue with a little bit of DIY effort on your part.
Unless the dusting is moderate to severe, an application of a quality densifier, an acrylic sealer, or a garage floor coating system will usually get the job done.
If the dusting is severe or the concrete is so soft that it can be gouged fairly easily, then we recommend contacting a garage floor coating company or concrete grinding contractor to discuss your options.
Lastly, do not rely on a home improvement center to help solve your problem. They typically are not well educated on such topics and most do not carry the proper products to use.
Instead, we recommend contacting a quality vendor who specializes in concrete floor coating and sealing products to ask questions. Their knowledge and experience can help you to successfully stop the concrete dusting of your garage floor.
I have been working on this garage floor painting project for weeks now because I had to move all of the items in my garage back and forth to do this two bay sections at a time. Now, because my wife wants her garage parking back and I want to stay married, I have decided that finishing the project with the 5 gallons of BEHR one-coat epoxy that I have (it has been tinted) will match the other bay already done. I had already rolled a clear coat on top of the paint in the completed bay (a cheap one from Home Depot). I just watched your website video about doing that. Again, I wish I had found your website before getting sucked into the Big Box store/DIY YouTube videos black hole of wrong information. I’ll get the proper clear coat you recommended in your video, likely the Rust-Oleum Epoxy Shield Clear High Gloss. If I have a finished look matching difference with the first completed bay, do you think that I can roll it over with the Rust-Oleum clear coat there as well?
Hi Larry. Yes, you can do that. You would first need to rough up the surface with 120-grit sandpaper to provide the proper profile for the EpoxyShield Premium Clear Coat to adhere.
OK, thank you. The first bay that I painted I started out with the BEHR one-coat epoxy in the color white that was in the can. I changed my mind and had Home Depot (were I bought it) tint it to a blue/gray color. I then finished painting the first bay with two coats of the blue/gray color, for a total of 3 coats. Then I rolled on the cheap clear coat from H.D. I got the shiny finish that I was looking for. After painting the adjoining bay also with three coats of the blue/gray it turned out darker than the first bay. El crap-O! I haven’t rolled on any clear coat to that bay yet. Any thoughts, or am I screwed? It may be because my concrete prep work on the second bay was far more thorough than the first bay. I did not grind the floor in either bay. On the second bay It was all floor degreaser and then muriatic acid, followed by a great deal of pressure washing. I did not prep the first bay anywhere near that well.
Hi Larry. The initial white coat in the first bay is the most probable reason why the second bay is darker in color. It created a lighter color tone. The only thing you can try doing is to scuff up the clear coat in the first bay with 120 grit sandpaper and apply more paint to see if it darkens.
Thank you for the response Shea. I figured it was that or the second bucket of paint was tinted darker than the first. Your idea sounds more plausible because I noticed that it was darker after only the second coat but thought that it would lighten when dried. Well, OK then. Looks like I’m in for a Spring project next year. I’ll follow your advice and I think waiting to put the Rust-Oleum clear coat on both bays at the same time would be better? I did purchase a large high quality mat to park on, so that will get me through the coming winter.
As long as you park on the mat and keep any contaminants off the floor that may damage the current clear coat, you should be OK.
And the fun just continues! I rolled on the Rust-Oleum Clear Coat and it went on very nicely. I was careful not to put it on too thick, I followed the application amount that the directions stated would cover on an already paint/epoxy covered floor. It was spot on for the coverage area stated on the directions. I used a 3/8 inch nap roller. Now, 15 hours after applying, the entire clear coat is covered in small “bumps” that you can feel as well. It looks like an orange peel surface. Any suggestions?
Hi Larry. What prep was done beforehand? Also, what time of the day was it applied? Was it humid at all?
No “Prep” per say. I swept the floor and just rolled it on over the BEHR One-Epoxy paint I finished putting on a week ago. It was humid here (northwest Washington State). The garage is very well insulated, including the floor, where I had placed a 4 inch thick insulation pad down before pouring the concrete floor. I estimate that the temp inside the garage was 60 to 65 degrees when I laid the Rust-Oleum clear coat on. I believe that the overnight temps did not go below 50 degrees. I started at 2:00pm finished it at 4:00pm local. The directions state that you have one hour to get the epoxy clear coat on the floor after making the pot mix. I needed two pot mixes to complete the job (638 sq. ft.) and both were rolled onto the floor by the one hour time limit. The finish did have that orange peel look within the hour of completion.
Yikes… OK. Remember when I stated in the comments above that you would first need to rough up the paint with sandpaper before application of epoxy? This has nothing to do with the orange peel effect, but you may encounter problems with peeling. The instructions also state to degloss the surface when applying it over paint and older coatings. There can be a few reasons for the orange peel effect. First would be improper material acclimation and/or large differences in temperature between the material and the concrete surface. If the kit had been in the garage the entire time before application, then this most likely is not the case. However, if it was in a warm house and then brought out and applied to a much cooler surface, then orange peel can occur. High humidity is the most likely culprit. If the air and particularly the surface temperature is not 5 degrees or more above the dew point, then cosmetic curing issues, particularly orange peel, can occur. If it was 5 degrees above the dew point, humidity close to 80% or higher will cause issues as well.
The orange peel will not affect the performance of the coating. However, the improper prep (not sanding) may. The only way to fix orange peel is to remove the upper most layer of the clear coating via sanding and then apply another coat during the proper conditions.
Yes, I did recall the “Prep” instructions you sent in the previous post, but I meant did I need to prep the first bay that I had painted and already applied a Home Depot clear coat so I could apply an epoxy-resin clear coat over that. The second bay was the one where the paint went on darker and that was the one I applied the epoxy to, I didn’t get that I needed to sand that one after waiting it to apply t he epoxy. It was a misunderstanding. Oh well, if a light sanding will prep it it to apply another epoxy clear coat, I can do that later when conditions are better. That would be next summer for here in northwest Washington State! We are 9 days from from November and we’ll be looking at relentless rain/humidity for the next 7 months.
I have a 100 year old slab in the room connected to my garage, which has some lovely character that I would like to enhance the color of and add some shine. But I also have a strip of plain looking concrete next to it that was replaced a few months ago that is dusting and fairly easy to scratch with a screwdriver. I want to stop the dusting of course, and would also eventually like to paint this new strip so that the color more closely matches the darker old concrete.
I called Concrete Sealers USA for advice on sealer/densifier/paint compatibility and they just said to contact my contractor and have them fix the defect, and advised me to read the National Ready Mixed Concrete Association’s whitepaper about dusting before calling them. Well that whitepaper says concrete hardeners are an appropriate remedy, leaving me with the same question about paint compatibility.
To make things even harder for me, I’m in California so solvent based sealers like HD6600-MMA will be hard for me to get. What combination of products can I use to enhance the color of the old concrete, fix the dusting of the old concrete, works with paint, while still being durable to light foot traffic and easy to touch up in the future?
Hi Lisa. I need some clarification before I can try and help you with your question. You stated that you wanted to enhance the color of the older concrete. This is typically done with a clear coat. However, you also state that you want to paint the new strip of concrete which would look completely different from the old concrete. Can you explain further what you mean by enhancing the color?
Since the new concrete will never match the old, the best solution I’ve been able to come up with is to paint that strip a solid color so that it looks like an intentional design. But I’d like the old concrete to have some sort of clear coat to bring out a darker wet look. Hope that makes sense!
Yes, that helps Lisa. We are familiar with the NRMCA paper on dusting. Dusting is the result of a thin (in most cases) weakened layer of concrete at the surface which can happen for a variety of reasons as is outlined in the paper. The paper recommends a densifier treatment after the weakened layer is first removed. Densifiers can work well at reducing and sometimes eliminating light dusting due to the weakened layer being micro thin. However, if you can gouge the concrete with a screwdriver then the layer is not micro thin. Furthermore, the worst shape a concrete surface is in, the least effective a densifier becomes. This is because the weakened layer is lacking some of the primary minerals that a densifier reacts with to initiate the hardening process. We have an article here that shows the before and after results of using a densifier after grinding the concrete.
Our suggestion would be to remove the weak concrete layer first, then apply a concrete paint (not a densifier) of your choice. The paint should stay adhered with that layer removed. You didn’t state how large your strip of concrete is. If it’s not large, you can remove it by hand with a rub brick like this one. If it’s a large area, then you may need to grind. If you don’t remove this thin upper layer, the paint will eventually peel. If just apply a densifier without removing this layer, it will only inhibit the paint from adhering properly.
For interior spaces with foot traffic only, we recommend a using a water-based acrylic sealer. These will slightly darken the finish which can bring out the character of the concrete. Quality water-based acrylics typically have a satin finish. If you want a gloss finish, then it requires a solvent-based acrylic.