
This suspiciously sounds too good to be true. These were our initial thoughts when we first heard of the claimed benefits of BallistiX clear coat sealers. However, after we had the chance to review and test BallistiX, our suspicions were mostly unfounded. We learned that Ballistix provides what may be the best protection in clear coat sealers for garage floor coatings and bare concrete that we have seen.
We realize this is a fairly big statement that requires some explanation. And it does have some stipulations which we will address. In addition, we will be the first to admit that it’s not for everybody. However, we don’t want to get ahead of ourselves. We will let you decide.
Besides abrasion resistance, clear coat sealers and topcoats for garage floor coatings and bare concrete have various degrees of resistance and limitations to a diverse number of environmental conditions, liquids, and other factors.
These include U.V. exposure, slip resistance, tire stains, automotive fluids, chemicals, salts, and general cosmetic staining. And this is where BallistiX excels more than any other topical sealer we have tested.
We first learned of BallistiX when an All Garage Floors reader contacted us to ask what we thought of it. Until then, we had never heard of it before. There was little information about it at the time and it appeared to be available to contractors only. Though we found it intriguing, the claimed benefits seemed a bit dubious and we did not pursue it any further.
About eight months later, ArmorPoxy, one of our respected sponsors, asked us if we would like to review and test a new product they had just become a distributor for. Coincidently, this new product was called BallistiX. Needless to say, we were now interested.
ArmorPoxy sent us a couple of product samples as they became available. We learned how to apply them and performed some unscientific tests for ourselves.
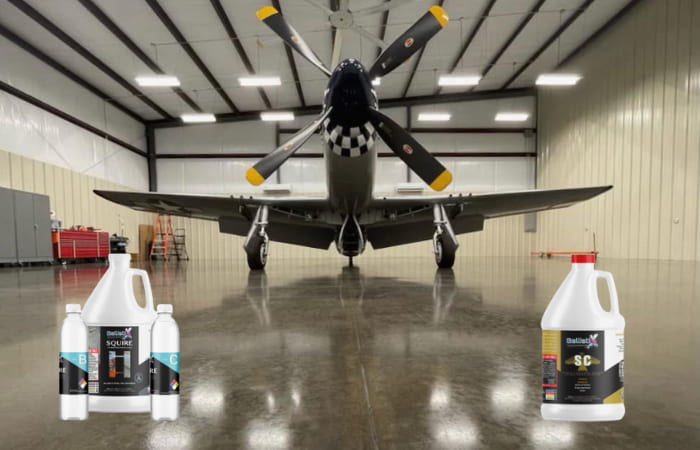
The two samples we received and reviewed here are the original 3-component formulation called Squire and the new single-component formulation called SC. They both have glossy finishes and will most likely be the most popular for DIY applications to bare concrete, coatings, garage floors, workshops, and decorative concrete.
In addition, ArmorPoxy arranged for us to have a phone conversation with a BallistiX applicator and technical representative. This allowed us to ask questions and learn more about the product.
What are BallistiX Clear Coat Sealers?
BallistiX is a Silicon-Ceramic-Silane-Hybrid clear coating and sealer that is available in an assortment of formulations. It can be applied to bare concrete, honed or polished concrete, and color-stained, or dyed concrete.
In addition, it can be applied over acrylic, epoxy, polyurethane, polyurea, and polyaspartic coatings. It also works very well over brick, tile, VCT, marble, stone, terrazzo, and metal. There is even a formulation for stone countertops.
It is engineered to provide unprecedented protection against fluids, chemicals, solvents, salts, stains, mold and mildew growth, rust stains, pitting, spalling, heat, and more.
Important to address is that BallistiX is not like traditional clear coat sealers. It is not designed to be applied in multiple coats to create build thickness. In contrast, it is a very thin film-forming sealer applied as a single coat. It averages less than 1 mil in dry film thickness.
The primary purpose of Ballistix is to provide the ultimate protective and decorative film-forming seal coat over bare concrete or other topical sealers.
What makes BallistiX different than other Concrete Clear Coat Sealers?
One of the key components that make BallistiX so unique is that it is comprised of inorganic materials. Traditional clear coat sealers such as acrylics, epoxy, polyurethanes, polyaspartic, etc. are organic. And unlike organic coatings, mold and mildew cannot grow on BallistiX since it requires organic food sources.
In addition, BallistiX uses nanotechnology. This allows the engineering required to create a chemical reaction with almost any clean surface it is applied to. This reaction produces a 3-point covalent bond to the surface that is almost unbreakable. Traditional organic coatings are carbon-based and can only achieve a two-point bond.

As a result of this molecular/covalent bonding, BallistiX can be applied to extremely smooth surfaces – even glass. Polished concrete or other coatings are an example. It does not require etching of concrete or roughing up the surface of a coating before application.
One fascinating characteristic is that the surface of BallistiX is extremely smooth and non-porous like glass. And just like glass, nothing wants to stick to it. In fact, Ballistix will not stick to itself if you try to apply another coat after the curing process has begun. It will be rejected. The surface needs to be fully cured and properly prepped before another coat can be applied to it.
Note: Do not confuse the smooth surface with self-leveling. BallistiX is a thin mil coating. How smooth it feels to the touch is dependent upon the texture of the surface to which it is applied.
Another feature of BallistiX that is different than other coatings is slip resistance. Almost all coatings can get fairly slippery when wet. However, BallistiX has been demonstrated to have high slip resistance when wet. It lists a wet coefficient of friction of > 0.80. We discuss what this means as well as slip resistance ratings and testing in more detail in our review below.
Something else worth mentioning is that BallistiX Squire resists heat up to 1200° F. This is incredibly high for a concrete coating. For comparison, budget epoxy coatings begin to soften around 140° F.
Other formulations of BallistiX have high heat ratings, just not quite as high as Squire. At the time of this article, we did not have that exact information available to us. We suggest contacting ArmorPoxy for those numbers if you need them.
Lastly, one detail we found quite interesting about BallistiX is some of the ASTM testing methods listed in the data sheets. We were particularly thrown off to learn that the abrasion testing methods listed, ASTM C501 and ASTM C1027, are for unglazed and glazed ceramic tile. What???
After some quick research, we found that this is the correct method to test and measure abrasion for ceramic surfaces. The standard ASTM D4060 test used to measure abrasion is for organic coatings only.
Since BallistiX is inorganic and a type of ceramic, we now understand why these testing methods were used. BallistiX achieves a Class 3 rating for the ASTM C1027 testing method. This rating means the coating is suitable for heavy residential and light commercial traffic.
Abrasion ratings in coatings give the end user a good idea of how durable a particular coating should be in terms of wear. It’s also good for comparing one coating to another. The problem, however, is that there is no conversion chart or comparison of abrasion ratings for inorganic to organic surfaces.
As a result, we can’t objectively tell you ourselves how it compares to traditional organic coatings in terms of wear. What we can tell you, however, is that porcelain and ceramic tile surfaces typically perform the best in terms of abrasion and wear for a garage floor or other high-traffic environments.
The representatives for BallistiX state that it wears just as well if not better than other top-quality commercial coatings. As for now, we will have to take their word for it.
BallistiX Features and Benefits
- Glossy in appearance with options for semi-gloss and matte finishes
- Impregnating “wet look” on bare surfaces
- Hydrophobic
- Slip-resistant with a Wet Coefficient of Friction > 0.80
- Not affected by road salts and deicing fluids
- Anti-microbial – Prevents organic food sources that cause mold and mildew growth
- Repels all automotive fluids, chemicals, and solvents to prevent staining and blemishing
- Resistant to chemical corrosion
- Prevents pitting and spalling of concrete
- Tires will not stain and leave permanent marks on the surface
- Will not peel from hot tires
- Approved for indoor and outdoor applications
- Resists heat up to 1200° F depending on the formulation
- Cool to the touch when used outdoors such as on pool decks and patios
- Can be applied directly to honed and polished concrete
- U.V. impenetrable or U.V. impervious depending on the formulation
- Breathable
- Very low maintenance to keep clean
- Will adhere to almost any clean surface it is applied to
BallistiX Squire does have a high VOC content of 428 g/l when mixed. SC is lower at 201 g/l. The smell is not overpowering though like traditional organic coatings with VOC content levels over 200 g/l.
We applied both products within a 1/2 hour of each other in a closed garage. The smell was somewhat sweet due to the various alcohols used. It did not bother us though since it quickly began to dissipate as it cured.
This is why BallistiX can be used indoors without fear of the odor lingering as it does with organic coatings with high VOC content. However, if you are sensitive to VOCs, we recommend wearing a respirator during application.
As a comparison, we’ve applied organic coatings with much lower VOC content that required the use of a respirator and keeping the garage door open for ventilation.
How to Apply BallistiX Clear Coats and Sealers
The application of BallistiX is different than traditional clear coat methods and may look intimidating at first. This is particularly true when you first view the mixing instructions of the 3-component Squire formulation.
In addition, application methods may vary depending on the formulation used. This includes the surface and/or coating it is being applied to.
However, we found that the particular kit package for bare concrete that ArmorPoxy has put together is developed specifically with the DIY crowd in mind. It’s not difficult to apply, particularly if you get a little practice in first. We will discuss the practice part in a moment.
Most formulations such as the 3-component Squire, are first applied to the surface using a pump-up sprayer. It is simultaneously pulled across the surface using a mop with a very specific microfiber mop pad. The microfiber pad breaks the surface tension of the coating and lays it flat.
Typically, it’s a two-man operation. One person sprays in front of the microfiber mop pad while the other pulls the mop pad across the surface behind the sprayer. Important to note is that the mop pad is not used to scrub in the coating or work back and forth like a roller. Doing so will create streaks and mop lines.
Other formulations such as the single-component SC, allow for a spray-only application option. The optional use of a Water Wiz applicator pad can help to provide a glass-like finish for smooth surfaces.
The only prep needed for BallistiX in most circumstances is an absolutely clean surface. This is essential. In addition, BallistiX requires that the surface is wiped with their Isopropyl Alcohol 99% solution before application. This removes any residues or dust and aids with the covalent bonding process.
Denatured alcohol or other alcohol solutions should not be used. BallistiX is extremely sensitive to moisture during application. Other alcohol solutions will leave behind a film and enough moisture to inhibit adhesion.
If BallistiX is applied over a coating, the coating has to be fully cured. If not, it needs to be past the recoat window at a minimum. There are methods to apply it earlier if time is of the essence, but they are more involved and won’t be discussed here. ArmorPoxy can provide that information if needed.
Depending on the formulation, Ballistix requires 6 – 7 days to fully cure once applied. At 70° it can be walked on in 3 – 4 hours and driven on in 24 hours. Walk-on cure time doubles for every 10° drop in temperature.
The coverage rates vary and depend upon the substrate it is applied to and the formulation used. Expect approximately 400 ft² per gallon for porous surfaces and up to 1000 ft² per gallon for non-porous surfaces (coatings).
Application is limited by temperatures which can vary depending on the formulation being used. Make sure to check what those limitations are before you begin.
BallistiX Squire Versus SC
We know that some of you are already wondering if there are any differences between Squire and SC. It’s actually a good question.
Due to consumer input, the SC formulation was developed to avoid mixing complexities. In addition, it provides slightly better wear and chemical resistance than Squire.
However, Squire is U.V. impenetrable whereas SC is U.V. impervious. This means Squire will protect U.V. sensitive coatings and prevent them from discoloring or being damaged by blocking the U.V. rays. Epoxy is a good example.
Though SC is U.V. stable, it will not protect U.V. sensitive coatings or surfaces. This is typical of most U.V. stable clear coats.
Squire is also best for polished concrete, solvent-based epoxy, urethanes, and polyaspartic. SC is not suitable for use on polished concrete.
Lastly, SC can be applied by a pump sprayer only for many applications whereas most applications of Squire require using the microfiber mop.
Our Review and Testing of BallistiX Squire and SC
The initial goal was for us to review the application and performance of BallistiX Squire with what would later become the ArmorPoxy 2-Layer No-Prep Floor Sealing Kit.
Now available, this kit currently includes your choice of BallistiX Squire (gloss) or NCO (semi-gloss), ISO 99%, Ballistiseal Pro water-based acrylic sealer, 9” rollers, mop head and handle, microfiber pads, and the pump sprayer.
DIY application is straightforward. Clean the concrete, let it dry, and then apply the acrylic sealer. The next day, wipe the floor with the ISO 99% solution and apply the BallistiX.
ArmorPoxy put together this 2-layer kit for good reason. BallistiX can be applied directly to trowel-finished, porous, or ground concrete. However, it first requires applying (spray only) a prime coat of BallistiX Squire with their Grenade pack mixed in.
If the spray prime coat is not applied, the concrete will absorb BallistiX due to its penetrating characteristics. In simple terms, the BallistiX with Grenade pack provides a false bottom and temporarily prevents the coating from being absorbed by the concrete.
Once the spray prime coat is applied, the second and final coat of Ballistix (no Grenade pack added) must be applied within ten minutes of the prime coat or it will fail. This requires a two-person application team to follow behind the prime coat spray applicator within a few minutes. This works well for contractors and saves time. This is what they call their “Grind and Seal” application.
This is not ideal for the typical DIY customer. It is also more costly since you need more than double the amount of BallistiX plus the Grenade pack and another pump-up sprayer. The Ballistiseal Pro acrylic sealer is a good substitute for the prime coat. It’s much less expensive and easy to apply.
We initially received a quart of BallistiX Squire, ISO 99%, microfiber applicator pads, and the HDX pump-up sprayer. We supplied our own application tools such as the mop, rollers, and paint tray. For the water-based acrylic sealer, we used Foundation Armor WB25.
When we did our application, it was believed any water-based acrylic would be a suitable substitute. However, things have changed which we explain in detail in the Updates section below.
Before we began our testing, ArmorPoxy informed us that the new single-component SC had just become available and sent us a sample. The plan was for SC to become another option for the 2-Layer kit. They wanted us to evaluate it as well.
We want to disclose that the concrete we applied these sealers on is not in the best condition. It has multiple crack repairs plus square stain marks from VCT tile that was laid years ago. It’s currently covered with interlocking garage tiles.
The concrete had previously been repaired and prepped via grinding for a coating. However, we found that the concrete was too soft for our liking. In addition, the grinding exposed a multitude of small surface cracks.
As a result, the condition of the concrete does not do clear coats justice, though it has served its purpose of applying and evaluating coatings and sealers.
Application
The concrete was fairly clean. All we did was lightly scrub it with a solution of laundry detergent and warm water. We then rinsed it down and let it dry overnight. The next day we taped off three sections.
We went a step further with our testing and took a couple of hours to polish the third section of concrete. We progressed up to 800 grit with diamond polishing pads for one-half of the section and 1500 grit for the second half.
BallistiX Squire can be applied directly to bare concrete (no primer coat) when honed or polished to 800 grit and higher since it is much less porous. We wanted to test this for ourselves.
After we finished, we applied the acrylic sealer to the other two sections of concrete. Acrylic sealers are very easy to apply. We dipped a 9” roller into a paint tray with the sealer and just rolled it on.
Important to note is that acrylic sealers go on thin. Do not apply them thick or issues such as cloudiness and cracking can occur. If you have especially porous concrete or concrete prepped via grinding, then a second coat is highly recommended.
When we did our testing, the initial directions were to wait a few hours or so for the acrylic coat to dry and not be tacky. Though the humidity was low, we waited five hours since the temperatures were cooler and in the mid-’60s.
The directions have since changed to wait 24 hours. The reason for this is that Ballistix is sensitive to moisture. Waiting overnight ensures you will not have adhesion or cosmetic issues.
Approximately 5 hours after applying the acrylic sealer, we assembled the three BallistiX Squire A, B, and C components for mixing. We admit that these instructions may look complicated if you have never mixed components for a coating before. However, it’s not hard at all when you follow each step. You can see them below along with a video we did showing how to mix it.
While we waited for Squire to cool, we applied BallistiX SC over one section with the acrylic sealer. Important to note is that ArmorPoxy had just learned that SC could be applied as a spray-only application and passed the information along to us. As a result, we decided to try this for ourselves.
We first wiped the area down with the ISO 99%. Typically, you would apply the ISO to a standard microfiber mop pad to wipe down the surface of a garage floor or larger area. Since we were dealing with a small test area, we just used a microfiber towel and hand-wiped it.
While we let the ISO 99% dry for a few minutes, we assembled the HDX pump sprayer. Make sure to use the adjustable blue nozzle tip since it sprays in the required conical pattern. We then poured some BallistiX SC into the sprayer and pumped it up.
Next, we tested the nozzle spray volume. We did this by spraying SC on a large piece of cardboard. We wanted to make sure that the volume was not too heavy. Thin is more with BallistiX.
Once satisfied with the spray volume, we applied the SC to the acrylic-coated concrete. The nozzle should be approximately 2’ above the concrete surface while working it in a rotational pattern. This is standard for other formulations.
We quickly realized that we were moving too slowly and applying too much. The first half was beginning to bead. Plus, we felt we needed to adjust the blue nozzle slightly. Not to worry though. Remember what we said about practice?
A nice feature of BallistiX is that you can test an area to see how it applies and reacts to the surface. You can leave it down for up to 20 – 30 minutes. If you like what you see, you can pick up where you left off. Just make sure to rewet the edges of the test area before that time is up.
If you don’t like the results, as was our case, you can use the ISO 99% solution to clean the area and wipe up the BallistiX. This is exactly what we did. We gave it 10 minutes to dry, adjusted the blue nozzle to a slightly finer spray volume, and then applied it again to our satisfaction.
After we were done, we used the ISO 99% to clean out the pump sprayer and nozzle before we applied the BallistiX squire. We did not want the two formulations to intermix. After waiting 20 minutes for it to dry, our Squire formulation was ready to be applied.
As with the application of SC, we first wiped down our two remaining test areas with ISO and then loaded the pump sprayer with Squire. Next, we pre-wet the supplied microfiber mop pad by spraying it with Squire. This is required for all formulations with a mop application before you begin. Do not start with a dry mop pad.
Since our area was not very big, we could have easily sprayed the Squire on first and then run the mop. However, we wanted to replicate the standard application procedure using two people.
Since you will be walking on the surface just cleaned with ISO 99%, it’s very important for the applicators to wear protective shoe covers or clean socks. Otherwise, you will contaminate the surface and can expose shoe prints.
We started by applying BallistiX Squire to our polished section first. Once we started, we soon realized that it was going to require more material than SC since the polished concrete was absorbing some of it. This was evident because the mop grabbed a little bit and the results looked streaky the moment we began.
This was easily rectified by starting over. The person spraying just ahead of the mop went a little slower so more material could be applied. After inspecting the application, we progressed to the section with the acrylic sealer.
After just a couple of feet, we realized that the application was too heavy since there was a small amount that the mop began to push ahead of it. This was because the acrylic sealer was not absorbing the BallistiX as was the polished concrete. This was easily corrected by not spraying as much.
Communication between the mop applicator and spray applicator is important. You want to get into a good rhythm of application fairly quickly as you go.
Once we were done, we cleaned out our sprayer with ISO 99%, threw away our microfiber applicator pad, and cleaned up our mess. We then waited seven days for the coatings to fully cure before we began any testing.
BallistiX Squire and SC Testing Results
Both Squire and SC cured to a very glossy finish. The section with the polished concrete slowly turned slightly darker as it cured. Our guess is due to the additional material required since it was not applied to a coating.
Close inspection of the SC application revealed an orange peel finish in some areas that you could see in certain light conditions. The last half of our video on chemical testing below does a good job of catching the orange peel effect. It is harder to see with the naked eye.
There is a reason why this happened which we will discuss further below. Otherwise, both formulations adhered well and looked good.
We did a water test on the coatings a few days after application before it was fully cured. We wanted to see how it reacted and to informally test the slip resistance.
The hydrophobic nature was instantly apparent as it refused to lay flat. It just collected sporadically in large beads. In addition, our tennis shoes squeaked with noise and stuck when we stepped in the water while trying to make them slip. You can view it in the video below.
Shoes with a pebbled bottom and bare feet on some formulations may not displace the water as well and could be slippery. If high slip resistance is very important to you, we recommend using the optional anti-slip media. It is mixed in with the sprayer before application.
Something we want to mention is that the ASTM C1028 testing method is outdated for a slip resistance rating. It would do BallistiX justice by using the more current ANSI/NSFI B101.03 testing methods.
We also began parking on a section within two days of the application. One of the cars parked in the garage has large, sticky performance tires that have been shown to cause tire stains to some coatings in the past. They have even left marks on RaceDeck tiles which is hard to do.
After approximately 2-months, we are happy to report that there has not been any evidence of tire staining. Contractors report the same. This is one of the features of BallistiX that make it a very attractive option to apply over garage floor coatings.
Once it was fully cured, we decided to do stain testing with a variety of chemicals and fluids. We subjected SC and Squire to 100% mineral spirits, used oil, brake fluid, transmission fluid, anti-seize, gear oil, anti-freeze, brake cleaner, and even muriatic acid. They were left to sit for 24 hours.
We then wiped up the areas using only paper towels. We were stunned by the results. With one small exception, all the fluids came clean without any evidence of a stain. Acids are known for discoloring coatings and we were surprised there was no reaction.
The one exception was a definite stain from the brake fluid applied to SC. After further investigation, we found that the brake fluid was applied over an area that had some small surface cracks. The brake fluid penetrated the crack and spread under the coating.
Because the concrete had previously been treated to grinding, it was very porous. This is a good example of why you should apply an additional coat of acrylic sealer for such conditions. If we had done that, it would have sufficiently sealed such a small crack and allowed SC to bridge it.
We tested our theory by applying brake fluid to SC again in a different area. Not surprisingly, it did not leave a stain this time. Our theory was correct. You can view our stain testing results in the video below.
Next, we subjected BallistiX Squire to our informal abrasion testing. We chose the section with polished concrete since it was slightly darker. This would allow abrasion marks and scuffs to be seen more easily.
We purposely slid the large steel wheels of a 3-ton jack back and forth over a small area. A heavy jack stand was slid back and forth as well.
After close inspection, we could find faint marks where all the sliding took place. Most were due to the slightly knurled edges from one of the jack stand feet. However, we could not feel any noticeable scratches or areas where the coating was compromised.
We have subjected other coatings to this same test and some have not performed as well. We were very satisfied with the results. BallistiX should perform comparably to other high-quality coatings in terms of abrasion resistance.
It’s important to make known that as tough as a coating can be, they are not tougher than steel wheels, rocks, metal, or any other hard, heavy object that may get slid across the surface. They will get scratched or damaged at some point if this happens.
In addition, if a clear coat is used over darker concrete, it is going to show scratches or marred areas more than if it was used over lighter-colored concrete. This applies to darker solid-colored base coats or colored stains as well. This is why lighter gray and tan base color coats are common for garage floors.
Updates and Changes
As we had mentioned, our application of SC had an orange-peel effect in some areas. Apparently, we were not the only ones that experienced this on occasion for spray-only applications. As a result, application procedures for SC have been going through changes due to constant field testing and feedback for this new product.
BallistiX now recommends using a Swissmex sprayer and grey nozzle tip if SC will be used for multiple applications. Commercial work is an example. Because Swissmex sprayers are expensive, they found that a Roundup sprayer works just as well for DIY use.
In addition, Ballistiseal Pro water-based epoxy acrylic sealer is now being used instead of other water-based acrylic sealers. It was found that other manufacturers’ acrylic sealers could have an adverse effect when used with SC and other BallistiX formulations. This explains why we had a slight issue with the orange peel finish in areas with SC.
Furthermore, they recommend using the Water Wiz applicator for SC to achieve a very smooth finish. It is used in the same manner as the microfiber mop pad. We have a video below from ArmorPoxy that shows the application of the Ballistiseal Pro and SC.
Why BallistiX is Available from ArmorPoxy
BallistiX is a high-tech coating typically sold to contractors only and cannot be purchased from local sources for DIY applications. This is due to some of the specific application tools required, product knowledge, training, and support required.
ArmorPoxy is one of the few distributors that has received approval to sell BallistiX products to the general public since they meet these requirements for their contractor and DIY customer base. They are very knowledgeable about the various formulations and which is most suited for a project. The chart they provided below is a good example to help you get started.
This is why we recommend contacting ArmorPoxy to discuss your project before you decide to purchase BallistiX. They can answer any questions, provide important information, and help qualify you for the best kit or formulation based on your needs.
Below is the Ballistix 2-Layer No-Prep Floor Sealing kit. It includes your choice of Squire (glossy) or NCO (semi-gloss).
If you choose to use SC, you can purchase the Ballistix No-Prep Convenience Line Floor Sealing kit here from ArmorPoxy. This kit includes Ballistiseal Pro and a Water Wiz applicator in addition to the other application supplies.
The 2-Layer Convenience line includes the option of using Counter Attack in lieu of SC depending on the application. Counter Attack is a new formulation that is a single component as well.
Something to be aware of is that shipping can be more expensive than other coatings. The reason for this is that the ISO 99% and Squire/NCO Part-A components need to be shipped Hazmat.
Lastly, though Squire and NCO have a high VOC content, they can be shipped to California in pints and quarts. We recommend contacting ArmorPoxy for further questions about shipping if you live in an area of the country with strict VOC regulations.
Do we Recommend Ballistix Clear Sealers for a Garage Floor? | Final Thoughts
Getting straight to the point, BallistiX clear coat sealers impressed us. We would not hesitate to consider using it as a final clear coat sealer for our own use. The amount of protection from stains, chemicals, UV exposure, and abrasion is stunning. Plus, the finish can be gorgeous depending on what it is applied to.
We have witnessed hundreds of applications posted in the BallistiX Facebook group for contractors. BallistiX is being applied to garage floor coatings, metallic epoxy floors, polished concrete, concrete dog runs, tile floors, countertops, bare concrete workshops, patios, pool decks, brick, rock, and the list goes on.
It is an excellent option for those with a traditional garage floor coating who want the added protection BallistiX can provide. There are no more worries about performance tires possibly staining the coating or undue effort in removing salt residue if you live where it snows. We’ve even seen dried rust rings from old, wet propane bottles that just get wiped up off the surface.
Some formulations for full color flake garage floors after the ISO wipe can just be sprayed on and walk away. That’s it. Solid color-coated garage floors or those with a light to medium flake broadcast will need to use the correct applicator pad to achieve a blemish-free finish.
As a note, BallistiX is not a clear coat substitute for garage floor coatings with color flakes. It is too thin to properly anchor the flakes. A traditional clear coat needs to be applied first before applying Ballistix. It can, however, be applied directly to coatings without color flakes in lieu of a traditional organic clear coat.
As great as BallistiX is, we can tell you right now that it is not for everyone. Though it can successfully be applied DIY, it does not fall into the “anyone can do it” category. There is a definite learning curve with some applications. If you are timid about applying coatings in general, we do not suggest using it.
Though we applied both formulations without much issue, we felt much more confident about applying them again after the first go around. If you are confident in your DIY skills or have applied coatings before, you should be fine as long as you pay close attention to the details.
For application to bare concrete, we would recommend the SC No-Prep Convenience Line. You don’t have to mess with mixing components, it is more forgiving to apply, and it provides slightly better abrasion and chemical resistance.
Due to the many uses of BallistiX, we highly suggest calling ArmorPoxy to discuss your project and determine which formulation would suit you best. They can answer your installation questions and provide any additional information you should be aware of.
During the few months we took to evaluate BallistiX and write this review, there were some product additions as well as changes in application procedures. We would not be surprised if this changes again. ArmorPoxy will have the latest information to ensure a successful application.
If you are in search of the ultimate clear coat sealer for your bare concrete or coating, then BallistiX has you covered. It will provide unmatched performance and protection that should last years to come.
Very helpful article.
I am a concrete contractor. We are trying to help a customer who has a new pool pad installed about a year ago. It is beautifully stamped and colored and has an acrylic sealer. But, the contractor who installed used a dark color and combo with the acrylic sealer…it gets both very slick and hot. The stamp, is a ‘stone look’ and has some deep grooves. I am wondering if BalistiX Squire with a non-slip pack would be a potential solution. If so, any suggestions on preparing the surface and installing product, since it is not a smooth surface.
Hi Glenn. Yes, BallistiX is a great option for pool decks. For a rougher acrylic surface, it would actually be sprayed on with the non-slip media mixed in. Typically, the surface needs to be thoroughly cleaned and then wiped with the 99% ISO. We highly recommend that you give ArmorPoxy a call to discuss your project. Tell them we sent you. They can recommend the best BallistiX formulation to use as well as provide the application information you need.
I have 3000 sq ft of garage. It is 2 years old and has some grease oil stains, along with some micro cracking, rust stains etc.
Instead of just a clear coat of Ballistix I’m thinking of a light grey dye or stain to help camouflage some of the imperfections.
Can you recommend any product compatible or what to stay away from? Some of the acid stains require the “acid” treatment. Somewhere I thought I saw that Ballistix advises to stay away from an acid treament. If that is the case will a dye be more advisable?
Hi Leslie. Any of the water-based stains/dyes would be compatible. DeltaDye is one such example. We have an article on it here. Another is ColorWave by Direct Colors. Acid stains will work. However, it’s important to properly neutralize the concrete before rinsing away the acid remnants. Also, etching caused by the acid stains will make the concrete more porous and would most likely require a minimum of two coats of the Ballistiseal Pro before application of the BallistiX sealer.
Do you feel Ballistix squire or Concrete Sealer PS210 has better chemical (oil) resistance?
Hi Chris. Both products have excellent resistance to oils and other petroleum products. I can’t really say which is better since neither failed our tests. However, BallistiX has better chemical resistance against strong solvents. If oil is your main concern, TS210 is the better value and easier to apply.