
Don’t hold off any longer on your garage floor project just because of some required garage floor repairs. Repairing a pitted or spalled garage floor is only intimidating because most people don’t know what to use or how to start. It really isn’t that difficult and in most cases can be tackled by the average DIY handyman. Once you understand what to do and which products to use, you will find that it’s not as difficult as you may think.
What is concrete pitting and spalling?
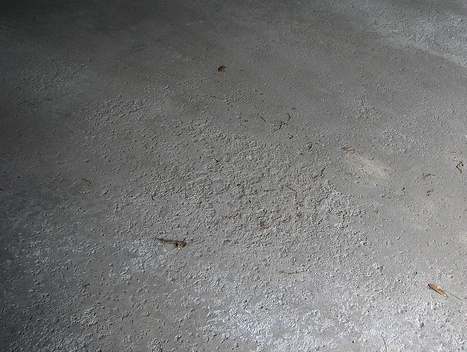
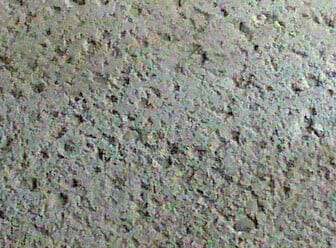
Pitting and spalling can sometimes look very similar to one another. Spalling will usually cause the surface of the floor to crumble or separate into thin layers. Pitting on the other hand can create smaller, deeper holes that have a more distinct cratered look.
Spalling is typically caused by cold winter climates that subject the concrete to freeze-thaw cycles. If water is deposited on the garage floor it can work its way into the capillaries of the upper surface of the concrete as it is absorbed. When the water freezes, it expands and causes microscopic damage to the surrounding concrete.
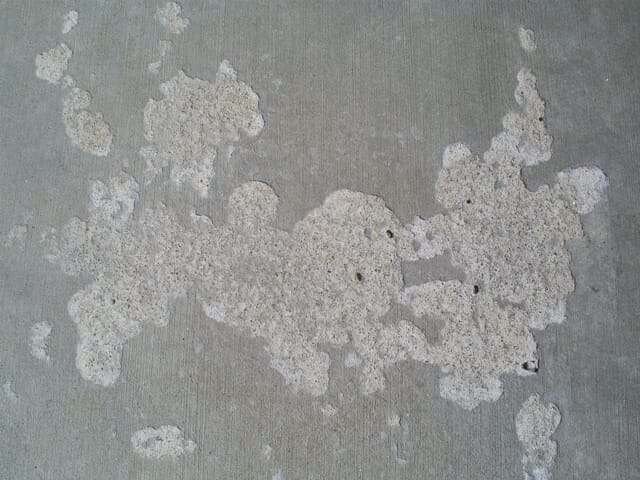
Over a few winters, this constant damage weakens the surface. As a result, the concrete starts to separate from the surface in sheets or crumbles.
Road salts and deicing fluids only contribute to making the problem worse. Salt is corrosive and will cause concrete to deteriorate. In addition, it lowers the freezing temperature of the water. This can allow the water more time to penetrate deeper into the concrete before it freezes.
Pitting, however, can be caused by improper finishing of the concrete, an inadequate concrete mix, improper use of an accelerator, or even old age. Pitting can sometimes cover large areas of the floor while spalling may be more localized.
Road salts and deicing fluids can cause localized pitting as well. It’s most common in areas where a parked car can deposit road salts and deicing fluid on the concrete.
Prepping the concrete for repair
Fortunately, the majority of pitting and spalling in a garage can easily be repaired. Typically, the depth of the damage is usually less than ¼” for spalling and ½” for some pitting. Many times it is less than that.
The first thing you need to do is clean the area to be repaired of any oil stains, wax, sealers, or anything that would be considered a bond breaker. Next, remove all broken and loose concrete with a hammer and chisel. It’s extremely important that you remove all loose or suspect material.
If you are repairing spalled concrete, we highly recommend firmly tapping the surrounding areas with a hammer and listening for a hollow sound.
Spalling starts damaging concrete from just underneath the surface. As a result, there may be surrounding areas of your garage floor that haven’t weakened enough to break free on their own and remain hidden.
Areas that sound hollow have deteriorated underneath and are weak. They should be hit hard with a heavy hammer to expose the damage for repair. This will eliminate the possibility of having to do any more repairs in the near future.
After you are done, sweep the area clean and then vacuum the remainder of the dust from the surface.
Many times instructions for concrete prep may state grinding or shot blasting of the concrete is recommended. If you are repairing smaller areas in which you have broken away all loose material with a hammer and chisel, then the surface profile of the concrete should be satisfactory.
Repair Procedures for pitting and spalling
There are a variety of product materials you can use. What you use will depend upon the size of the repair you are making, how deep it is, and in some cases, how you want it to look. In addition, considerations should be made if you plan on applying a garage floor coating.
The type of materials used is usually broken down into two categories. These include resinous repair materials such as epoxy and polymer-modified cement repair materials.
This post may contain affiliate links. If you use these links to make a purchase, we may earn a small commission. As an Amazon Associate, All Garage Floors earns from qualifying purchases. You can read our full disclaimer here.
Epoxy Concrete patch repair products
If you are going to be coating your garage floor with paint, or epoxy, or covering it with a garage floor mat, then we recommend using an epoxy-based product for most of these repairs. The exception to this is very large areas, which we will discuss shortly.
If you have just a few small holes from pitting, then we recommend using something like Rust-Oleum EpoxyShield Concrete Patch.
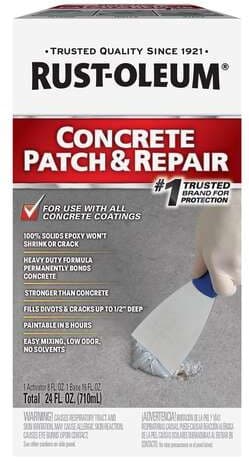
This is the same product that works well for crack repairs. If it’s not available from your local home improvement center, you can find it here at Amazon.
The EpoxyShield patch is a 2-part epoxy gel that you mix as you need it. Mix the Part-A and Part-B according to the directions. Apply it to the repair area making sure to work it in to push out any trapped air. Smooth it out as best you can with a putty knife or margin trowel. Within 8 hours the repair will be hard enough to grind or sand flush.
For larger areas of pitting and spalling, we recommend using a 100% epoxy concrete patch with a sand aggregate. The silica sand is mixed in with the epoxy to act as a filler. Legacy Industrial’s 5-Ton Epoxy Patch Kit is a good example of this.
This type of repair works extremely well and is a popular method among floor coating contractors. Besides repairing pitting and palling, it does a good job of filling larger holes and cracks as well.
In addition, it can be trowelled out fairly smoothly. Once cured, these repairs are actually stronger than the concrete.
Depending on the size of their kit, you can cover from 7 – 16 sq. ft. at a depth of 1/4”, for pitting and spalling.
Rust-Oleum TurboKrete Concrete Patching Compound is a similar product. It uses a 100% solids epoxy resin as well. You can find the Rust-Oleum TurboKrete here at Amazon.
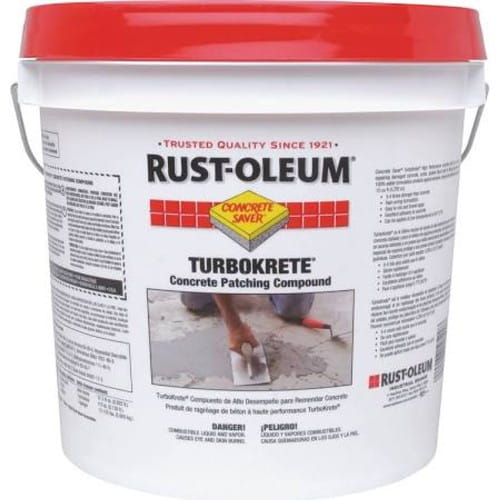
We’ve used this kit before and have found that the required mix of sand to epoxy is a bit too much. Reducing the amount of sand in the mix by 10-15% provides for a smoother finish and easier application.
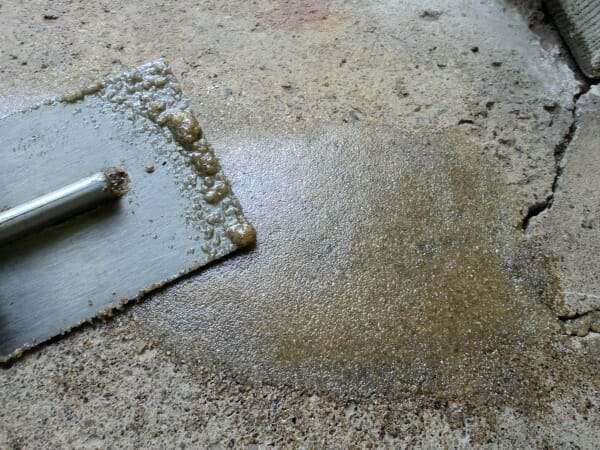
After following the mix instructions from the manufacturer, you will want to trowel the epoxy patch onto your damaged area. Be sure to trowel it with some pressure. This forces the mix into the crevasses of the damaged area and works out any trapped air at the same time.
Once it’s trowelled in, you can smooth the mix with a cement float and feather it to the existing surface. One industry trick is to spray the float with a little Windex. This will keep the trowel from sticking and provide a nice surface.
Polymer-modified cement patches and toppings
Another product that works well is polymer-modified cement. These are a mixture of Portland cement, sand aggregate, and polymers. You just add water. They are used for patching concrete, overlays, and concrete resurfacing cement toppings.
The nice thing about polymer-modified cement products is that they are fairly easy to work with and adhere much better than standard concrete mix. Some can be mixed thicker or thinner depending on the depth of the damage that is being repaired.
Another nice feature is that many can be feathered to as little as 1/16” and can cure quickly. They can be ready for an epoxy coating, paint, or stain, sometimes within hours.
Pay close attention to what the manufacturer offers as some have special mixes for patches deeper than ½” and other mixes for overlays, shallow pitting, spalling, and complete resurfacing.
They may require prepping the area with a priming liquid before application so be sure to read the instructions carefully. Don’t worry, it’s a simple process.
Polymer-modified cement patches are a good choice for very large areas of pitting and spalling. This also includes broken concrete lips and edges, deep holes, and areas where the repair may need to be shaped. The edge of a concrete apron is one such example.
Ardex is a company that makes excellent polymer-modified concrete repair products. Ardex CP is their concrete patch and Ardex CD is used for resurfacing and shallow repair areas. You will need to call or use their website to find a dealer near you.
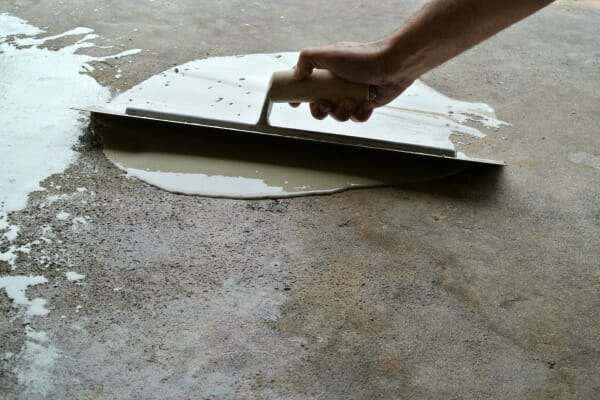
If you have large areas of shallow pitting and/or spalling, then a polymer-modified overlay or topping would be the best choice. These work well in areas where the damage is not much more than 1/8” to 1/4”, especially if you want to retain a standard grey color.
Mixed to a thinner consistency than a patching mix, a polymer-modified cement topping can be poured directly onto the area and spread using a hand trowel or metal-edged squeegee. If you have any spots that are deeper than 1/4″ within the area you want to cover, it’s best to mix a small, thicker batch first to patch over these spots.
In about an hour or so, you can rough these spots over with a mason’s stone, grinder, or a block of 60-grit sandpaper. Sweep and then apply the topping directly over it.
Because these products set up quickly, you should be able to tell fairly soon if you have any areas that have settled and created a low spot that needs a second application. Usually, within 4-6 hours you can rough up the area with 60 grit sandpaper and apply another coat.
Once you have finished and the repairs have cured, you may need to lightly grind any ridges or areas where the mix didn’t feather nicely into the existing concrete. This will help to create a nice smooth transition.
Do not use a polymer-modified self-leveling underlayment! This type of product is not engineered as a wear surface and is not approved for outdoors. Underlayments are only used indoors and require that they are covered with floorings such as carpet, tile, or linoleum. You cannot apply garage floor coatings over underlayments.
Final notes
Remember – If you are going to follow up with an epoxy coating or paint, these repaired areas will still need to be prepped by grinding. This provides the proper profile for coatings. You cannot etch polymer-modified concrete or epoxy patch repairs.
Also, always honor all contraction and expansion joints. Repair materials such as these are not designed for filling these joints up and will lead to surface cracks if you do.
When making repairs to your garage floor, be sure to pay close attention to the mixing instructions and any tips that come with the product. After all the repairs are made, be sure to protect the garage floor from further pitting or spalling by sealing the floor or applying a coating.
Like anything else, there is a bit of a learning curve to deal with depending on the product. Once you get started, however, you will find that doing most of these repairs on your garage floor is not as difficult as you may have thought.
I have a broken concrete edge at the garage side door entrance. The size is about 15″ long, 3″ wide and 1.5 ” deep(triangle shape). Due to the quick temperature drop, I want to complete my epoxy work soon, so I could not wait to get the best concrete patch online. Because the broken edge, Rustoleum concrete patch cannot hold the edge shape. Therefore, I got a vinyl concrete patches from HD. Here is the link:
http://www.homedepot.com/p/Quikrete-10-lb-Vinyl-Concrete-Patcher-113311/100318504
My questions are:
1. Can I apply my solvent based epoxy (the kit) on top of the vinyl concrete patch? Are they compatible?
2. How long do I have to wait before applying epoxy?
3. If this product is not compatible with epoxy, do you have something to recommend that I can get it locally and repair the edge quickly?
Thank you so much.
Hello Quan. Quikrete Vinyl Patch is not the best choice. They recommend applying it in layers if you are making repairs more than 1/4″ deep. We recommend Sakrete Fast Setting Cement Patcher. You should be able to get this from your local home improvement center. It can make repairs in one layer up to 2″ deep. Let it cure for 24 hours before coating over it. We recommend grinding the surface of the repaired area or sanding with 40 grit sandpaper before applying the coating.
I have a pitted area caused by golf cart battery acid leakage. The pitting is about 1/8″ in. in small areas. What would be the best product for this?
Hello Spencer. Sakrete makes a good product called Top’n Bond. It’s a polymer-modified cement that’s available in a small tub for under $10 from your local home improvement centers. Because battery acid was the problem, be sure to neutralize the concrete first with some baking soda and water.
Hi, can I use any of these products in stamped concrete? I want to fill in the stamp texture because the cracks are constantly getting dirt and dog hair in them. Thanks
Yes you can Tim, but it will require proper prep of the concrete first. Most stamped concrete has been treated with a sealer in order to protect it. That sealer needs to be removed first or the overlay will not bond. Acid etching will not work on sealed concrete so it will need to be mechanically removed. Since most stamped concrete is not level, it generally requires using a bead blaster to remove the sealer and prep the concrete. Ardex 301 is a good example of a product for what you are interested in doing.
I have a 3 car garage and the side we typically 2 cars on has sunk by a couple inches, the are is about 16′ x 20′ is there anything I can do myself to bring it up?
Hello Tom. When a slab has sunk that much the first thing you want to do is figure out why so it doesn’t sink again. Was is a soil compaction problem, a broken pipe that caused erosion, and etc. Once you do that, the most common way to fix them is a process called “Slab Jacking”. It involves pumping grout or a polyurethane type of foam under the slab. The foam fills the voids and lifts the slab back up. This article here explains the process.
Thanks for the info Shea, I didn’t think you could raise such a large surface area, I will call someone and discuss, thanks again for the information.
You’re welcome Tom.
Shea, thanks for all the great info on your site.
I have a 600 sq ft garage with about 30 sq ft of spalling. I plan to use the 7-inch Diamabrush hand tool on the smooth areas and than Legacy Industrial’s HD-110 Concrete Patch on the spalled areas. After the patched areas have cured, will they need any special prep (grinding, acid etch, etc) before apply an epoxy coating?
Thanks for your advice.
John
Great question John. For the HD-110 it will require grinding. This does two things. It will rough up the epoxy patch to accept a mechanical bond of the epoxy coating and it will also smooth out the epoxy patch to make a nice transition to the concrete surface. The idea is to treat the patched area like a patching a small dent in a fender. That way the repaired area does not stand out.
Hi Shea,
I plan on grinding my garage floor to remove old paint, and then put down the rustoleoum expoxyshield resurfacer . There are cracks and larger areas of spalling that I will be filling in. Can the cracks be repaired before the grinding process or do they have to be repaired after? Secondly, do I have to grind the floor a second time before I actually paint the resurfacer on it? I do not plan on doing anything else to the floor once the resurfacer is down…just leaving it the gray color.
Hello Maciej. Do your repairs first, then grind the floor. The grinding will smooth out the crack repair material and prep the concrete for the resurfacer at the same time.
Shea,
I finally got the project done and the resurfacer is finally down. I was thinking of adding an extra layer of protection…can I put a 1-part epoxy paint directly over the resurfacer?
If you ground the surface after application in order to smooth out the surface, then yes Maciej, you can apply a 1-part epoxy paint to the surface. If you don’t know the difference in performance of a 1-part epoxy paint to a 2-part epoxy coating, then you may want to read this article first.
Hello,
If we are going to be using a polymer modified cement (looking at sakrete fast patch) to repair some issues in our floor do we have to grind after completion? We do plan on laying down rocksolid once the whole surface is prepped.
I am guessing that regular acid etching won’t fully prepare the floor? Would sanding work to smooth the areas?
Additionally, our flooring is in pretty bad shape stain wise. We started with dawn and scrubbed the floor, then pressure washed. We’ve used the rustoleum brand cleaner and degeeaser but some stains are pretty stubborn. Do you have any suggestions?
Hello James. Grinding of the patch is necessary for two reasons. The first is that acid etching does not work well with polymer-modified cement since it lacks a lot of the free lime that acid reacts with. The second reason is to smooth out the patch work so that it blends well with the concrete. The patch is not going to self-level smooth and perfect. Think of it like filling a small dent in a fender before painting. A repair shop has to sand the filler down so that you can’t see where the dent was.
Regarding the stains. The idea is to remove the oils that block the penetration of liquids. In this case, the coating. Badly stained concrete will still have a faded stain look to it after it is cleaned correctly. Do the water drop test on the stains. If a drop of water beads up on the stain, then it’s not clean enough. This article here will give you some tips on stains.
Thank you!
Would sanding work, or do we have to rent a grinder?
Sanding won’t work James because the patch is too hard. Grinding is the way to do it. You can buy a 4″ grinder from Harbor Freight for $14. Amazon has the concrete turbo cup grinding wheels for $12. This is a very inexpensive setup for grinding patch work. Just be sure to keep the wheel flat and don’t apply a lot of pressure. You will want to use an N95 respirator and safety glasses because of all the concrete dust it kicks up. Home improvement centers sell the respirators for a few bucks as well.
Hi there. Such a helpful article. We have a cement patio and stairs that needs to be evened out and resurfaced. There’s some cracks, some loosening/crumbling, and some holes from Ants digging. We patched it up last fall. It looks terrible. We’d like to even it out with one large coat and then stain it ideally to be aesthetically nice again, and probably by the fall will deck over it. Should we use the HD 110 epoxy first? What’s the best way to do one swift coat to even it out and then stain? Thanks so much!
Lisa
Hi Lisa. HD110 is an epoxy based patch. It can’t be stained and is best to use if applying an epoxy coating or you are just leaving the concrete bare. All the loose cement needs to be chipped away and removed before you do any repairs. What you should use is a polymer-modified cement patch material instead. Once the cracks and pitting are all filled, you can grind the surface and apply a polymer-modified concrete overlay. Ardex CD is one such product. Once it cures, it can be stained. Here is a video demonstrating how it works.
Awesome. Thank you so much!
I just had a concrete designer ( non masonary) give me an estimate for an over lay. He said the patio wasn’t a candidate for an over lay because the patio has to many dips etc.
2
We tried to do some patch work last fall ourselves in one particular are because the crumbling was a hazard. In a year or two we will be decking over the entire patio and stairs because we will be renovating the house with an addition as well. In the meantime, we really want something we can do aesthetically mostly because it’s just very unsightly. It’s structurally sound overall. There are uneven cracks and some crumbling, but over all sound. We are DIY type people and really hope we can find a solution to at least uniform the patio for the summer season of entertaining. Wondering if we just painted it? Or do you think we could use the Ardex? I have pictures. The designers seemed like it would be too big of a job for us.
Thanks so much.
I watched the video, too.
If you are going to be decking over it in a couple of years Lisa, then it’s really not worth the effort and money to smooth it out as you were originally asking. We would suggest repairing any of the loose spalling or pitting and then paint it over with a 1-Part epoxy paint. It won’t look perfect, but it will look much better and be easier to keep clean. If you want more than just the standard gray or tan colors, Seal-Krete has a good variety of color. We wouldn’t recommend 1-part epoxy paint as a long lasting solution for a garage floor, but for outdoor patios and walkways it performs well with foot traffic and will not yellow in the sun.
Thank you, Shea, so much. I’m so appreciative of your advice!!!
Last question- what about a self leveling concrete to repair the cracks etc, before the part one paint? Would that be a good choice to use to do the repair work? Some of the cracks have created an unevenness. I’d ideally like something to pour over to patch the cracks and then prime and paint with the part one paint you suggested. I just want to make sure to get the right product for the crack patching etc. Or stick with the Ardex CD you suggested? Thank you, again, so much!
Self-leveling concrete is not used to repair cracks Lisa. A proper crack repair should be done first with the right product. For the pitting you can purchase polymer-modified cement patch from most home improvement centers. Top’N Bond by Sakrete is and example as is QuikRete Vinyl Concrete Patcher. The Ardex CD is a thinner topping layer that is designed to be applied after all repairs are made when a smooth and consistent finish is required for staining, translucent coatings, and etc.
Hi ,
I have pitting ,spalling, & a bit of cracking at the edge of my garage. It is where the garage door comes down which is my first problem to address. I was wondering what product to repair it with? I got my floor done professionally (Epoxy) but it rained during the process & they never covered it with plastic in that area. I have the edge of both my 2 car garage, & the one car garage peeling because of this. Suggestions?
Thanks
Hello Susan. Most spalling and pitting can be repaired with either an epoxy/sand slurry or polymer-modified cement patch. It’s important to remove any loose material and chase all the cracks before you do. Once you do the repairs, you will need to grind the surface to smooth everything out. After that, you can choose to recoat over that area or paint it.
If using a product like Top n bond to repair larger areas of pitted and spalled concrete in my garage, how long after that can I apply epoxy? The manufacturer mentions the areas should be covered with plastic and kept moist for several days to help with curing, but is that enough for a complete cure, or does it take longer? Thank you.
If you are applying it to larger areas Levi, you will want to wait 48 to 72 hours before you do anything. Tape a sheet of 16″x16″ plastic over the top and if it does not condensate or turn the repair area darker in 12 hours, then all the moisture has cured out. Remember that you will still need to apply a light grind to the surface in order to provide a mechanical bite for the epoxy.
Can you really apply the epoxy just a few days after the Top N Bond? The Top N Bond package clearly says to wait 28 days before painting. Really hoping I can do it sooner!
Hi Jason. We just read over the technical data sheets for Top’n Bond and could not find any reference to waiting 28 days before painting. They do list that it takes 28 days to achieve the full bond strength and compressive strength, however. If you are repairing a very large surface area or doing a skim coat over the entire surface, then it does require some time to cure properly which would require a much longer wait period. To verify, we called Sakrete about applying coatings after repairs. They stated for repairs less than 1/2″ deep over small areas that you should wait 48 hours before applying a coating for temperatures over 60 degrees. The wait time would increase for colder temperatures.
Hi! I am hoping to be able to do something a little different. I want to paint my driveway, which is 50 year old pitted and cracked cement. I don’t really want to change the lumpy surface texture, but I would like for it to stop deteriorating and be sure my paint will stick. I also want to be able to repaint spots later as needed, and not leave an irreparable surface. I have an idea that using the densifier will be the best idea. Please advise me? Thankyou so much.
Hello Dixie. Just to make sure you understand correctly, densifier is not paint. It’s a penetrating concrete treatment that is used to strengthen the surface of concrete and to help reduce moisture mitigation. It is not a quick fix for concrete that is already deteriorating, though it may slow down the process if the concrete is not in too bad of shape. You can apply paint over concrete that has been treated with a densifier however. Something to keep in mind is that paint is not a good option for a driveway. It will need constant touching up since it will be exposed to the elements as well as vehicle traffic. Petroleum products will cause it to break down as well. Also, it will be slippery when wet. If you want to add color to the concrete, you may want to consider staining it and then applying an MMA acrylic sealer such as this one. You can mix an anti-slip aggregate into it and roll it. However, if your concrete is too damages or porous, the acrylic sealer may soak in too much and not be very effective.
Hello and thank you for all the helpful articles. I’m finishing up repairs on my floor. I plan on using primer before floor coat and it’s been brought to my attention that I shouldn’t use a primer over sikaflex gap filler? What happens if I do that? Are there any primers you can recommend that is compatible with sikaflex and rustoleums epoxy 2 part repair?
Hi Lotek. You can’t apply anything over SikaFlex. It’s a flexible, non paintable joint sealer. It is the wrong product to use if you are trying to fill cracks and joints that you want to apply a coating over. The Rust-Oleum Epoxy 2-part concrete and crack repair is an example of the correct type of product to use for cracks. It shouldn’t be used for joints, however. This article on garage floor repair will give more examples. Also, make sure you are not using a latex paint concrete primer if you are installing a coating. It needs to be an epoxy based primer and should be sourced from the same supplier you are purchasing your coating from if possible.
Hi guys I just finished filling in cracks with Quikrete vinyl patcher and I plan to paint the floor with Rust Bullet concrete paint. Do I need to sand or grind the rough spots in the patched areas or will the paint hide them?
Yes, you will want to grind those areas flush Brian. If you don’t, they will telegraph right through the Rust Bullet paint.
Thanks, is there a special disc for the grinder?
Yes, you want to use a 7″ or 4″ concrete turbo cup wheel depending on the size of your angle grinder. Amazon has the best prices generally compared to the home improvement centers. Just be sure to hold the flat to the floor. Not much pressure is requires. It will make quick work of your repairs.
Spend $40 on the concrete cup and it’s too aggressive! Even holding it flat with no pressure it’s gouging out the concrete and creating a whole new problem
The concrete turbo cup wheel is the standard concrete grinding tool for what you are doing Brian. Make sure to move it about fairly quickly across the surface in side to side motions while keeping it flat. If you work slow, the wheel spends too much time in one spot and can grind down fairly quick. With a little practice you should get the hang of it.
Ended up going with a 40 grit flap disc (much cheaper) and it was more than adequate
How should I repair a contraction joint that is crumbling itself? There is the obvious crack on the bottom but also the sides of the joint is cracked and crumbling.
Hi Frances. You need to break out all the loose and crumbled pieces first. After that, you can lay a polymer-modified concrete patch down the middle of the joint and then trowel it with a concrete groover trowel like this one here. This should rebuild the integrity of the edges of the joint. Just be sure to grind the edges flush with the rest of the concrete after it cures.
This site has been extremely helpful. Have done some reading still a few questions.
I have a 3 car garage and in the Northeast so lost of snow/salt issue and large sections with pitting. Plan on using epoxy coat on top. I was debating of using the HD-110 Concrete Patch vs Ardex CD to fix. the pits. As I will be using epoxy, I am leaning towards the HD-110 as that is a stronger bond.
Few questions:
1) It seems most people do not recommend power-washing surface and if have a few oils stains just take care of those areas?
2. I will need to first grind the areas that I will apply HD-110 first?
2) HD-110 says the epoxy top coat needs to be put on within 24 hours of applying HD-110? But I need to grind first the whole surface prior? So after I grind, don’t I need to vacuum and wash out all particles prior to putting on epoxy top coat?
3) On the exterior edge of the garage (beyond the garage door) I have about 1″ x 3″ chipped concrete on ledge where tires run over and also really bad pitting/spalding on top. I won’t be able to epoxy this area. So it sounds like Sakrete Fast Setting Cement Patcher is best fixing the edged area. Then use Ardex CD- using a more dense concentration to fill in the pitting, grind, then top coat with the Ardex CD?
Hello Tom. We will try to answer your questions by the number.
1). Power washing is fine, just make sure you give the concrete adequate time to dry. Power washing drives water deeper into the concrete so it takes longer for all the water vapor to work its way out.
2). No need to grind first if the area is uneven and rough. Just make sure the concrete is clean and that all loose concrete has been removed.
3). Once the HD-110 has cured, grind the surface and the rest of the concrete. This will help to smooth out the repaired area, prep it for epoxy, and make a smooth transition from the repaired areas to the rest of the concrete surface. This way the repairs should not be visible through the epoxy – similar to fixing a dent in a car for example.
4). If the area beyond the garage door is only 1-3″ inches, just use the Sakrete for the entire area.
Thank you for your great answers. I powerwashed but had a lot of residual salt streaks (living in the snowbelt of the northeast) so have to clean further with vinegar. A few follow up questions:
1. The exterior concrete outside of the garage door is about 7″ and the width of 3 car garage. The pitting is pretty severe. I received the HD-110 Concrete Patch, and it includes a lot of sand as part of the mix, could I use it to patch the exterior pitting or epoxy still not a good idea for exposure to sun and the elements?
2. The HD-110 Concrete patch, I saw that you could not add the sand if you are just wanting to fill in smaller pitting holes?
A lot of rinsing will remove the salt streaks Tom. The HD-110 will work fine for the strip outside the door as long as it will be covered with a U.V. resistant coating. If you have some small holes that need to be filled, just set aside a small amount of the part-A and part-B epoxy in the correct proportions. You can mix this separately to fill your small holes. As a tip, you may want to mix up the HD-110 in smaller batches until you get the hang of applying it. If you are slow initially with the application, it will start to setup on you if you mix the whole thing at once. Be sure to firmly press it into the pitted areas with your trowel.
I have an 18 year old garage floor that has some pitted sections that are large in area, but shallow in depth. If the plan is to grind the entire floor, acid etch, and then epoxy coat, is repairing the pitted area necessary? Can I get away with just the grinding? The pitting has been caused by road salts.
Unless the grinding completely removes the pitting John, it will need to be repaired. Just 1/16″ is still approximately 62 mils. Unless you use a 100% solids slurry, the pitting will show through. If you clean the pitted areas and then apply a skim coat of a polymer-modified concrete, you can grind the area smooth with the rest of the floor. It’s actually not very difficult to do. Also, there is no need to acid etch the concrete if you are grinding.
Thank you.
There is an old concrete patched trench about 35 feet long by 15″ wide that has sunk on the middle(up to 1.5″) length wise, also has cracked quite a bit. Is there a product I can use to fill and level at the same time without having to remove the existing concrrete?
You can use a polymer-modified concrete patch Alex. Do not use regular cement as it will not adhere well and is prone to cracking. Polymer-modified products are mixed with water and fairly easy to work with as long as you don’t work too slow. This product by Quikrete would be an example. Ardex makes excellent products as well. Just make sure that which ever product you choose is good for the 1.5″ depth. Some products are only for depths of 1/2″ or less. Just keep in mind that what ever caused the original patch to sink may cause this one to do the same.
I have a 1 car garage.cement floor that i believe is pitting and spalling. The concrete is very dusty from dried cement. I can sweep every hr. and get a good shovel full of dust. I want to redo or fix the entire floor preferably with a self leveling type of product as i don’t think I’m great at floating it myself.
Hi Leonard. A self-leveling type of polymer-modified cement overlay can be used for such situations. Ardex is an example of a company that makes good product for this. Keep in mind that self-leveling does not mean self-finishing. It will find the low spots when spread out, but it’s not going to lay level on it’s own. It still requires some finishing with a trowel to get the proper surface profile and spread.
Hi guys. Great site. My question is this. I have some pitting on my garage floor. I bought Extreme Set 100 to fill in extensive cracking and have some left over. Would I be able to use that product to fix the pitting? This is finally the last of my repairs before applying the epoxy. Also, do I need an epoxy primer before putting down the actual epoxy? I haven’t purchased the epoxy yet and Epoxy Master makes it sound like you don’t need one. Is this true? Would you recommend Epoxy Master or would you recommend another manufacturer? I have done some research but now that it is time to pony up the $ I just want to make sure I go with a quality product and company. Thank you for your help.
Hello Scott. Yes, the Xtreme Set 100 would work, but it’s not ideal. You will need to be quick about your work and should fill the pitting with sand first, then apply the Xtreme set.
EpoxyMaster has excellent product, but they are one of the few hold outs of commercial quality product that doesn’t sell an epoxy primer. It’s not wrong if you don’t use a primer, but it’s highly recommended and can reduce possible application issues. It’s not uncommon to purchase an epoxy primer elsewhere and still use EpoxyMaster. That is what many people do for Epoxy-Coat’s product as well. Or, you can always purchase everything as a package from someone else. They key is to use a high solids epoxy and preferably with a high performance clear top coat if the budget allows for it. You are already pointed in the right direction concerning quality coatings if you are considering EpoxyMaster.
I will probably go with EpoxyMaster. How about Legacy Industrial’s primer could I use that first fallowed by EpoxyMaster, or is there another brand you would recommend? Again, thanks for your help.
Also, Do I have a certain amount of time before I can apply the topcoat?
The same applies for EpoxyMaster as well. You have up to 24 hours to recoat in order to achieve a chemical bond. If you exceed the 24 hours you would need to degloss the surface with 120 grit sandpaper in order to achieve a mechanical bond for the topcoat.
Yes you can Scott. It’s a popular epoxy primer to use and is compatible with EpoxyMaster epoxy products. The recoat window for their epoxy primer is 10-24 hours.
Last question I think. If I go with Legacy Industrial’s primer fallowed by Epoxymaster’s base coat, can I finish it up with Legacy’s HD356VOC urethane coat/sealer for the topcoat? It would be a little cheaper than the Epoxyarmor and I like the idea of using a single component product for ease of use. Thank You.
Yes you can, Scott. It will work well with the EpoxyMaster color coat. Just be sure to apply it within 24 hours of the EpoxyMaster.
Great article, very helpful. My epoxy-coated garage floor has spalled over the years and the epoxy has worn. The spalling isnt deep, but is about half the surface area in size. I plan to grind, clean and fix the spalling with an overlay or topping. Which would I choose? And would it need regrinding before applying epoxy again? Should the epoxy be coated for a longer life?
Hello Jim. Ardex CD is a good topping for resurfacing. You will need to grind the surface after it has cured in order to provide the proper profile for the epoxy. We also like using a 100% solids epoxy and sand slurry for filling spalled areas. It provides and even better bond and is tougher yet. If doing that, it’s best to grind the area smooth after it has cured. If going with an epoxy coating afterwards, we would recommend a high solids epoxy color coat with a top coat of polyurethane or polyurea. You will not get the problems with such a system as you had with your previous coating.
So I was changing my car’s oil this morning and got some on the driveway. I sprayed degreaser and then scrubbed it, but now the scrubbed areas are rougher than the surrounding areas and don’t have the “grain” look. And there’s a stain!
Is this the time for a densifier or a penetrating sealer?
Thanks for your expertise!
Hi David. You may want to give Pour-N-Restore a try for the stain. Yes, a penetrating sealer will help resist oil stains as well as protect your concrete in general from the elements. Keep in mind that penetrating sealers are not stain proof. You still need to clean the oil from the concrete within a reasonable amount of time or it will still stain – just not as bad. We would recommend a good siliconate sealer for your driveway.
Thanks to all of the great info here, I’m prepping my garage floor for eventual epoxy coating.
I have about 250 sqft of pitting and I’m looking for the most cost effective / user-friendly way to repair it. I bought some bags of Quikrete Vinyl Concrete Patcher; do you think this a good solution?
I’ve been filling cracks with Quikrete Epoxy Concrete Repair, but I’m using a lot of it. Can I partially fill cracks with sand when using this product?
Hi Josh. Yes, the Quikrete products will work. Make sure to allow the Concrete Patcher to cure fully so that it releases all of its water content before applying a coating. Also, you will need to grind the surface (not etch) to prep it properly for adhesion. You will want to grind anyways to smooth out all of your repairs. For the cracks, you can fill them with sand to about 3/8″ from the top and then apply the epoxy repair. This will help reduce the amount of material that you are using.
Hi Shea,
I have a 330sqf garage floor which I ground using a Home Depot floor polisher with the diamond prep wheel. Unfortunately, after doing so, I discovered that there is 1/16 to 1/8 depth pitting all over the place. I am now trying to decided if I should rent a commercial floor grinder and try to remove 1/8 inch everywhere or if I should cover it with self-leveling concrete before grinding. What would be your recommendation ?
Also, do you have a recommendation on a good self-leveling concrete. I mostly have access to Sika product.
Thank you
Hello Charles. You do not want to attempt removing 1/8″ of concrete from the entire floor. It requires an entirely different machine and produces many pounds of concrete dust. What is the final goal for your floor? Are you going to apply a coating?
I will be applying a epoxy/polyurethane coating, probably a Armorseal 650 and Armorseal HS Polyurethane. I will go white and I want something really easy to clean. My garage will be use as a machine shop with occasional metalworking and woodworking.
OK. If most of the floor is pitted as you say, then a quality polymer-modified cement would be the more efficient option. Sika makes a few high quality products depending on the application. The 222 may be your best bet, but we recommend contacting them and tell them of your project to verify. If you only have few areas with the issue, we prefer using an epoxy sand slurry to make those repairs. ArmorPoxy carries such a product. The advantage with the ArmorPoxy kit is that it would not need to be ground flush afterwards (providing you recoat within the window) like the Sika repair would require.