
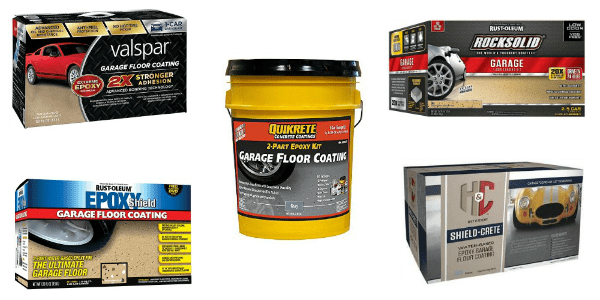
There is nothing more frustrating than applying two or more epoxy coating kits to your garage floor, only to discover that the colors do not match after the coating has cured. You can clearly see where the application of the first coating kit ended and where the second kit overlapped due to a slight, but distinct difference in the color tone of the epoxy or similar coating.
Other issues are coatings that look less glossy and have a different color tone in some areas of the garage floor than others. So why do color inconsistencies with garage floor coatings happen and how can you avoid them?
Uneven color is most common with 2-part coatings due to certain characteritics with their composition, but it can happen with other coatings as well. Epoxy floor coatings are one such example.
Epoxy is a 2-part thermosetting coating that requires you to mix together part-A with part-B before application. The part-A is typically the colored resin component. The part-B is the hardener or activator that when introduced, starts the chemical reaction to begin the curing process. The part-B is clear or sometimes slightly amber in color.
Why Epoxy kit colors don’t Always match
Most issues with garage floor coating kits not matching exactly in color have to do with the part-A colored resin. However, other factors can prevail as well. The three primary reasons are as follows:
Colored pigments settle
The part-A resin gets its color from pigments. These pigments make up part of the solids content in coatings and can settle to the bottom of the can or pouch that contains it.
If the colored resin is not mixed thoroughly first before being introduced to the part-B activator, some of the color pigments that settled can be left stuck to the bottom of the container and affect the true color of the coating. This is a common DIY mistake.
If you require two kits to cover your garage floor, then you increase the chances that one will be off in color compared to the other if the settled pigments are not mixed first.
Coating Batches are different
Another issue is that just like carpet, wood, or other flooring products, different garage floor coating batches can make for a slight difference in color.
For example, if you were to purchase two DIY garage floor coating kits from your local home improvement center, there is no way to determine if they are from the same color batch or not.
We actually called Rust-Oleum about this. They stated that there was no way to identify color batches from the outside of the package for both their EpoxyShield and RockSolid products. They did say that their 2.5 car garage floor coating kit is actually two single car kits in one package and should be from the same color batch.
However, if you need one 2.5 car kit and one single car kit to cover your entire garage floor, they stated that the color batches are not going to be the same between the two kits.
Note: Rust-Oleum is one of the few manufacturers that denotes part-B as the colored resin or base color and part-A as the activator. Regardless, all manufacturers and vendors label each container and you will know which is which.
Stretching coverage rates of coatings
Stretching the coverage rate of coatings has less to do with the part-A colored resin. However, it is a common DIY mistake that leads to some areas of the garage floor coating looking patchy or dull and having a slight difference in color or gloss compared to other areas. RockSolid is one such coating that has had issues with this.

When a coating is stretched, it cures to a thinner dry film thickness than is recommended by the manufacturer. As a result, it will take on a different color tone or appearance compared to areas of the garage floor where it wasn’t stretched.
The best way to prevent this from happening with your typical DIY garage floor coating kits is to make sure that you have approximately 15% more product available over your garage floor square footage. This rule applies for the first coat only on bare concrete.
For example, if you have a 460 square foot garage floor, chances are that a typical 2.5 garage floor coating kit will not adequately cover your concrete at the recommended wet film thickness. These 2.5 car kits usually cover up to 500 square feet. 15% more of 460 is 529 square feet.
Remember, coverage rates are dependent on the surface profile and porosity of the concrete. If your surface is more porous or rough, coverage rates will be less. The only time a coating will reach the high end of a coverage rate is when you are applying a second coat. You do not loose any of the coating to porosity, surface roughness, and etc.
In this example we would recommend using one 2.5 car kit and one single car kit. The 2.5 car kit would be used on 375-400 square feet of garage floor and the single car kit for the remainder. This will provide for adequate wet film thickness, with more consistent color and gloss. It will also result in longer wear since the coating is at or above the manufacturer’s recommended dry film thickness.
We understand not wanting to spend more than you have to. However, more than one person has ended up with a poor looking coating or had to spend more money to recoat the entire floor to fix the problem, all because they tried to save from having to buy an additional kit.
High solids commercial quality garage floor coating kits need less additional materials. We recommend factoring in approximately 10% of additional material for the first coat.
Mix all colored resin together first to ensure coating colors match
The key to ensuring that your garage floor coating colors match from kit to kit is to mix all of the colored resin components together first before mixing any single kits of part-A and part-B together. This is sometimes referred to as batching and is a common practice among commercial installers.
We recommend the following steps to ensure color uniformity:
- Premix each unit of colored resin first in its own container to avoid settled color pigments
- Pour the contents of each premixed colored resin into a clean bucket and then mix together
- Pour the contents of one part-B activator into a clean mixing bucket followed by the appropriate amount of part-A colored resin
- Mix according to instructions and apply to garage floor
- Repeat steps 2 – 4 for each batch you need to mix
You will need to purchase some inexpensive 2.5 quart disposable plastic measuring containers from your local home improvement center. You can find them in the paint section. This will allow you to pour the correct amount of premixed part-A colored resin for each part-B activator that you mix together.
It’s important to keep track of the fluid ounces. Each kit should tell you how many ounces each colored resin unit contains.
Always use a clean mixing bucket for each batch. You can use the first bucket of the remaining part-A colored resin to mix your last batch since you should be left with the proper amount if you measured your batches correctly.
Be careful with mixing! Always use a fresh mixing stick or clean paddle mixer when mixing just the part-A colored resin. If you introduce any part-B activator from a used stick into the part-A, you can begin the chemical curing process prematurely.
The only exception we would have for these mixing procedures is if you are applying color flakes to full refusal. This effectively covers the coating and any color discrepancies will make no difference in the outcome.
Do not mix all garage floor coating kits together at once
Every once in a while, someone gets the bright idea to combine and mix all the kits together that are required to cover the entire garage floor for one application in order to ensure color match. DO NOT DO THIS!
2-part concrete floor coatings are thermosetting and build up heat when the part-A and part-B are mixed together. The amount of heat they develop is based on volume. If you mix two or more kits together at once, the coating can get so hot that it will begin smoking before you can get it out of the mix bucket.
Even if you were able to pour it out onto the floor before it got that hot, it will begin to cure must faster and will become unworkable before you could roll it all out. That is why you rarely see a 2-part garage floor coating kit that is more than 1.5 gallons total. This goes for commercial quality coatings as well.
The one exception is single-part moisture cured coatings. Polyurea is one such example. These can and should be premixed together before application to ensure color uniformity. In fact, they can be purchased in 5-gallon containers.
The reason you can mix single-part coatings like this is that they are moisture cured coatings. You don’t mix 2-parts together (hence single-part). They curing process is activated instead by moisture content in the air. Once they are applied to the garage floor, the moisture in the air begins the chemical reaction.
Paint and 1-part epoxy paint are another example of product that can be mixed all at once. However, they are not true coatings to begin with. They dry when applied to a surface and do not chemically cure.
Final thoughts
Following these recommended procedures to ensure color uniformity and gloss of your garage floor coating is not difficult. It just requires an additional step or two during the mixing process.
Interestingly enough, when we called the Rust-Oleum tech line about identifying color batches for their kits, they recommended this procedure for all of their coatings, though they do not list this in their instructions. We found this was true for most of the other brands as well.
Our guess is that these manufacturers want to keep things as simple as possible and only offer this information to those that call or contact them with a problem or question.
Will you experience a difference in color or appearance of your garage floor coating if you don’t follow these guidelines? The odds are more on your side that you won’t than you will. However, do you want to take that chance? There are pages of online reviews from people that complain of these exact issues.
These mixing and coverage rate guidelines are recommended to ensure color matching, uniformity, and gloss for most garage floor coatings. This includes the less expensive DIY garage floor coating kits as well as the higher quality commercial coatings that you can purchase from reputable garage floor coating vendors online.
I just did my 1 car garage with Rust-Oleum Epoxy-shield Pro and then applied the Clear Coat the next day. A few hours after I had done my clean up, I noticed a 4x1ft stretch where the clear coat seemed a little thin and did not match the rest of the garage. Just checked it this morning and that area is a little smaller but still noticeable. Is there something I can use to fix that, without buying another kit? The smallest and cheapest thing I could find was a 1 gallon can of a water based clear coat for painted concrete surfaces, but upon reading the label it said to not use on epoxy coated surfaces. Its not a huge issue and can deal with that small area, but after all that prep work, I’d like to see if any of you know of a simple and cheap solution. Thanks in advance.
Hi James. Unfortunately, Rust-Oleum does not sell touch-up kits and you can’t try to fix it with something else that is not equivalent. In addition, epoxy that is touched up does not blend well like latex paint does on a wall. When you go back over a small section that has already cured you can see the overlap marks. It’s not as noticeable with a clear as it is with color, but it’s still noticeable.
Copy that. It’s not too big of a deal. I guess I just didn’t roll far enough on that part. I blame it on dim lighting 🙂 . Thanks for the reply.
I am going to apply epoxy in couple of days and thank god that I read your article . I was planning to mix 2 kit But I learned now that it wasn’t a good idea . Here is my question . I have 3 Rust Oleum professional kit which is more than enough to do 2 coats and I was wondering how to batch them . After reading your article , can I mix All 3 color Part in 5 gl bucket and use them by mixing 1 gl at a time with hardner part ? I know you already explained the same in article but my question is that can I hold the mixed color part for a day to do my 2 coat ? My garage is 560 SqFt and each kit coverage is 300-400 so I know that volume wise 3 kit shall be sufficient but the question is shall I mix and batch then between first and second coat ? Means can I hold premixed color part for 24 Hrs without mixing with Hardner part ?
Yes, you can do that, Amit. Take a close look at the packages and the data sheets. They will tell you exactly how much in ounces each part-A and part-B is. Use a measuring bucket for each colored resin that you mix with the hardener to make sure you are getting your amounts correct. Keeping all the colored resin in a bucket for 24 hours is fine.
It appears coverage rates with Rocksolid is a major issue and the ultimate fix is buying more than you need however, Which installation process is recommended for 480 sq ft Garage:
1. Buy 2 kits and lay it thick?
2. Install 1 kit and re-coat with 2nd kit
—Keep in mind the single car kit for my particular color is know where to be found. Using 2 kits.
I’m assuming that you have the 2.5 garage kit that covers up to 500 square feet. The best method is to apply the first kit as directed and then apply the second kit if necessary. The first kit acts as a primer and the second kit provides the even color and high gloss that RockSolid is known for. If you are lucky and the first kit looks good, you can return the second.
Thanks for the prompt reply. Great site
I mixed EpoxyShield as stated but still have some over lapping lines and a difference in color. How can I fix this?
Hi Debra. If you mixed all the color resin together first as described in the article you should have the exact same color unless your ratios of color resin to hardener between the batches was not the same. In other words, if you had more color resin to one part of hardener than the other, then the color could look slightly different. Also, it’s important to keep a wet edge. If you waited too long before applying the second batch and the first part of the coating was already tacking up, then you will get overlap marks. Coatings are not like paint and do not blend together well like paint on a wall. Unfortunately, the only way to fix that would be to apply another coating over it.
I applied epoxyshield and am noticing the two differnet colors as I went to a different side of the garage. I already threw flakes down. Can I puchase another set and just put the new epoxy over the 2 day old epoxy with flakes?
Hi David. If it’s the Rust-Oleum EpoxyShield water-based epoxy, you have 72 hours to apply a new coat without further prep.
Is it ok to re apply over flakes though?
Yes, it will be fine. Just apply new flakes over the next coat.
What about for adding a second coat of the ‘garage floor coating kit’ from Rust-oleum? Do I have 72 hours to reapply (and over flakes) without further prep?
That’s correct, Heather. However, the sooner after 10-12 hours or so the better. You don’t want too much dust collecting on the surface.
I have rock-solid garage floor coating that comes in a bag can I pour that in a bucket and mix it up one batch at a time
Hi Daniel. The bag is called a burst pouch. It has a divider in the middle of the bag that separates the colored resin pouch and hardener pouch from each other. When rolling one end of the bag as described in the instructions, the pressure bursts the divider between the two and allows you to mix the product in the bag without using a bucket. If you opt to cut the corners of each pouch in the bag to pour into a bucket and mix, you would need a clean mix bucket for each bag of RockSolid you need.
I plan on using two Rocksolid 1 car garage kits for a 300 sq. ft space.
Can I mix each burst bag and then pour them out on the floor at the same time for application, essentially mixing them that way, or do I still need to mix all the colored resin components separately first?
Hi Annette. You need to mix it as we outline in the article. Mix the colored resin together first in a clean bucket. After that, you need a clean mix bucket for one pouch of the clear hardener. Pour the proper amount of colored resin into that bucket, mix, then apply. Once applied, pour the second pouch of clear hardener into the bucket of remaining colored resin and then mix and apply. Do not mix the batches separately in their pouches first and then attempt to mix them by pouring them out on the floor together. It will not work.
I’m building a 40×40 (1600 sq. ft) garage. How can I expect to color batch for such a large floor? It doesn’t sound like it’s even possible. when I say color batch, I’m speaking of using the RockSolid product not epoxy
Hello Ken. RockSolid would not be our first choice for coating such a large floor. If you run into problems with it laying down too thin for a single color coat (loss of gloss and rich color tone), it’s going to require another coat to fix the problem (2x the original cost). We would recommend 4 2.5 car kits based on the poor coverage rates RockSolid is known for. That’s 8 individual batches applied at no greater than 200 square feet per batch.
In order to ensure color uniformity, it would require cutting the corner of the colored resin pouch for each kit to combine and lightly mix in one large bucket. For each full batch you mix to apply, cut the corner of the hardener pouch for each kit, pour it into a clean bucket, and then add a measured quantity of the colored resin. However, you can use the same measuring container for each batch of colored resin you add. We don’t remember how many ounces are in the colored resin pouch, but it should be printed on the pouch. If not, call Rust-Oleum. Also, the industry standard is for the colored resin to be Part-A. However, Rust-Oleum labels it as Part-B for some products so double-check. Always use a clean bucket for mixing each new batch and mix for 2-3 minutes. It’s highly recommended to have one person mixing while another is applying it to the floor. This ensures that you will keep a wet edge going and create overlap marks from taking too much time between batches. This article on color uniformity explains more.
Thank you Shea for your quick response. Have a great day.
I mixed the bag as instructed but the first area near the walls came out darker than the rest of the floor. Could it be that the expansion joint near the boarder of the room had moisture and the resin reacted to it?? I only applied 1/2 of the floor (with color flakes) so when i apply the other half can i go back over the darker area to get it to match??
Hello Terry. No, you can’t apply a second coat of the same color to make it lighter. We don’t know what coating you used, but resin does not react to moisture by turning darker. Moisture causes a variety of problems with coatings depending what was used, but color change is not one of them. A color from a single mix batch can’t get darker either, but it can appear lighter if not applied thick enough. The concrete affects the color of the first coat if it’s too thin. It may be that the areas near the border have the correct amount of coating applied (or more than needed) and the rest of the floor does not. The number one rule of coatings is that you don’t stretch the coverage rate. Did you measure out on the floor how much square footage the first batch should cover?
I used Rust-Oleum Rock Solid dark gray and it was 10 shades darker the first several feet near the concrete wall where I started rolling. After it dried I was able to inspect the thickness of the coat from the dark area to the light area and it was unable to see any difference. After talking to a customer service rep at R-O I was advised that perhaps the bag was not mixed enough and that the only thing to get the color consistent would be to put a coat on top of the existing one so I did. This time I made sure I mixed the pouch twice as long as the directions indicated and put another coat on top. Doing so corrected the color problem but now i will have to do the same process to the other side of my garage to get the texture to match which is an expensive solution but its far better than to have the original color mismatched near the walls
Hi Terry. OK, it’s what we guessed the problem was then. Not enough of the coating was applied (thick enough) once you got away from the perimeter of the garage. When you applied the second coat, the thin areas became thick enough and the full color richness evened out as it should. This is the number one complaint that people have with RockSolid. We discuss this in our review of RockSolid here. We also discuss it in our video that compares EpoxyShield and RockSolid. You can see that here. We discuss it in the last 1/3rd of the video.