

How hard is it to install your own garage flooring? Do you have the skills or experience to do it? These are important questions to consider when choosing a DIY garage floor that will be best for your needs. Besides the obvious things like price and durability, you also need to assess installation requirements along with your skills and abilities since you will be installing the garage flooring yourself.
With these factors in mind, we will examine the easiest DIY garage floor installations to the more complex and briefly discuss what is required to install each one. Our ratings will range from easy to moderate to difficult. This should help you to determine which garage flooring option is best for you based on your skills and what you feel comfortable installing.
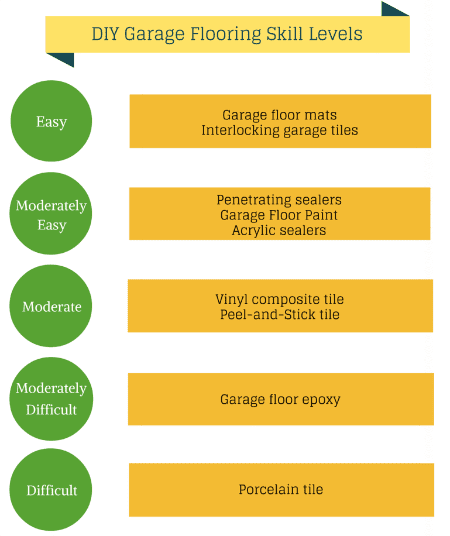
Easy to install DIY garage flooring
You have two options to choose from in easy to install garage flooring. The first of these would be garage floor mats. They offer one of the largest selections in terms of size, color, tread design, and levels of durability. They do a good job of protecting and enhancing the looks of your garage floor and at a skill level that a beginner can tackle.
The only garage floor preparation that is needed is to sweep the concrete before installation. If you can lay down a large carpet then you can install a garage floor mat. If you elect to cover the entire garage floor, the only tools required are a straight edge, tape measure, and a utility knife.
Your second choice for easy to install garage flooring is interlocking garage floor tiles. These tiles can truly give your garage floor that cool, custom look. Like mats, interlocking tiles come in a variety of colors and textures. They are excellent at resisting stains, they insulate from the cold floor, and they can support thousands of pounds per tile.
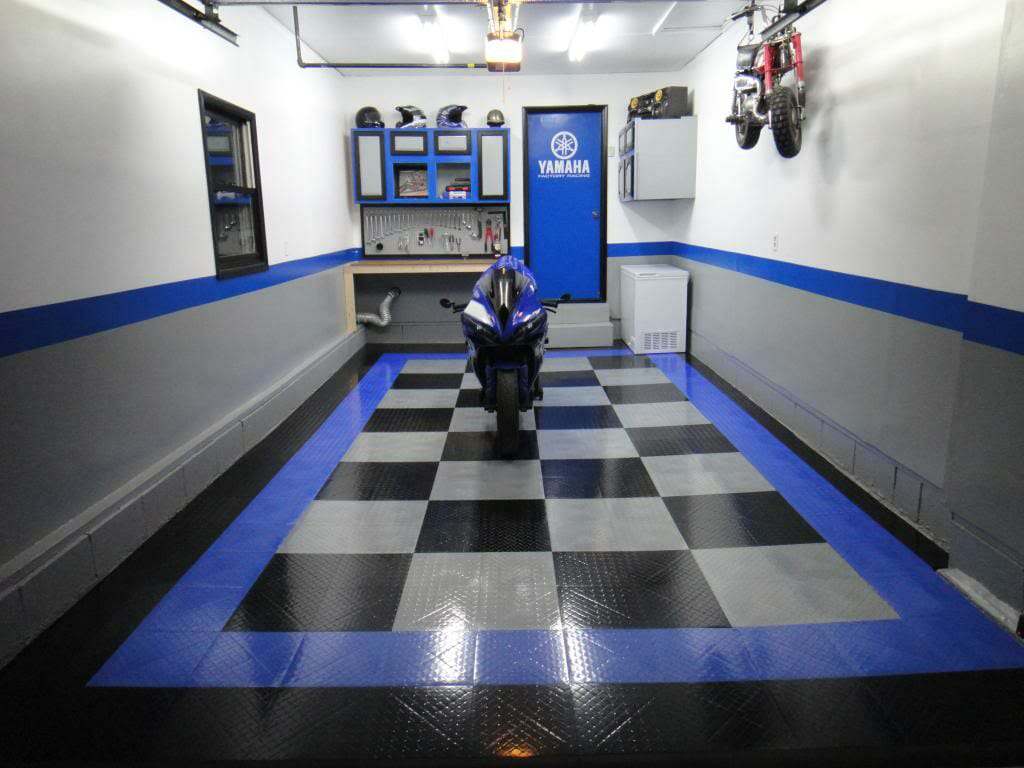 Very few skills are required for the installation of interlocking floor tiles and all that is required for tools is a tape measure and saw. Most companies that sell interlocking tiles provide easy to follow instructions. Installation for a typical two car garage takes just a few hours on average and you don’t need to prep the concrete before installation other than sweeping.
It’s actually fun snapping all the tiles together and watching your floor turn into the showcase of your garage. In our opinion, interlocking tiles are one of the best DIY garage flooring options that provide eye popping results.
Moderately easy DIY garage flooring
There are a few more DIY garage floor options that will require some limited skills and experience for installation. Among these are penetrating sealers, garage floor paint, and acrylic sealers. These options are also some of the least expensive in most cases.
The reason these fit into the moderately easy category is because installation for each of these garage floors requires thoroughly cleaning the garage floor first to remove stains and dirt. Acid etching of the concrete is also required in most cases in order to open the pores of the concrete at the surface.
Another thing to keep in mind for these types of installations is possible garage floor repairs. Since the concrete is being sealed or painted, you will want to repair any cracks or pitting to the floor beforehand. While most repairs are not difficult, some may require special tools such a trowel, putty knife, chisel, or even a grinder.
It’s fairly easy to apply sealers and paint, but it does require some attention to detail. If you can paint a wall and scrub a garage floor, then you can install this type of garage flooring. Most sealers are applied using a pump up sprayer and mop or by using a paint roller. Garage floor paint will require paint rollers and a brush to cut in the edges.
As a note, 1-part epoxy paint and the inexpensive 2-part epoxy paint kits fall into this category as well.
Moderate DIY garage floor installation
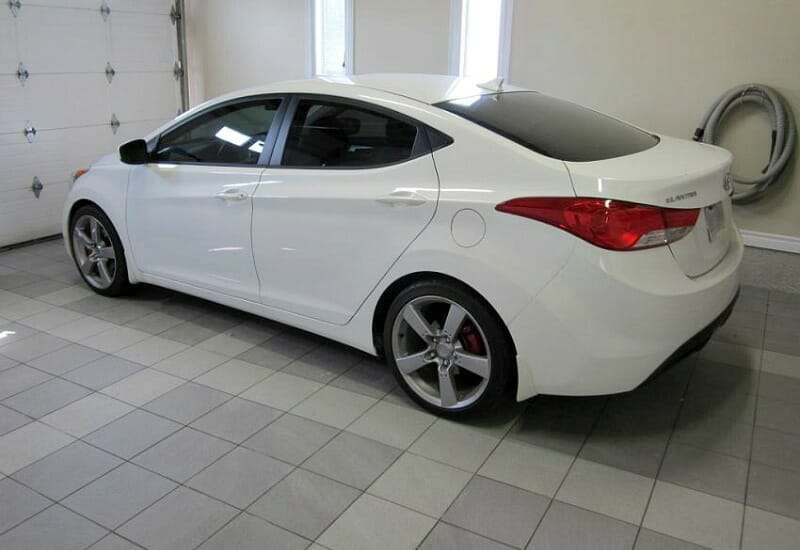
Among the garage floor installations that will require more experienced DIY skills would be vinyl composite tile (VCT) and Peel-and-Stick vinyl flooring squares. Though floor prep is not difficult, some skill is required in laying out the tile squares for a uniform and even look.
Installation of a VCT garage floor will require you to thoroughly clean the garage floor, repair any large cracks, pitting, and to fill any contraction joints. The application of the glue and placing of the tiles does require some skill, but a beginner can do it if you are confident with your DIY abilities and skill at following instructions.
Few special tools are required, but you will need a notched trowel for spreading the glue as well as mops and supplies for waxing the floor. The rental of a floor maintainer (buffer) is optional but helpful for maintaining a VCT garage floor.
Peel-and-Stick vinyl tiles do not require as much work. They do require the same floor preparation as VCT but do not require spreading glue on the floor since they have a special adhesive backing. The tiles do not require waxing and buffing, but the application of an acrylic sealer with a mop is a great option to help prevent stains.
Moderately difficult DIY garage floors
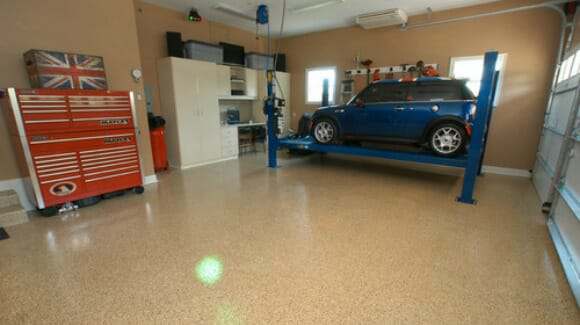
The application of high quality garage floor epoxy and multi-coat systems can be more difficult and complex compared to other garage flooring. This is due to the importance of the preparation of the concrete and the close attention to detail that is required when applying the epoxy.
 However, many a multi-coat epoxy garage floor system has been installed by the moderately skilled novice with great success. The key is to follow the instructions closely and to have a second person to lend you a hand when applying the coating. If you are fairly skilled when it comes to DIY projects, then epoxy flooring is not out of your reach. Plus, you will save hundreds of dollars in installation costs by doing it yourself.
Preparation of the concrete requires a minimum of an acid etch or preferably grinding of the concrete. You will need to rent or purchase the correct tools for grinding the concrete as well as purchase additional paint supplies and spiked shoes for the application of the epoxy coats.
A properly installed epoxy garage floor will stand up well to high traffic garage floors, clean easily, have the highest resistance to stains, and will last for many years.
Difficult / high skill requirement DIY garage flooring
Porcelain garage floor tile is one of the more complex and higher skilled DIY garage flooring installations that you can choose. We do not recommend this for a beginner and only recommend tackling this job if you have some knowledge or previous experience with setting tile.
 Preparation of the garage floor is similar to VCT floors with special consideration to making sure the floor is fairly level. Unusually high spots in the concrete need to be ground down and extreme low spots filled in before laying the tile.
Other supplies and equipment include thinset mortar, grout, mix buckets, trowel, grout float, knee pads, tape measure, chalk line, sponges, and straight edge.
If you have prior experience with setting tile then this is a floor worthy of consideration. A porcelain tiled garage floor will take heavy abuse, will not stain, looks absolutely fantastic, and will last for years.
Most of these garage floor installations can be accomplished with low to moderate DIY skills and experience. Even the more complex garage floors such as multi-coat floor coatings can be installed by the moderately experienced DIY person. All it takes is attention to detail and planning out the project.
As a tip, we suggest that you ask as many questions as you can and get all the installation information beforehand to make sure you are comfortable before making a purchase. If you do, you won’t have any unpleasant surprises and will be rewarded with a trouble free installation experience.
Leave a Reply