
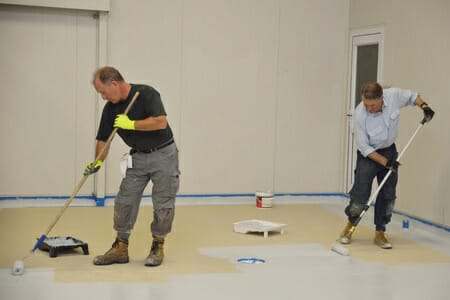
Are you planning a DIY garage floor epoxy installation? If so, consider this a “must read” if you want to avoid the most common errors that people make when applying a garage floor coating. From peeling epoxy floors to bad finishes, these 5 mistakes will cover 95% of all problems associated with either epoxy floor failure or appearance issues.
Day after day people install their own garage floor coatings and with great success. After the anticipation of creating a nicely coated garage floor however, nobody wants to go through the headaches and heartaches created when your floor doesn’t turn out like you expected.
So take a few moments to look over our list of common epoxy installation mistakes in order to insure a successful floor coating for your garage.
1. Poor floor preparation
This is the most common reason by far for epoxy floor failures and/or bad finishes. Many times when doing an epoxy garage floor coating for the first time, people underestimate how important it is to prep the concrete properly. It involves much more than making sure it is clean. Epoxy will not adhere to a smooth surface.
Not only does the surface have to be free of all oils, waxes, and other contaminants, the pores at the surface of the concrete need to be opened up properly. This usually involves acid etching at a minimum. Grinding the concrete in preparation for epoxy is even better, but it isn’t always feasible for the average homeowner. You can learn more about which method is best for you here.
The most common problem associated with poor floor prep is peeling or delamination of the epoxy.
Fisheyes is another problem. This is created by contaminants in the floor, such as grease or oil that causes the epoxy to pull away from the concrete while curing. It forms a circle in the finish resembling a fisheye.
2. Moisture in the concrete
This common mistake usually happens from not allowing the concrete to dry sufficiently after acid etching. Depending on temperature and humidity, you need to allow for a minimum of 24 hours, sometimes longer, for the concrete to dry. If not, moisture that is still trapped in the pores of the slab will rise to the surface and create bubbles in the finish.
Some water based epoxies and primers allow for application to concrete that may still be damp however. Contact the manufacturer for further information if you are unsure.
Not performing a moisture test is another mistake. Moisture under the slab can create hydrostatic pressure that will actually cause the epoxy to separate from the surface, sometimes taking pieces of concrete with it. You can avoid this problem by doing a simple moisture test first to determine if your floor is suitable or not for an epoxy coating.
3. Stretching out the epoxy
Stretching the epoxy out in order to cover the entire floor when you are running low will result in areas with a much less glossy surface and a distinct difference in color appearance. It also creates a weaker coating. This is a common mistake that is made with the single coat epoxy paint kits such as those from Rust-Oleum and Quikrete, but can also happen with premium epoxy products as well.
If you have a 400sf² garage floor for example and purchase a kit that has a coverage rate of 300-400sf², you will not have enough epoxy. A properly prepared floor is porous and will absorb some of the coating. You will run short.
Many manufacturers state in the fine print that you can expect up to a 15% material loss due to product left in the container and first coat applications. Most DIY installers are not aware of this. You can avoid this problem by making sure not to underestimate the amount of epoxy that you need.
Also, when pouring the freshly mixed batch of epoxy onto the floor or paint tray, do not scrape or try to get every last drop from the mixing container in an attempt to get the best coverage rate. The very bottom and sides of the container are never fully mixed properly. Doing so may result in spotty areas of the coating that will remain soft and not harden.
4. Faulty mixing of the epoxy
There are many problems associated with improper mixing. The most common of these issues is mixing too fast with a paddle mixer and trapping air in the epoxy. If this happens, you will get air bubbles in the surface during application. You can easily avoid this by not pumping the paddle mixer up and down or running the mixer too fast near the surface creating a vortex and sucking in air.
Other issues are not mixing the Part A resin and Part B hardener correctly or getting the ratios incorrect. Pay close attention to the mixing instructions. Some epoxies require the newly mixed batch to sit for a specific time before application. This is called induction time. If you don’t allow for this then the epoxy may not cure and harden properly.
5. Not following temperature and/or humidity restrictions
Be sure to follow the manufacturer’s recommended instructions for temperature and humidity. Epoxy applied at low temperatures or below those recommended may not cure and harden correctly.
If applying epoxy in high temperatures the pot life (time available to apply the epoxy) can be reduced by half or more. This can make the epoxy unworkable before you get it all applied as well as create bubbles from outgassing due to the warm temperatures.
High humidity levels can create a microscopic layer of moisture at the surface of the concrete that you cannot see. This will cause adhesion issues resulting in delamination or peeling of the epoxy. High humidity can cause some epoxies to blush at the surface as well.
Final thoughts
Achieving a successful floor coating isn’t that difficult. Many of these epoxy application errors can easily be avoided by thoroughly reading the manufacturer’s instructions. If ever you are in doubt, contact the manufacturer for clarification. Most problems could have been avoided this way. Also keep in mind that a bad batch of epoxy is extremely rare. The majority of problems associated with epoxy coated garage floors are due to these 5 common mistakes.
If you take the time to research your project, prepare your surface correctly, and make yourself familiar with the manufacturer’s instructions, you should be able to avoid these common mistakes and enjoy a successful garage floor coating that you can be proud of.

On Monday I applied rust oleums rock solid garage polycuramine floor coating along with the chips provided in the kit. I was planning on applying a clear coat after 24 hours but noticed roller lap marks at two points in the floor. Both occurred at the point where I opened a new pouch of coating. What is the best method to remove these lap marks? My initial thought is to completely recoat the two of the four slabs with the base color coat along with re-chipping the second coat then apply the top clear coat. I noticed on another comment that you can recoat epoxy floors after seven days cure time. Would this also apply for a polycuramine floor? I’m lost on how to proceed next. Not sure if a second coat will cover these marks. Thanks for any assistence
Hello Jim. Unfortunately there isn’t much you can do about roller lap marks now. In order to prevent them you need to keep a wet edged going at all times. The key is to have the next bag mixed up just as you are finishing applying the first. If it’s a one man job, then be quick about remixing the next. Applying a second coat of color will hide the marks. If there are any raised edges from the marks, sand them down flush with the rest of the coating first.
I think you may have gotten your comments about recoat windows backwards. RockSolid Polycuramine allows up to 7 days for a chemical adhesion recoat. Epoxy on the other hand needs to be recoated withing hours or you have to rough up the surface.
Good luck!
Yikes, there’s a lot to consider when applying epoxies and concrete coatings. I was considering doing it myself, but I wasn’t aware of the purpose of acid etching. I guess I’ll have to research the cost of doing it myself versus hiring a contractor to do it. Thanks for the info!
You got that right Stephanie i did it myself about 7 years ago and did everything right but it now needs to be done again. With all the work and touch ups check out the professional companies. Some offer lifetime warranties. I have seen garages done professionally when i go to peoples houses with my mobile detailing business. They are much smoother and thicker. Yes i did mine for about $500 total cost versus three times that or more for the professionals . But they’d be coming back to do it again if it even wore down at all. Grinding and etching concrete is not easy and messy and hazerdous fumes not to mention the solvent based epoxy itself. Joe
We accidentally painted our garage floor with floor paint without the Catalyst added. After 72hours of waiting for the gooey substance to dry we realized our mistake. Does anyone have any suggestions on how to get the substance off the floor?
Hello Clayton. Scrape all the heavy stuff you can off the floor using a very wide putty knife. Sometimes an 8″ or 10″ drywall knife works well. The remaining residue will need to be cleaned up with MEK solvent. Be sure to wear rubber gloves and a respirator and turn off any flame sources in the garage when using the MEK. Once you get it all wiped up the concrete will be ready for a new coating.
Hi Shea,
Thank you so much. How do we clean floor after using the MEK before reapplying a correctly mixed epoxy floor paint?
The MEK will remove the residue and clean the floor. It evaporates very quickly. Once you cleanup the goo with it you are ready to go.
A new employee of mine just made this mistake! 2/3s of the floor (acid stain with dye enhancer) were applied correctly, will I have to grind the good mix off completely? Will the Mek hurt the color?
Hi Nathan, which mistake was made exactly?
can expoxy be placed over a 7yr old concrete floor? Plan to acid wash it first or does it need to be removed by grinding?
Hello Frank. Yes, a 7 year old floor is fine. Epoxy can be applied to a 40 year old concrete floor if you wanted to. Acid etching the floor will work, however grinding is the best method if you can get hold of the right equipment.
My contractor recently about 7 months had my restaurant kitchen floor completely epoxied. However, they spilled/sprayed paint during that time and will be re-applying epoxy on top of the initial epoxy now to correct the defect.
What is the correct process and what do I need to be aware of during this process of re-applying epoxy on a 7 month old initial application??
Hello TK. It’s a fairly simple process and you will actually benefit with the additional coat. The surface is deglossed by roughing it up enough for the next coat to achieve a mechanical bond. It can be done with sandpaper or a sanding screen on a floor buffer. A real stiff nylon brush on a floor buffer can work as well. Once done, the floor is cleaned and usually wiped down with a solvent for final cleaning and dust collection. After that the new coating is applied as before.
When re-applying epoxy on top of previous epoxy, should acetone be used prior or after the sanding process of the initial epoxy flooring??
Use it afterwards. It works well to pick up all the remaining dust and debris that can contaminate the new coat.
I’m about to paint my two car garage, I had to buy two 1 car garage kits. I’m really worried about getting to shades from the two sets. How can I mix these cans? Or how can I guarantee I don’t get multiple shades on the floor?
Hi Rui and thanks for the good question. We are assuming you purchased 2-part epoxy. If so, pour both Part-A colored resin containers into a larger container and mix them together. After you do that, you can then pour them in equal amounts into each Part B hardener to mix together. This will insure consistent color between the two kits.
Can epoxy be applied over mastic or over oil based primer that was used to cover mastic?
No you cannot. All mastic, paint, and sealers need to be removed first before applying epoxy. It can only be applied to properly prepared bare concrete or an existing epoxy coating.
Best way to not leave roller marks on clear coat??
Hi Tom. Keep the roller saturated and don’t press too hard on the roller in order to squeeze out more of the coating. Don’t over roll or back roll over an area after it has sat for a few minutes. And finally, use a quality lint free roller like Wooster.
Hey Tom, just had the lower level done in house in epoxy metal fx and there are fisheys everywhere, Its been clear coated. Is there any fix to this? must have been oil a another containment on base coat.
If the fish eyes are in the base coat and it has already had a clear coat applied, there is not much you can do at this point. If the fish eyes are in the clear coat, you can sand the fish eyes out and then re-clear the top coat again.
I had my floor done professionally. One side didn’t have a gloss finish. The contractor elected to place a clear coat. It’s been over a week and it hasn’t dried plus has an oily wet feel. Contractor said its the weather and will take time to dry. How can this be fixed?
Hi Jeanette. It’s hard to determine what to do without knowing what kind of clear coat was applied, weather temps, humidity, and etc. It’s very possible if you are having cold weather and/or very wet weather, that it is interfering and extending the cure time of the coating.
Hi! I have enjoyed reading your advice. My problem is. I had a contractor in to give stained concrete. After 3 tries and 2 overlays it failed, due to overly “porous slab”. We paid them more $$ to do metallic epoxy because they didn’t know what else to do to give the “stain” . Now we have bubbles with water in them popping up. How do I get them to fix this the right way? They want to patch it, but I found that on the spec sheet for MetalFX they should have done a moisture test first which they did not. We could have more issues later in more spots! If they redo the work they want us to pay more $$ to place a vapor barrier. I know they messed up but they don’t want to admit and fix properly, help!
Hello Erin. We’re sorry to here about the predicament you are in. The only real solution is to remove the coating and conduct a moisture test to determine if an epoxy vapor barrier will be sufficient or not. If it’s not, then epoxy is out of the question. You will need to go with an acrylic sealer or penetrating sealer instead.
You may want to examine the contract closely to see where you stand. We aren’t in the position to give legal advice, but if they don’t want to rectify the issue you may need to bring it up with the Better Business Bureau and seek council with them. They can provide you with options you can take to gain some leverage over the company to make it right.
I just applied Rustoleum Epoxy Shield garage floor kit and decided I should add a top coat, it’s been 24 hrs when I am writing this post and I won’t be able to do the top coat until tommorrow, will I still be able to apply the top coat and have it Adhere well?? The base coat has color flakes
Hello Alex. The general rule for most epoxy coatings is don’t wait past 24 hours, temperature and humidity dependent. However, we recommend giving Rust-Oleum customer service a call and talk to them since their TDS does not provide recoat times. If we remember correctly, you can recoat EpoxyShield up to 72 hours after application.
I was wondering if it’s OK to split the 2 part epoxy in half i.e half of hardener and half of paint and then do a thin coat first. Then mix the other 2 halves and do a second coat
Hello Trev. You didn’t state what your objective is for doing this. All you are doing is creating more work and potential problems. You are effectively cutting the spread rate in half by doing that. If you try to stretch the epoxy out you will not get good penetration into the concrete. The second coat will be just as thin and the color will not be uniform.
Shea,
I have a seven year old raw-cement floored screened porch that is accumulating stains, etc. I want a finish that will be attractive and durable, but I have no idea what to select to protect from further staining but also look nice and still be safe for foot traffic (no slipping). I have been reading this site and seeing a lot of what appears to be good information. Yet I still don’t know what would be best for my purpose. I really dislike painted cement/ concrete as it peels/ flakes and looks awful, but I know nothing about 1-part/ 2-part epoxy. Do I need to go to this level to ensure a long-term, durable finish that won’t need to be re-done in a few years? Or are there other options?
Hi Anita. If you dislike painted cement, then you may be a candidate for stained concrete. Stained concrete does not have a solid and consistent look like paint. It adds character to the concrete by highlighting the different attributes of the surface. Once stained, the surface is then coated with a topical sealer to make the color pop. Since it sounds like it would be foot traffic only, a good acrylic sealer will get the job done and is not hard to apply. It will last quite a few years and is not hard to reapply if necessary. It’s not uncommon to wax the sealer as well to protect it.
Hi, my concrete floor did not get properly cured…it is generating too much dust. I can easily scratch the surface with a loosely held screwdriver. Can I apply epoxy on this surface? This is a warehouse and will have manual forklifts of about 1 ton max.
It’s definitely possible, but some crucial questions need to be asked and answered first. We recommend that you give Legacy Industrial a call and ask for Scotty. You can find his info here. Legacy Industrial provides product and advice to installers who do coatings for warehouses and other industrial applications that may encounter such issues. He can tell you what you need to know and suggest the appropriate product before you proceed any further.
Hi, I am a structural engineer in Florida. Sdsingh is describing “laitance”, which appears as a dusty material on the top of newly placed concrete slab-on-ground. The following article has great technical information on this subject. You may want to contact a structural engineer or similar concrete expert before making a decision on what to do next. I would also question why you are thinking of epoxy on a floor that receives forklift traffic, I would consider a penetrating stain or similar that will not tend to wear off. But get your slab issue properly diagnosed first.
https://www.cement.org/docs/default-source/fc_concrete_technology/durability/is177-concrete-slab-surface-defects-causes-prevention-repair.pdf?sfvrsn=4
I purchased the 2.5 car garage kit. Should i mix the two base cans and the two activators in one big can and mix? Or should i mix one of each and wait till almost done then start the next batch?
Mix one batch at a time Gary. If you mix that much together at once you will effectively shorten the pot life more than half due to the exothermic reaction. What you can do, however, is mix the two Part-A colored resins together to insure color uniformity. Then pour out half of the Part-A mixture into your mixing bucket followed by one can of Part-B hardener. That will leave you with the remaining half of the Part-A colored mixture and remaining can of Part-B hardener to mix for the second batch. Just make sure to keep a wet line between batches and you will not be able to tell where you stopped the first batch and started the second.
These are great comments. I made a big mistake doing my garage floor. Instead of using a roller to apply the epoxy i thought if i troweled it on really thick it would be a better finish, NOPE. The top has cured but below is still tacky. I can push my finger on it and leave a finger print. Guessing ill have to scrape it up and dtart again
If you give it time Lee it may still cure throughout.
i dont know what to do, the first coat of epoxy has roller fibers in it, they are everywhere. i told them to stop until i find out what can be done. it is a METALLIC EPOXY . please help
Hello Mike, sorry to hear of your dilemma. High quality lint free rollers should be used when applying epoxy. Low quality rollers have a tendency to shed when applying it. Even with the premium rollers it’s wise to run the roller over a large piece of duct tape to remove any lint that still may be present. Peel off a couple feet or so and step on one end while pulling tight on the other. Run the roller over the sticky side of the tape. There’s not much you can do about the lint in the epoxy other than re-coating it to cover it up.
A company placed a stone product on my patio, and the epoxy is now showing white stain over my brown stone. We reapplied new epoxy as directed by the company with no success. Any suggestions as to how to fix this?
Hello Julie. Are you sure it was epoxy that was applied over the stone? Epoxy is not designed for outdoor use and will yellow in the sun. We are guessing it’s an acrylic sealer that was applied as that is the standard for outdoor clear sealers. It sounds like you have blushing of the sealer which can be caused by a few things. It can be moisture getting trapped under the sealer or from the sealer being applied too thickly. Acrylics need to be applied in thin, multiple coats. If applied too thick, it will bubble and blush. This article here discusses the many causes of blushing.
The fix generally requires rolling Xylene onto the surface with a nap roller then wait a minute or two. The Xylene breaks down the sealer allowing trapped air and moisture to escape. You then dampen the roller with Xylene again and then roll the surface one more time to smooth it out. Once the Xylene evaporates, the sealer will dry. We recommend contacting your contractor first to determine what was applied and see if they will be responsible for the fix.
Hi
Just rolled my garage floor with 2 part resin damp proof membrane as a sealer coat and it has fish eyes every where
Will the next two cots of finish cover these ore what do I have to do before top coating it
Thanks bob
Hello Bob. Fish eyes are usually a sign of contaminant on the floor. The resin reacts to the contaminant by trying to separate from it, thus causing the fish eye appearance. A rapid change in temperature just before applying the coating can cause this as well. When this happens, the general recommendation is to let it cure and then prep the surface with 100 grit sandpaper and then wipe down with denatured alcohol. You can then apply the the remaining coats over it. If the color coat is a high solids, it will usually do a decent job of filling the fish eyes if applied at a very conservative coverage rate.
Thought I was being careful and doing my due diligence, but made a bad assumption when mixing the Clear Coat Resin and Hardener that the ratios were the same as the base coats.
When I got to my last mixing I realized that there were only two cans of hardener left, but 8 cans of resin. About 1000 Square feet of garage floor were covered with 1:1 ratio instead of 2:1.
Going away for four days , which was supposed to be curing time, so what can I expect and how do I remove 1000 square feet of clear coat (when the color base and speckle was looking so good) when I return?
Hello Dave. We’re sorry to hear about your unfortunate mistake. When you get back you will most likely encounter a rubbery clear coat. You will need to scrape it off and remove the remaining residue with MEK. Unfortunately this is going to play havoc with your color flakes as well. You will need to sand the color coat with 150 grit sandpaper or use a 100 grit sanding screen on a floor buffer to prep the floor for application of the new clear. At that point, you have the option of applying a new color coat with color flakes or applying the clear as is.
Thanks for the feedback Shea.
Looks like I dodged a bullet for now in that I mixed too much hardener with the resin instead of the other way, and I guess since I live in a desert it appears to have cured ok.
Only time will tell, but I’ve already changed the oil and replaced a power steering pump in my truck, spilling Oil and Power steering fluid on the floor with each task. Both cleaned up with just a rag.
Bookmarking this website for future reference for if the clearcoat fails, or when it’s time to reapply. At least I now have some leftover unopened cans of Clear Coat where I just need some additional hardener.
Good to hear that it’s working out for you Dave.
I thought that l mixed up the Rustolum Epoxy Shield properly, but I think that wasn’t the case because I have tacky spots on my floor that aren’t dry after 3 days. Do I use MEK and get rid of the tackiness? And then recoat again?
Hello Ken. The tacky areas are uncured epoxy that needs to be removed. You will need to scrape up the uncured epoxy, wipe the surface down with MEK, and then reapply. If you are recoating the entire floor, you will need to rough up the surface of the cured epoxy with 150 grit sandpaper as well.
WE applied the rustoleum garage kit. It was for a two and 1/2 stall garage. WE mixed the cleaning crystals that come with it into the paint. We realized our mistake on the next batch we mixed. Will the first part of the floor be ok?
That’s hard to say Jan. If the mix didn’t activate the citrus acid, it just may stay suspended within the epoxy. Then again, it could cause the coating to deteriorate from within. We recommend contacting Rust-Oleum Customer Service for guidance.
I am getting ready to apply Rust-Oleum epoxy coating to my garage floor. In preparation I have cleaned the floor as best I can but there are still paint stains from when I painted the ceiling. I have not been able to remove all of these stains using a pressure washer and scraper. Will the epoxy adhere to these stains?
Have you etched the floor yet according to Rust-Oleum’s instructions? How large are these stains? Based on your removal methods and if you have etched the floor, we would recommend giving them a quick sanding with 100 grit sandpaper and then apply the epoxy. If you were installing a commercial quality coating then you would need to remove them for sure. However, Rust-Oleum states that if all the above have been done, you are OK if you sand the paint before application.
HI just applied epoxy and noticing air bubbles. What’s the best way to fix?
Hello Paul. The only way to “fix” the issue is to apply another coat. Bubbles can be caused for a few different reasons. Not letting the concrete dry long enough if it was washed or etched, mixing the epoxy too fast allowing air to enter the mix, or rolling too fast for example. As long as the bubbles did not pop and leave large craters, applying a new coat will solve the problem.
Hi we just applied RockSolid on our garage floor, and same thing (bubbles) happened in small area after several hours of drying. We had the floor etched last week and have been drying ever since, so we don’t think it’s drying issue. There are also fisheyes and rough textured areas. We are thinking about re-coating tomorrow. Should we sand and apply denatured alcohol prior to re-coat? If so, how long do we have to wait till denatured alcohol to dry? Also could we re-coat over decorative chips we put on?
Generally fisheyes are a sign of some sort of contaminant on the floor Mark. It could be oil from a stain, silicone tire dressing in the concrete, and etc. The coating tries to separate from the contaminant thus causing the fisheyes. RockSolid allows up to 7 days for recoating before having to rough up the surface, so you should be fine with applying a second coat over the decorative chips tomorrow.