
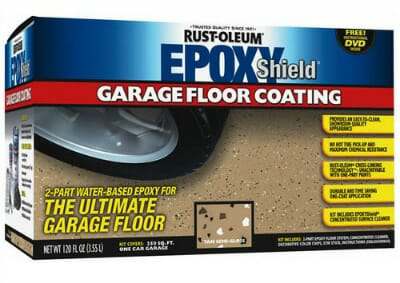
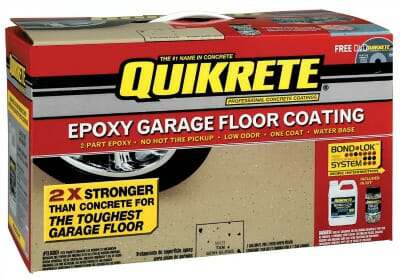
 If you ask a person who has used a Rust-Oleum Epoxyshield or Quikrete garage floor epoxy paint kit to give you a review, you will get a different answer almost every time. Many people do not have kind words for these kits. They complain of the epoxy paint peeling up fairly quickly or of the coating itself wearing out in places. There are times however when Rust-Oleum or Quikrete don’t always deserve the bad reviews that they receive.
These kits of course are the ones you can purchase from your local home improvement center or online for $65 to $75. This one here is a good example from Amazon. They are water based, you generally have a choice of tan or gray colors, and they even have decorative paint chips to toss onto the surface. All of these kits will include some form of a citrus acid etch and cleaning solution for the concrete.
So why are so many people unhappy and bringing the reputation of these epoxy paints into question? The answer lies partly in people’s expectations, their lack of knowledge on how epoxy paint works, and the marketing of the paint kits themselves.
So why the problems with Rust-Oleum and Quikrete?
When the decision has been made to upgrade the protection and looks of the garage floor, some don’t want to break the bank or are on a budget which is understandable. When they visit their local home improvement store to see what paint is available, they may be advised on the added benefits of epoxy instead.
They are then pointed to the epoxy paint kits instead of the standard latex acrylic garage floor paint. Once they see the nice shiny picture on the box promising a beautiful epoxied floor that goes on with ease, they spend a little more money expecting the long lasting and durable coating that is advertised on the box.
The other scenario is the online shopper looking for a deal on epoxy floor coating products. They find great deals online for these epoxy garage floor paint kits with all the promises of a beautiful epoxy floor for less than half the price of other epoxy systems. They then make the purchase not really knowing what they are getting.
So, what are they getting? Both the Rust-Oleum Epoxyshield and Quikrete epoxy paint is an actual 2-part water based epoxy coating — one part is a tinted epoxide resin and the second part is a polyamine hardener. Both have approximately a 50% solids content by volume with the remaining being water. The water acts as a carrier agent for the epoxy and allows it to be applied very easily, just like paint and that is why they are marketed as such.
What happens, however, is this water base evaporates as the epoxy cures and what you are left with is just over 50% of what originally went on the concrete. Actual dry film thickness is approximately 3 mils for the Rust-Oleum Epoxyshield product and 2.4 mils for Quikrete.
————- Epoxy Review Update ————-
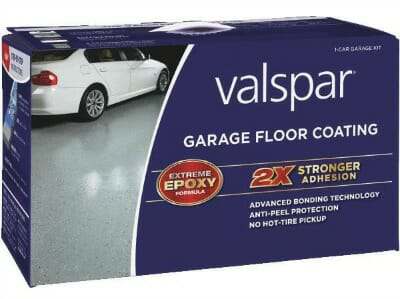 Due to the amount of questions we have received, we want to update this article to include the Valspar garage flooring kit as well. It falls into the same category as EpoxyShield and Quikrete. The Valspar product is a water based 2-part epoxy paint kit that cures to a dry film thickness of 1.5 mils.
Lowes generally carries this line, but you can find it here from Amazon and usually at a much better price.
———————————————————————–
A better quality kit that is more expensive but doesn’t get as many bad reviews would be the Rust-Oleum Professional Series epoxy. The Professional series is solvent based instead of water based.

Best yet would be a higher quality epoxy that has up to 100% solids with no VOC’s to worry about. It’s more difficult to work with and you have a shorter period in which to do it, but when it cures, very little evaporates and what you have left is 100% of the product on your floor. As an example, epoxy paint is on average 2.5 mils thick when cured and 100% solids epoxy is 9 to 12 mils thick.
Another thing to keep in mind is that the Rust-Oleum and Quikrete epoxy paint is a one coat product with a semi-gloss finish, where as commercial epoxy systems are a minimum of three coats with at least one of those being a glossy clear coat. This is what gives epoxy floors their shine and depth.
So as you can see, there is a big difference between a one coat product such as the Rust-Oleum or Quikrete epoxy and the much thicker and more expensive multi-coat system of commercial epoxy floors. You cannot expect to get the same protection, durability, and shine from these simple one coat kits that you do from a higher quality commercial product.
The big issue though is that many home owners are not aware of these differences in epoxy floors and expect the best from the lesser expensive kits.
This video is a good and honest evaluation of the typical DIY epoxy paint kits you can purchase from home improvement centers
Another problem is poor preparation of the floor when these kits are installed. This is probably the biggest mistake that is made. The pores of the concrete surface need to be exposed in order for epoxy to mechanically bond to it. This is called profiling the concrete. Rust-Oleum and Quikrete both give you a citrus acid cleaning solution to use on the concrete to help expose these pores, but the problem is that it’s not always effective. Many times you need something stronger such as muriatic acid to etch the floor.
A few drops of water on various spots of the floor can test this. If the concrete turns dark and immediately absorbs the water, then the concrete is profiled correctly. If it sits there without absorbing right away, the pores are not exposed and the epoxy will not bond well.
Poor profiling of the concrete is what causes the delamination or peeling of the epoxy paint within a few weeks or months. The pores of the concrete must be exposed and be free of all oils and dust. It takes more work to prep the floor than it does to apply the epoxy paint. Poor floor preparation is the cause of most bad coatings.
Can we recommend Rust-Oleum or Quikrete epoxy paint?
So, are the Rust-Oleum Epoxyshield and Quikrete garage floor epoxy paint kits truly bad? No, not necessarily. If you properly prepare your floor then you should be satisfied with the results as long as you are aware that what you are applying is not the same as a commercial epoxy coating. There are many people who have done just that and give great reviews about their floors.
For additional protection and a longer lasting floor coating, you can purchase an optional second coat of clear epoxy which will enhance the look and prolong the protection of the floor by doubling the thickness. The average life expectancy of these floors is 3 – 5 years before they start to show their age and even longer if you apply a second coat of clear.
Dollar for dollar, Rust-Oleum and Quickrete epoxy paint cannot compete with a commercial quality epoxy coating when you cost average your floor over years of service, but if you are on a budget, then these just might be the product you are looking for. In fact, there are actually more satisfied customers who have purchased these products and would recommend them again, than there are bad reviews. Just be sure that you know what to expect.
Hi,
I am wondering if I could use the Rust-Oleum EpoxyShield on a concrete floor that has vinyl tiles. The tiles are firmly adhered to the concrete floor. If we prep the floor with 120 grit sandpaper and wash it clean, does the epoxy stand a chance to adhere to this type of floor?
Hi Rudy. Yes, the epoxy will adhere fairly well. However, you need to keep in mind that if the tiles have any type of pattern or relief cut into them, then it’s going to telegraph right through the coating. In other words, it’s not going to provide a smooth, seamless look. EpoxyShield is a low solids coating. Though it self-levels upon initial application, the wet film thickness of the coating shrinks as the water evaporates out during the curing process. It’s similar to what happens when you try to hide a blemish or nail hole when painting a wall. Once the paint dries, you can still see the defect.
Thank you.
Can I put two coats on the floor and when
Hi Clint. Yes, multiple coats are fine. You need to wait approximately 10-12 hours before applying a second coat.
I used the Rustoleum epoxy flooring in the garage a few days ago – Dark Grey w Gloss. I added the decorative chips. I applied it too thin and wondering if I can do a second coat w a satin finish (and more decorative chips)?
Hi Diana. If you want to create an even color tone and gloss, you can apply a second coat of the same product and color flakes. Applying a clear coat with color flakes will not fix the issue. Also, Rust-Oleum allows up to 4 days for recoats with EpoxyShield water-based epoxy. If you go past the recoat window, it will require roughing up the surface first with 120 grit sandpaper before it can be applied.
I have a 20×20 shop out back that was here when I moved in. The problem is when they poured the concrete they didn’t put down a moisture barrier and the floor sweats doing temperature changes. Will this product keep my concrete floor from sweating. Thanks
Hello Chris. A moisture barrier blocks moisture from coming up from underneath the slab. Sweating is caused from condensation. Relatively warm moist air comes in contact with the cooler slab and condenses making it wet. I suggest reading our article here on sweating slabs. If your slab sweats, a coating will not prevent it since it will always be the same temp as the slab.
I now have a huge line between the different sections.
What can i do to fix this problem?
Hi Allen. You didn’t provide enough information about how you applied a coating, how many kits you used, or what coating exactly that you used. This all helps in determining a possible problem and / or solution. What do you mean by a line between the sections? Did you apply a coating and then overlap a another coat over it sometime later? Where you keeping a wet edge during the entire process? Is there a contraction joint between coats?
I am a professional painter and have used this product many times. Now that they put it in foil packs its crap.When l buy it l buy a 2and a half and a one car kit to make sure l have enough. The last 2 floors l have done have peeled and they don’t stand behind it. Also the clear coat that goes over it has hardened 2 on me in 10 minutes.The can gets so hot you can not touch it. I WILL NOT PURCHASE ANOTHER KIT OF THIS CRAP AGAIN.
I purchased this product and applied per the manufacturer directions. My 600sqft garage cured great except a 4 x 10 ft section by my entry door. It is sticky and tacky. How or what can I do to just fix this 40sqft section?
Hi Jonathan. What product did you use exactly and how long has it been down?
I used Rustoleum epoxy floor kit. It’s been down for 3 weeks now. I’m having a professional company come out in 2 weeks to fix my problem,unless you have a suggestion.
Hi Jonathan. Unfortunately, we can’t possibly help with anything unless you state what it is you need help with.
Can I do anything about the parts of the floor that didn’t cure? I’m trying to fix the tacky areas.
OK, that is usually a result of a kit not getting mixed correctly or thoroughly. Sometimes with Rust-Oleum you can apply an additional coat and it will activate the tacky areas enough to cure them. We suggest calling Rust-Oleum Customer Service and explain the situation.
I bought this product in June 2012 (2 packages) and stored the packages because life got in the way. I have not opened the boxes or cans but they sat in my basement storage room in temperatures around 5-8 degrees celsius (winter) and 8-20 degrees celsius (summer).
Is the product still good to use since sitting for 7 years?
Hello VF. Unfortunately it is way past the point being able to use it. 1 year is the usual shelf life, but you can usually get 1.5 years or so if it was stored well.
I’ve applied 2 part solvent based epoxy (Awlgrip, Interlux) using roll and tip for years. So I have some idea what I’m doing.
Brand new concrete inside a barn (was poured 8 months ago). Cleaned and scrubbed with the citrus. Let it dry for a week.
Temperature 80 degrees, humidity 60%, slab temperature not measured but probably around 70. Mixed Part A and B in separate bucket with electric paint stirrer for 15 minutes.
Applied with 3/8 nap roller. It went down beautifully and I was very pleased.
The next day… In the center of the floor are black splotches that are very shiny.
Very disappointed for the price, not understanding how it could separate like that after application.
Hoping I can paint over it with something else as the thought of sanding it off a 24′ x 14′ floor isn’t appealing!
Hello Alan. It sounds like a contamination issue of some sort. Separation is the typical reaction when that occurs. My concern is with the product that you are using. Most of the data sheets I could find for the brand support application to fiberglass, wood, steel, and fiberglass. Such smooth surfaces generally require rolling and tipping due to the smooth surface and the formula of the coating. It’s rare to require tipping for concrete applications. Do the data sheets for the product you are using support application to concrete substrates? If not, that could be the part of the problem. Regardless, if the epoxy has adhered well, you can apply the appropriate concrete coating over it. We would recommend using a floor maintainer with a 100 grit sandscreen to make quick work of it. You can hit the edges and corners using a pole sander. Wipe down with denatured alcohol on a microfiber pad before application.
I did my garage about four years ago. While it’s still holding up fairly well I wondering if in a year or two how can i apply another coating over the existing coat or will I need to strip off the old coat?
Hi Ronald. We have an article here that explains that exact procedure. As long as the old coating is still adhering well, you are good to go.
I use your product to do countertops. Are there any others out here that uses it for the same thing
Hello Eric. We don’t sell product. Are you referring to one of the examples of the garage floor coating kits in the article? Epoxy for actual countertops are 100% solids and of much higher quality that what is listed in this article. This is an example here.
I have used the Rustoleum Epoxy shield 2.5 Garage kit last week and I think it turned out pretty well, but I did make a mistake and ran the epoxy past the garage door and put paint chips that you can see from outside the garage which my wife does not like the paint chips, I was going to put on the clear coat and have looked at tinting the clear coat to hide the chips and darken the floor but I cannot find the tint additive available anywhere, would it be advisable if I went over the floor with a second epoxy shield coat to cover up the chips? Or look at another more expensive product from a paint suppler?
Hi Justin. The area that went outside the garage door is going to amber (yellow tint) due to exposure to U.V. light. You could coat over that area with a clear coat from Rust-Oleum, but it will amber as well (epoxy and polycuramine are not U.V. stable). You could apply a U.V. stable polyurethane or polyurea, but the epoxy underneath the clear will still amber even though the clear would not. The other option for the strip outside would be to rough it up with 120 grit sandpaper and then paint it with a latex acrylic concrete paint that is color matched. Latex will not amber. Since you are just driving over the strip and not parking on it, it will not peel from hot tires or be exposed to chemicals that will stain it. Of course the last option would be to grind it off to the bare concrete and then seal it with a penetrating sealer.
Would I be able to do a second coat with a U.V Stable Polyurethane over the whole garage floor? If so do you have any recomendations?
Yes, you can. Just keep in mind that it will not prevent the outside epoxy strip from ambering. Also, you will need to degloss and rough up the surface of the epoxy with 120 grit sandpaper in order to create a mechanical bond since you will be too far past the recoat window for a chemical bond. Most polyurethane for concrete coatings are high performance in nature and ordered from vendors online. You will not find it from a home improvement center. Here is an example of a very good product. If you have Sherwin Williams nearby, they sell a product called ArmorSeal Rexthane that is almost as good. Lastly, this is a good product from Amazon.
Help! My Rustoleum Epoxy floor covering is still tacky in about 25% of the area although we’re now coming up on 60 hours since applying. The puzzling thing is, the other 75% is totally fine and hard as a rock. Temperature has been with within limits here in Northern Virginia. A bit muggy, yes, but why then has the other 75% dried just fine? The area in question was covered using the same bag of mix as was used in other sections that are completely dry, and I kept moving so the problem isn’t ‘old’ mix. In fact, other areas I covered later with the same mix have also dried. I’ve had a strong floor fan blowing over it the whole time. What can I do?
Hello Nelson. Did you mix the coating in a bucket and then scrape the sides to get more of the coating onto the floor? If so, the coating that has stuck to the sides generally is not mixed well and as a result will not cure properly. Fans don’t help since curing is a chemical process. Coatings do not dry like paint does. Applying another coat will sometimes provide enough catalyst to activate the cure process. Before you do this, we recommend contacting Rust-Oleum customer service. They have a good reputation for helping customers and can determine the best course of action based on a few questions they will ask you.
Thank you for your response to my situation. In answer to your question, I was using the Rustoleum product in the double bag, where we pour out a ribbon directly from the bag, so there was no bucket. After looking on line at several youtube instructional videos I accepted the grim news that there is “nothing you can do” about a tacky surface that refuses to dry other than to REMOVE it. Arggh! I actually tried to do that — what a MESS! So here I sit, telling you and others on this blog that I’ve gone and purchased those flexible interlocking tiles that Lowe’s & Home Depot sell, and will be covering the entire floor today.
Yes, removing it is never fun. Just as an FYI, be careful about what information you pick up about coatings when searching the internet. There is a lot of wrong info out there and is one of the main reasons we started this website. Did you ask Rust-Oleum about coating over it to activate it? Good luck with the tiles and we hope things work out well in the end 🙂
We painted our 28 x 40 garage floor with the rustoleum rocksolid product which needed 2.5 kits. It is very noticeable where each kit left off. You should have a cutline or plan as many have said colors do not match. Also after product has dried it looks like it separated from the rustoleum flakes. Disappointed for all the work and cost.
Hi Norm. We have an article here that discusses how to ensure color match when using more than one kit. The coating will separate a little from the flakes. The reason is that it’s not 100% solids. There is some evaporation of solvents as the coating cures. This causes the thickness of the coating to shrink. That is why they state a wet film thickness and dry film thickness. You can apply a clear coat to protect the flakes and the color coat.
Thanks for the reply. Is there a paint, caulk, etc product that will go over RockSolid once dry. It really accentuates the cracks as the color pulls away.
That is why proper crack repair ahead of time is so important, Norm. You can apply a caulk, but all that will do is highlight those areas even more. You can’t apply a paint since all it will do is shrink up (a lot) as it dries and will not fill the crack. Unfortunately, if you want to hide the cracks it will require applying the proper crack repair filler, sanding, and then applying a new coating.
I have an older basement, the concrete floor had previously been painted but it has been chipping. I have scraped the loose flakes, vacuumed and washed the floor in its entirety, and today painted with Rustoleum Garage & Interior Floor Primer. I’m wondering if I’m now in a position to apply the epoxy, and have it adhere properly?
Hi MDC. According to the data sheets, you need to wait between 24-48 hours before applying a recoat of epoxy.
Hello, I am planning to cover my 2-car garage with the Rustoleum Professional epoxy kit. My garage floor is quite old and dirty, and (I think) has some kind of existing coating on it from the previous homeowners. I’m not sure what it is, but water beads up on the surface rather than soaks in. How can I determine what sort of coating is on it? Can I power wash it off, or use some kind of chemical solution? I know the foolproof answer is “grinding” but that sounds like a pain and expensive and I’d rather avoid that unless absolutely necessary. Thanks so much for the great information here!
Hi Shane. To be honest, we don’t know of one good example from someone who was successful with doing so and didn’t regret it. Trying to figure out what type of coating is on your concrete and then going through the messy and labor intensive process of cleaning the floor and chemically stripping the coating, is much more of a headache than just grinding it off down to the bare concrete. Grinding also preps the concrete for the coating at the same time. Chemical strippers work slow, they are sometimes expensive, and some are noxious depending on what you are trying to remove from the concrete. It requires a lot of scraping and washing, plus a place to dispose of the liquid remnants if they can’t be washed down the gutter. If you were to chemically strip it off, it still requires acid etching afterwards as well. This is why it’s always advantageous to grind when removing a coating. We would recommend renting a 10″ Edco concrete grinder from Home Depot or your local equipment rental. They are easy to run, they come equipped with a vacuum attachment, and the work well at removing old coatings.
The clear coat epoxy kit got goopy and dried into a hard lump within 45 minutes of opening foil pouch..it got extrememly hot and then ruined parts of floor i had already done with the epoxy paint kit..i called today and was asked to send photos so that rustoleum could send me new product. However this doesnt include the cost to repair the paint melted away, the rollers needed and i will be another month getting my rental ready … i am very upset right now..wonder how long b4 i receive a replacement product for the 300 dollars i spent..would have been much cheaper to use a piece of linoleum…
Hi Sonya. What did you pour the clear into after you mixed it?
It went into paint tray to roll out..this is what the instructions said to do.
OK, that eliminates a possible problem then. We can understand the frustration. Some people leave it in the pouch or pour it into a small bucket which will accelerate the curing process. The chemical reaction of the curing process accelerates and builds much heat if it is contained and not poured out into a paint tray. It does need to be applied within 1 hour after mixing or it will do what exactly what happened to you, but you seem to have been within the one hour time period. The only other thing we can think of is if the tray was sitting in direct sun. You would get a similar reaction.
I am refinishing a 700 Sq Ft basement floor that had/has several coats of old paint on it with about 75% of it peeled off. I assume I have to strip off all of the old paint first then prep the bare concrete. Once I’ve done this, which is your best recommendation for a solvent based epoxy floor coating?
Hi Tony. Are you sure you want a solvent-based coating? We ask because solvent-based coatings will produce smells and VOC’s that will fill the house and take time to dissipate.
Hi shea, yes, I am aware of the VOCs and odors from solvent based products. I have a well ventilated basement where I can draw the fumes out. I’m not living in the home yet. If theres a water based product that’s as adhesive and durable as the solvent based, I’d be interested.
I see. Assuming that you have moisture tested the concrete and there are no issues with it; how well a coating penetrates and adheres is 90% concrete prep related – providing you are using a quality product to begin with. Most of the special epoxy primers are a lower solids water-base that are designed to penetrate and adhere very well in order to provide a solid base for subsequent coats to chemically adhere to during the recoat window. However, if you just want a single coat application of a colored base, the single-part polyurea coating are solvent-based and adhere very well. We discuss them here and include product we recommend. If you are not as concerned about gloss and thickness, for less money the Rust-Oleum Professional epoxy coating is solvent-based and known for good adherence.
I applied the Rust-Oleum Epoxyshield kit to my two car garage floor in 2005. The home was new, the floor was well cured, prepped and cleaned before application. It has generally held up well, however the floor has gotten beat up quite a bit over the years from various projects. There are only a few places where the coating has chipped away, mostly near the threshold into the garage. Given its current condition, what would be the best product to use over the existing Rust-Oleum Epoxyshield coating? What would be the recommended preparation steps before applying a new floor coating system?
Hi William. We would recommend staying within the Rust-Oleum line if you don’t plan on removing the current coating. There are higher quality products available, but they only work as well as what they are adhered to. We have an article here that addresses how to apply new epoxy to an old coating.
I applied Rust-Oleum EpoxyShield and one section I was really pleased with and the other not so much. One problem is I didn’t roll it on thick enough in areas that were more porous. The other problem was a patch in the floor where it is discolored around the edges of the patch. My question is, even though I have put chips down could I repaint that section? The garage is cut into sections so I’m not worried about the color matching perfect.
Thanks
Yes, you can do that, Mike. EpoxyShield has a three to four day recoat window where no additional prep is required.
Hello. I am planning to apply rust-oleum epoxy shield on the cement in me garage. I have washed it with water first and dried overnight until no dust was detected with the finger test. Then applied primer for masonry and bricks in one layer. Some guys from youtube recommended even two layers. Now I was wondering if the epoxy will have good adhesive to the primer. You mentioned it has to have as many pores as possible to bond with the cement. So, did I make mistake? Why some people do the primer? P.S. Is it Ok to apply the polyurethane layer on the top of epoxy to make it more durable? Thank you. Andrey
Hi Andrey. Ugh… No, this is not what you should be doing. That is why it’s so important to read the instructions first before you do anything. Epoxy needs to be applied to bare concrete, not primer paint. Epoxy is a true coating and is not compatible with paint and will not adhere properly. In addition, epoxy achieves a much stronger bond to bare concrete than paint does and is one of the benefits of epoxy coatings. Unfortunately, you will need to remove the paint first if you want the coating to adhere well as it is designed to do.
Good Morning Shea, 2 days ago, I painted my garage floor using Rust-Oleum’s Rock Solid Epoxy. The shine is incredible but I have thousands of small bumps that are very noticeable. This is the 4th coat of Rust-Oleum over the past 20 years (but first with the Rock Solid). I sanded extensively, de-greased, power sprayed (twice), swept and used a leaf blower to push dirt out of the garage. I don’t believe these are air bubbles. It was windy the day I painted but the bumps are so prevalent and everywhere, I’d be hard pressed to think they were from dust/dirt. I plan to wait a week then sand and try one more coat. Any suggestions? I could send pictures if it’d help. Not sure if this got through or not. Turned off my VPN and will resubmit.
Hi Les. What was the last process you used on the floor? Did you do a solvent wipe with denatured alcohol or do a final clean with something else? Also, how did you mix the RockSolid? Lastly, what type of roller did you use?
Hi Shea, the prior coats were all rustoleum. First three were standard epoxy. The last one was rock solid (and it has some bubble spots). I sanded the floor for 6 hours (using a rental from Home Depot) and got most of the high spots down. The entire floor was roughed up pretty well. Then de-greased using Purple Power (available at Walmart) then rustoleum’s etching mix. Rinsed 3 times with a power sprayer, mopped the floor and let dry for 24 hours. Used a floor brush to sweep the floor then used a leaf blower to blow everything out. I purchased a 2.5 garage and 1 garage kit and combined them. Broke the pouches and mixed the epoxy in the bags (per instructions) then poured them into a 5 gallon bucket and slowly stirred with a paint stick (no power mixer). Purchased a 1/4 inch epoxy roller at Home Depot. I traded back and forth between the roller provided in the kit and the one I purchased off the shelf. No difference.
I never thought about denatured alcohol as a final cleaner.
I meant to mention I poured the mix from the 5 gallon bucket into smaller pots to pour on the floor and rolled as slowly as I could. I also had plenty left over. Looking at what was left in the buckets (after it dried), it’s perfectly smooth.
Thanks, Les. You completely over did the prep and used far more cleaning chemicals and water than was necessary. There are one or more possible culprits for the bubbles. From my understanding, you were applying a new coating (RockSolid) over an older Rust-Oleum coating. Providing that the older coating was worn, but still adhered to the concrete, the only prep necessary is to rough up the surface via sanding (which you did), sweep or vacuum, and then do a solvent wipe which will remove any remaining dust and contaminants. There is no need to degrease after sanding. Purple Power is a very strong degreaser that should only be used before sanding if you had areas of the coating that for some reason developed oil stains. Also, you can’t etch a coating. Etching solutions only work on bare concrete. They react with the free lime and other minerals in the concrete in order to break down the surface texture and expose the pores. If I’m mistaken and you were prepping bare concrete, then the bubbles would be caused from not allowing the concrete to dry long enough after thoroughly soaking it with all those solutions and rinse water. It would take a few days for the slab to dry. When applied to soon, moisture vapor escaping out of the concrete will get caught under the coating and create all kinds of bubbles.
Lastly, was the leaf blower electric or gas? Gas leaf blowers are notorious for depositing a microscopic oily residue / droplets on the floor from the exhaust. Coatings will effectively repel from these contaminants forming bubbles and/or fisheyes. The best thing to do to remedy the problem is to sand the surface again. This time, just use a shop vac or soft bristled broom to get the dust up. After that, pour denatured alcohol on a microfiber mop pad and wipe the surface down. It will evaporate fairly quick. After that you are ready to apply a new coat.
Shea, one last question. I live in Alaska. This weekend it’s going to be in the high 50’s and low 60’s. Would it be better to wait until it’s warmer to do this? TIA, Les
RockSolid allows application and curing to temps no lower than 40 degrees, Les. You should be fine with the reported forecast.
Hi Shea, I’m hoping that you can help me. I have two cats that peed on the carpet in my basement. I’ve pulled up the carpet, and carpet pads, and cleaned the concrete floor with TSP (3 times). I’ve also used an enzymatic cleaner. Now I’d like to seal the floor (as a “just in-case” before covering with luxury vinyl planks). I don’t have moisture issues (at least not right now), and I want to do anything I can to ensure that the cats don’t “re-offend”. From what I’ve read – a sealer that still allows the concrete to breathe would be ideal for a basement floor (keeping any new offences from doing any permanent harm but not locking in any moisture) but that this type of sealer would still allow any residual odor to seep through as well – which I don’t want. What would you recommend?
You did your research, Samantha – good job. You are definitely caught in a Catch-22. Is the odor completely gone and has the basement ever had a moisture issue or had a damp smell?
She’s did my floor yesterday by myself came out nice applied chips or flecks do I now do a light sanding before applying the clear coat
Hi Ralph. It depends on what product you used and how long ago it was applied. Most recoats are required within 24 hours, while some products allow up to seven days. After that, you need to degloss the surface by roughing it up with 120 grit sandpaper.
Hello,
I have a new house w/ dbl attached garage.. Would the prep work still be the same? My assumption is that i dont need to ‘degrease’ and instead just wash and then sand the concrete sealer off before using rustoleum product.
Is this the way?
Hi Ricky. Concrete prep is always the same whether it’s new or old. This article explains why. Of course, no need to degrease for new concrete. Just to be clear, if you have a sealer on the concrete then the surface needs to prepped via grinding, not sanding. Sanding has little effect on concrete. The grinding will prep the concrete at the same time and etching will not be required. Because grinding opens up the pores of the concrete real well and allows for good penetration, most low solids, thin coatings like Rust-Oleum will require 2 coats since they are not thick enough to provide good color uniformity with one coat.
Hi, does does Rust-oleum Epoxy Shield have a strong smell? My bedrooms are right above the garage.
Hi Michelle. No, the water-based EpoxyShield does not have a strong smell.
I’ve already applied two coats of Rust Bullet Concrete on my garage floor, but I’m not happy with the appearance (roller marks everywhere, and I’ve discovered that the cracks I patched are still obvious). I’m considering applying the Rustoleum EpoxyShield over it, including a clear coat and flakes to help hide surface inconsistencies. There’s also a Rustoleum Recoat Primer product that I can use as a first coat over the Rust Bullet. Do you think this will work well?
Hello Gordon. Rust Bullet concrete generally needs three coats to achieve satisfactory looks and performance. This is because it goes on thin. Roller marks can be tricky with Rust Bullet Concrete and requires a light touch with good back rolling procedures. It’s also important that crack repairs are done properly, making sure to grind the surface flush similar to how auto body work or wood work requires sanding flush before painting or staining.
Yes, you can apply Rust-Oleum EpoxyShield over it. However, you cannot use Rust-Oleum Primer Recoat as it is not compatible with Rust Bullet. You will need to rough up the coating first with 120 grit sandpaper. Additionally, you will essentially be applying a low performing / low quality product over a high performing one, albeit one with some cosmetic deficiencies. Are you familiar with Rust Bullet DuraGrade? It’s slightly thicker, it does a much better job of preventing roller marks, and you can apply color flakes and their clear coat. It will still require roughing up the surface of your current coating though since you are past the recoat window.
Thanks for the reply! OK, if I decide to go with another coat of Rust Bullet Concrete (or Duragrade) to stay at the same quality level, and apply flakes, would I also need to use their clear coat? The Duragrade clear coat is on the pricier side and isn’t readily available (I haven’t found a site that can get it to me in less than a week, and I would like to get the job finished this week).
Yes, you need to stay within the Rust Bullet line when using their products, Gordon. You can’t use a different manufacturer’s clear. Amazon shows a ship date (at least for us) for Friday. You can also go straight to Rust Bullet and inquire with them as well.
I recently applied a coat of gray rust-oleum Epoxyshield on my shop floor, followed by the rust-oleum clear coat two days later. So far it looks and feels great, except there are probably about a dozen 1/4″ dia bubbles scattered around. These showed up with the clear coat application. FYI, I did follow all the concrete prep instructions (Etch, scrubbing, washing).
1. Does this indicate a problem with my application or possible other problems down the road?
2. Do you reccomend a product for spot filling the little “craters” the air bubbles left?
Hi Cole. It sounds like an application and or mixing issue. If the epoxy is mixed too fast with a jiffy mixer air can get trapped in the coating and form bubbles as you roll it out. Rolling it on too fast can have the same effect as well. It’s just a cosmetic issue and will not affect the performance. If you want to fix the issue. It would require sanding or cutting out the tops of the bubbles and then applying another clear coat.
Thanks Shea, that’s useful information!