
 If you ask a person who has used a Rust-Oleum Epoxyshield or Quikrete garage floor epoxy paint kit to give you a review, you will get a different answer almost every time. Many people do not have kind words for these kits. They complain of the epoxy paint peeling up fairly quickly or of the coating itself wearing out in places. There are times however when Rust-Oleum or Quikrete don’t always deserve the bad reviews that they receive.
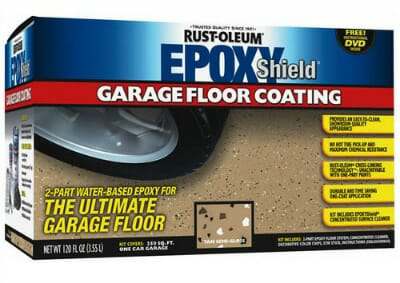
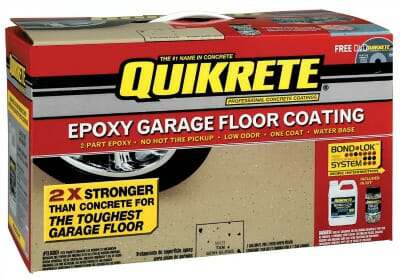
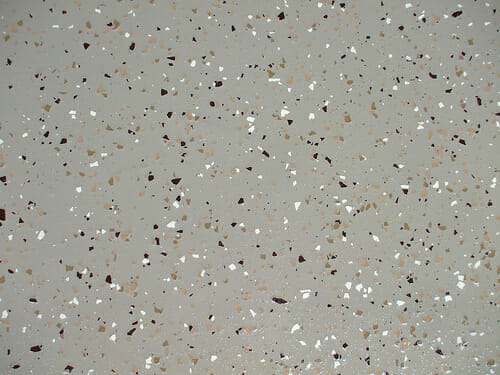
These kits of course are the ones you can purchase from your local home improvement center or online for $65 to $75. This one here is a good example from Amazon. They are water based, you generally have a choice of tan or gray colors, and they even have decorative paint chips to toss onto the surface. All of these kits will include some form of a citrus acid etch and cleaning solution for the concrete.
So why are so many people unhappy and bringing the reputation of these epoxy paints into question? The answer lies partly in people’s expectations, their lack of knowledge on how epoxy paint works, and the marketing of the paint kits themselves.
So why the problems with Rust-Oleum and Quikrete?
When the decision has been made to upgrade the protection and looks of the garage floor, some don’t want to break the bank or are on a budget which is understandable. When they visit their local home improvement store to see what paint is available, they may be advised on the added benefits of epoxy instead.
They are then pointed to the epoxy paint kits instead of the standard latex acrylic garage floor paint. Once they see the nice shiny picture on the box promising a beautiful epoxied floor that goes on with ease, they spend a little more money expecting the long lasting and durable coating that is advertised on the box.
The other scenario is the online shopper looking for a deal on epoxy floor coating products. They find great deals online for these epoxy garage floor paint kits with all the promises of a beautiful epoxy floor for less than half the price of other epoxy systems. They then make the purchase not really knowing what they are getting.
So, what are they getting? Both the Rust-Oleum Epoxyshield and Quikrete epoxy paint is an actual 2-part water based epoxy coating — one part is a tinted epoxide resin and the second part is a polyamine hardener. Both have approximately a 50% solids content by volume with the remaining being water. The water acts as a carrier agent for the epoxy and allows it to be applied very easily, just like paint and that is why they are marketed as such.
What happens, however, is this water base evaporates as the epoxy cures and what you are left with is just over 50% of what originally went on the concrete. Actual dry film thickness is approximately 3 mils for the Rust-Oleum Epoxyshield product and 2.4 mils for Quikrete.
————- Epoxy Review Update ————-
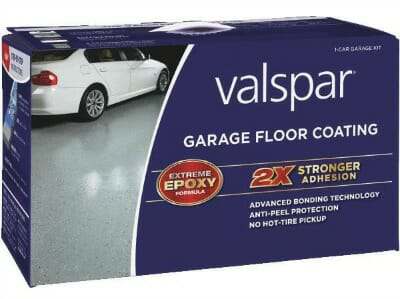 Due to the amount of questions we have received, we want to update this article to include the Valspar garage flooring kit as well. It falls into the same category as EpoxyShield and Quikrete. The Valspar product is a water based 2-part epoxy paint kit that cures to a dry film thickness of 1.5 mils.
Lowes generally carries this line, but you can find it here from Amazon and usually at a much better price.
———————————————————————–
A better quality kit that is more expensive but doesn’t get as many bad reviews would be the Rust-Oleum Professional Series epoxy. The Professional series is solvent based instead of water based.

Best yet would be a higher quality epoxy that has up to 100% solids with no VOC’s to worry about. It’s more difficult to work with and you have a shorter period in which to do it, but when it cures, very little evaporates and what you have left is 100% of the product on your floor. As an example, epoxy paint is on average 2.5 mils thick when cured and 100% solids epoxy is 9 to 12 mils thick.
Another thing to keep in mind is that the Rust-Oleum and Quikrete epoxy paint is a one coat product with a semi-gloss finish, where as commercial epoxy systems are a minimum of three coats with at least one of those being a glossy clear coat. This is what gives epoxy floors their shine and depth.
So as you can see, there is a big difference between a one coat product such as the Rust-Oleum or Quikrete epoxy and the much thicker and more expensive multi-coat system of commercial epoxy floors. You cannot expect to get the same protection, durability, and shine from these simple one coat kits that you do from a higher quality commercial product.
The big issue though is that many home owners are not aware of these differences in epoxy floors and expect the best from the lesser expensive kits.
This video is a good and honest evaluation of the typical DIY epoxy paint kits you can purchase from home improvement centers
Another problem is poor preparation of the floor when these kits are installed. This is probably the biggest mistake that is made. The pores of the concrete surface need to be exposed in order for epoxy to mechanically bond to it. This is called profiling the concrete. Rust-Oleum and Quikrete both give you a citrus acid cleaning solution to use on the concrete to help expose these pores, but the problem is that it’s not always effective. Many times you need something stronger such as muriatic acid to etch the floor.
A few drops of water on various spots of the floor can test this. If the concrete turns dark and immediately absorbs the water, then the concrete is profiled correctly. If it sits there without absorbing right away, the pores are not exposed and the epoxy will not bond well.
Poor profiling of the concrete is what causes the delamination or peeling of the epoxy paint within a few weeks or months. The pores of the concrete must be exposed and be free of all oils and dust. It takes more work to prep the floor than it does to apply the epoxy paint. Poor floor preparation is the cause of most bad coatings.
Can we recommend Rust-Oleum or Quikrete epoxy paint?
So, are the Rust-Oleum Epoxyshield and Quikrete garage floor epoxy paint kits truly bad? No, not necessarily. If you properly prepare your floor then you should be satisfied with the results as long as you are aware that what you are applying is not the same as a commercial epoxy coating. There are many people who have done just that and give great reviews about their floors.
For additional protection and a longer lasting floor coating, you can purchase an optional second coat of clear epoxy which will enhance the look and prolong the protection of the floor by doubling the thickness. The average life expectancy of these floors is 3 – 5 years before they start to show their age and even longer if you apply a second coat of clear.
Dollar for dollar, Rust-Oleum and Quickrete epoxy paint cannot compete with a commercial quality epoxy coating when you cost average your floor over years of service, but if you are on a budget, then these just might be the product you are looking for. In fact, there are actually more satisfied customers who have purchased these products and would recommend them again, than there are bad reviews. Just be sure that you know what to expect.
Shea:
Thank you for all the great info. Like Steve on May 29, was looking at a primer for my DIY epoxy kit but read your comment that it is not required. Should I not use it, if I do, where can i buy a proper primer for the DIY epoxy kits. I was planning on using Rustoleum Professional grade kit that is solvent based and then use a top coat. I have a residential 20 year old garage floor (of which another part of the floor is 5 years old). I was planning on doing a concrete degreaser and then a phosphorus acid etch. I also read somewhere to coarsely sand areas of the floor where tires will be to provide better adhesion.
Also, can you comment on the Sherwin Williams product:
Second question is do you have any comment/experience with the Sherwin Williams product: H&C® Shield-Crete® Epoxy Concrete Floor Coating.
I also read somewhere about people using a parking mat to keep the front wheel drive tires off the floor to prevent hot tire pick up.
Thank you
Sundip
Hi Sundip. I think we may need to do an update on the article. All of these DIY epoxy kits that you can get from your home improvement centers – EpoxyShield, Valspar Garage coat, Quikrete, H&C ShieldCrete and others, are most all low solids water based kits. Because they are low solids and water based, they penetrate the concrete similar to the way an epoxy primer does. This is why a primer is not needed. A true epoxy primer is actually a better quality product than these kits and is reflected in the price. 1 gallon, which will cover 300 sq. ft., will cost a little over $100.
These DIY kits are designed to have a much longer pot life for easy application and less chances of making a mistake. In order to make them this easy to work with and to keep the costs down, they have to sacrifice some on quality and durability. This is why a successful application will only last a few years or so before it starts to wear out. A second coat or a coat of clear will help to improve the durability and life of the product. The exception to these kits would be the Rust-Oleum Professional series epoxy by EpoxyShield and the new RockSolid Polycuramine. The Rust-Oleum product is solvent based with a higher solids content. We cover the RockSolid product here. These are a more durable solution to the inexpensive water based kits.
If you are going to etch the concrete, then yes, taking 40 grit sandpaper to the concrete where the tires sit will help to slow down the hot tire lift that you will get with these products.
Does the Rust-Oleum Professional series epoxy by EpoxyShield need a first coat of epoxy primer? Is it recommended?
Hi Christian. Neither the water based or solvent based require a primer. They are both a lower solids epoxy and do fine penetrating the pores of a properly prepared concrete surface. The quality of these kits, even the solvent based Rust-Oleum Professional series is not as good as a similar solids commercial quality primer.
I’m planning to use the Rustoleum Professional garage floor coating. I’ve thoroughly cleaned with degreaser and patched the eroded spots with Quickcrete Concrete Patch Compound (premixed).
How long do I need to let this cure before etching and applying the coating? Thanks.
Hi Jim. According to the Quikrete TDS you need to wait a minimum of 24 hours. I believe that the premix is their latex acrylic. If that is what you have, Quikrete states to only use latex acrylic paint on their product. You may want to give their customer service a call and ask about epoxy. I don’t believe you can acid etch their product either.
Shea – Thanks for the info. Great site. Wish I’d seen it early. Since I have a quart of the Quickcrete patch on the floor, I’ll be returning the Rustoleum Epoxy coating kit.
Would the Drylok E1 you mention in your painting thread be an acceptable coating or will an epoxy paint have the same problems as the two-part epoxy kits?
If I have to go with acrylic latex, are there any you recommend? Otherwise, I just live with it. Thanks.
Yes Jim, the Drylok E1 should work fine over the patch. 1-Part epoxy paints are a latex acrylic with a small amount of single part epoxy added to increase the durability of the paint. It should not have any effect with the vinyl patch. Since you only used a quart of the vinyl patch, one consideration is to grind or chip it out and use a suitable repair material for epoxy. Then you can use the Rust-Oleum product if you wish.
I’m looking at using one of these kits for my garage, but I want to do my basement first. I’m ripping up the carpet and have concrete underneath. I notice Rustoleum sells both a “garage” and “basement” version of these kits. Is there any difference in the quality of product and/or preparation needed for the basement vs. garage versions? Could I use the garage version in my basement but not vice versa? Or are they same thing packaged and sold differently? I came across this article and read all the comments. It seems you are very knowledgeable about these products. Thanks.
Great questions Greg. There is a difference between the basement and garage floor kits. The basement kit comes in a satin finish with a lower solids content than the garage floor kit. The garage floor kit has a higher solids content, which makes it more durable (think driving cars on it), and a glossy finish. You can apply the garage floor kit in a basement but you would not want to apply a basement kit in the garage. The prep is the same.
Hello!
If I understood correctly there are to different DIY Rust-Oleum Epoxy Shield kits: one is water based and the other (the professional) is solvent based.
I read that the water based does NOT need primer, but what about the solvent based? Do I need ta first coat of primer first?
Hi Christian. Neither the water based or solvent based require a primer. They are both a lower solids epoxy and do fine penetrating the pores of a properly prepared concrete surface. The quality of these kits, even the solvent based Rust-Oleum Professional series is not as good as a similar solids commercial quality primer.
I am using rust oleum-epoxy shield garage floor coating kit that says its a 2-part water-based epoxy and I plan on applying 2 coats of rust-oleum epoxy shield premium clear floor coating kit Which says its a 2-part solvent-based epoxy. so I have a couple of questions. The first is are these 2 kits compatible? If not, which clear kit is compatible with the water based kit as I can’t return it. Also what is the proper curing time between each layer? From what I understand it says to let the paint and paint flake coat dry 24 hours before applying the first coat of clear and then the second coat should be applied between 10 and 72 hours please help I want to do it right the first time. Thanks
Hi Mindy. The solvent based clear coat kit is compatible with the water based kit so you are good to go there. After you apply the water based color coat wait a minimum of 10 – 12 hours and not much longer than 24 hours before applying the clear coat for the best results. Just remember to pay close attention to the mixing instructions and induction times based on air temps. Also, floor prep is the MOST IMPORTANT part of the whole project to achieve a successful coating.
Hi Shea, Very informative and educational site. I’m in the middle of repainting my garage floor with the 1-part acrylic epoxy by seal-krete and would like to know if I should use their brand of clear coat as my final top coat or can I use any type such as the Rust-Oleum Epoxyshield. Thanks!
Hi Lou. With the exception to Seal-Krete, nobody really makes a clear for 1-part epoxy paint. It needs to be a true 2-part epoxy coating for a proper clear coat. The Seal-Krete product does not do well at all in a garage environment. You would be better off without it.
Hello,
I have a garage floor that was really clean, and I degreased and etched the floor so the epoxy can stick to it. But now for some reason after power washing the floor multiple times there is a white film that will not come off the floor and wasn’t there before all the etching, please help because I’m afraid to lay epoxy on until white film is gone. Thanks in advance!
Hi James. The white film you are referring to is calcium carbonate and is the resulting product of the acid etch. If the floor was allowed to start to dry at any point during the etching process this white residue can settle into the pores and be difficult to remove. You definitely want it gone before applying the epoxy. Repeated washes along with a deck brush will remove it. Sometimes a mixture of hot water and TSP with the deck brush and a good rinse helps as well. Just keep at it as it will come off.
Hi Shea, I just picked up the Valspar Garage Floor Coating Kit, which I plan to use in a storage room in my basement and I have two questions. First, the directions for the cleaning solution say to thoroughly rinse the area, however the storage room is in the back corner of a finished basement with no drainage due to a sealed radon system. So how do I clean up the cleaning solution? Can I just use a mop and a bucket of water? Also, it seems like that stuff is going to give off some potent fumes and I only have one window on the far side of the basement. How much do I need to worry about ventilation? My central air system is in the room I will be painting – do I need to shut off my AC while I am painting? Thanks in advance!
Hi Susan. Yes, you do need to take some steps for the fumes. Get yourself a respirator for acid fumes and some safety goggles – the kind that fit flush to the skin of your face like what mad scientists wear. You should be able to get both fairly inexpensively from your local home improvement center. Use a small fan to circulate air towards the open window and shut off any flame sources that you may have in the basement. Be sure to read the directions thoroughly.
Work in small 4’x4′ sections. This will keep the fumes down and containment of the solution much easier. It’s important that the solution is rinsed well from the concrete. Use a mop and bucket with plenty of fresh water. Do not let the solution start to dry on the surface before rinsing. A wet vac works great for pulling up the heavy water. Also, make sure the concrete is pre-wet before applying the solution. As far as applying the Valspar coating goes, it’s water based and has low VOC’s. No respirator needed and no need to worry about your AC.
First off, thank you for this website! I just finished an Rustoleum epoxy shield floor in my garage and could not have done it without the tips I learned here. I grinded the floor and it adhered very well. I bought extra base product after talking to the rep on the phone because the spread distance is estimated for for etched floors and I was glad I did. My question is with the top coat. I applied the Epoxy Shield Clear Coat (solvent based) 6 days after the Epoxy Shield Garage Floor Coating (water based). The instructions said any time after 24hrs for this coating. I did not sand the base layer. It only said I had to sand it after 5 days if I was applying over the Rustoleum Professional Coating (solvent based). Does this make sense? I only questioned it after seeing some of your replies to similar questions on top coats. I’m not sure if I’m thrilled with the top coat. It looks really glossy and didn’t seem to even out as nicely as the base layer. There’s some areas where the anti skid granules accumulated and didn’t go on evenly. Maybe I wasn’t prepared for the level of gloss. Overall it’s fine and I still love it, but I wonder if it could be better. It’s only 24hrs since I applied the gloss. I could apply a second coat to even it out within 72hrs according to the box. Would that help?
Thanks!
Hi Ben. Congratulation on your floor! Applying clear coat can sometimes be tricky because of the fact it’s clear. It can be hard to see depending on the light. The key is to make sure you follow a set pattern when applying it in order to make sure it goes on evenly. Bending down low on occasion to get a better view helps. When applying non-skid granules it’s important to stir the mix occasionally or it tends to settle to the bottom of your pan and cause clumping or patches of heavier application. You can apply a second coat to help even things out. Just keep in mind that you will have to use the non-skid again because you will be covering it up with the second application.
Hi Shea,
Sorry about my bad english. I want to apply Rust-oleum epoxyshield on my garage floor. After I watched the DVD, I realized than my floor already have a clear seallant and the expoxy may not adhere well. The seallant have 5 or 6 years old, and I wonder if the acid provided in the rust-oleum kit will be enought to open porosity, and if not, what do you recommand for well prepared the floor before apply epoxy. Thanx
Hi Jessy. Acid etch will not work at all on a previously sealed floor. It works by reacting with the free lime in the concrete and the sealer will block it. You need to grind the floor to remove the sealer. You can read about how to grind here. Once you grind, there is no need to acid etch the concrete.
Hi..I applied the Epoxy shield today I will be putting a second coat tomorrow morning. I have a few questions. .if the floors is still tacky can I apply the second coat and when doing so if it is still tacky can I walk ..and my other question..when I apply a clear coat how many hours do I wait before Appling and how many coats of the clear coat would you recommend…thanks!!!
Hi Denise. If you can press your thumb to the coating without getting a thumb print then you should be OK to walk on it to apply another coat. Same goes for the clear. Wait a minimum of 10 to 12 hours between coats. One coat of clear works fine for epoxy.
I installed Rust-Oleum’s epoxy shield coating in my garage roughly 15 years ago, purchased from a local home center. I was on a tight budget and the other options at the time just weren’t affordable. Since then I have restored 2 cars, welding and using various chemicals during the process and have also dragged snowmobiles with steel skis across it every winter. It wasn’t until last year that I finally had an issue with some wear on the surface. While I’m sure it isn’t the quality finish I may have got by spending $600+ I found it to far exceed my original expectations. As stressed with virtually every other floor coating, proper prep is the key to a long lasting finish.
Great to hear Eric. You are right, proper prep is the key to gaining the maximum performance capabilities from your floor coating.
We are wanting to use an epoxy paint on our previously painted garage floor. We scraped up the peeling paint and cleaned it very good with the pressure washer and TSP. We tried etching the floor but the muriatic acid doesn’t sink in, now we’re wondering if sanding the floor would work. I would say 75% of the floor still has paint on it. Can we put the epoxy paint on top of the old paint without it peeling off? If so, the next question is which brand should we use?
Hello Saige. As you found out, muriatic acid only works on bare concrete. It doesn’t work on coated surfaces, it doesn’t remove paint and it doesn’t clean up oil spills. It works by reacting with the free lime in concrete. That’s why you have so much paint still left on the floor.
If you have regular concrete paint on the floor it’s highly recommended to grind it off in order to remove the old paint and prep the concrete simultaneously for an epoxy coating. You can sand the paint to accept an epoxy coating, but the problem is that the coating is adhering to the paint, not the concrete. Since concrete paint will peel, so will your epoxy since it’s adhered to the paint.
If you want to use a 2-Part epoxy paint like the ones discussed here, we recommend the Rust-Oleum Professional floor coating kit by EpoxyShield. It is a solvent based epoxy which is more durable and will last longer than the water based products. You can see and example here from Amazon .
.
Hello. Thanks for the informative website.
I live in California and I’m considering using the Epoxyshield professional epoxy. I’ve noticed that Home Depot and several other retailers seem unable to ship this product to California and several other states. I’m unsure why but I’m guessing there is an environmental restriction. And the professional version isn’t sold in stores in California as far as I can tell. Is there anyway for California residents to get it?
Hi Bryan. Do you live in the area encompassed by the South Coast Air Quality Management District? It includes all of Orange County, most of LA county, as well as San Bernardino and Riverside Counties. This district has the highest restrictions on VOC’s than anywhere else in the U.S. If so, that is the reason you can’t get it shipped there.
Your best option is to purchase a commercial quality high solids water based epoxy or 100% solids epoxy. It will be better than the Rust-Oleum product and can be shipped to your area. Online vendors such as EpoxyMaster, Garage Flooring LLC, and Legacy Industrial all carry such product. Many of these type of vendors also carry a polyurethane and/or polyurea top coats that can be shipped there if you are looking for that as well.
We hired a company to put down the Epoxy. He used Sherman Eilliams. It was a two step process and the directions said the second coat should not be put down for 4 hours after the first. Or nearly that. He didn’t wait that long so now I see tire marks that only come up after rubbing WD-40. We waited 7 days before we drove ours cars back in. We paid $1,500.00. He says its natural for tire marks to show.
Hi Patricia. Sherwin Williams makes a wide variety of epoxy floor coating products and it’s hard to determine what you should and should not see without knowing exactly what was used. How long the company waited before applying the second coat should not have an effect if the epoxy cured fully.
It’s not uncommon however for certain tires to leave marks or footprints on coatings. Tire heat can determine that as well. We talk more about that here. The type of coating can determine whether or not the marks clean up or not and how long you wait before cleaning up the marks can determine how well they clean up as well. Great job using the WD-40 by the way.
Thanks for the great Website.
I’m going to repaint my 30 year old Garage Floor. The current paint, is at least 10 to 15 years old, and is some type of concrete or porch & floor enamel, which has held up pretty good over the years. About 25% of the floor is bare concrete, the rest is paint, and isn’t chipping. I had planned on trying to remove all the current paint by using a paint remover product, however the man at Home Depot paint dept. said it isn’t necessary to completely remove the old paint as long as it isn’t chipping, just clean really good by using a good cleaner/grease remover, pressure wash making sure the surface is perfectly clean. Then apply a Behr clear Primer ( especially for concrete I assume) then use the Rustoleum epoxy kit for garage floors. No need for etching, or removing the existing paint. What do you think I should do! It sounds a whole lot easier than the removing of old paint.
Thanks for your advice!
Hello John. We are glad you asked these questions because this is a great example of why home improvement centers are not the place to get advice about epoxy floor coatings. If you were just going to “paint” your floor, then this is good advice. However, you are planning to apply a 2-Part resinous epoxy coating, not paint. The Rust-Oleum epoxy will not adhere to the Behr primer and would start peeling up within days after being applied. The Behr primer is good for latex acrylic paint or 1-Part epoxy paint. For a better understanding between paint and epoxy, I suggest reading this article here.
Epoxy needs a properly prepared bare concrete surface or previous epoxy coating to adhere to. The bare concrete needs to be etched at the minimum. Technically, if you sanded the current paint the epoxy would stick to it, but how well it stays down is dependent on the paint it is adhered to. Epoxy forms a much better bond to concrete than paint does. The correct way to apply epoxy to your floor is to remove the current paint via grinding or chemical stripping, and then prep the bare concrete. Grinding would do both.
If you don’t want to do any of that, then I suggest you go with a 1-Part epoxy paint. We have some suggestions here. It will not be as durable as a 2-part epoxy, but you could then prep the floor as originally suggested.
I had the same problem (painted areas that can’t be removed) as you are having. I really don’t know what kind of paint it was (oil-based vs. latex or other?). I considered using a torch to burn it off since it defied all my attempts to scrape with a carbide scraper. Finally, I decided that since it is bonded that hard to the concrete, as long as I furnish adequate grip surface, it should work just like the bare concrete. After all, all the epoxy patch and polyurethane caulking that are used to fill the cracks will grab the epoxy paint well enough (or claim to) so why not a tenacious paint? Right? So here is what I did: First, I used the most aggressive orifice on the pressure washer and blasted it good. I aimed at the paint both at perpendicular and slight angles to try to lift it where it could be effected. You may notice that some areas begin to flake so concentrate in those areas since probably the original paint didn’t cure well in those areas. Then I used 1:4 muratic solution scrub followed by a neutralizer rinse. After dry, I took a standard utility blade and scored any remaining painted areas making as closely hatched surface as possible. (Don’t be surprised if even the steel blade doesn’t score very deep if the paint is very tough.) If you uncover any new paint chips peeling… vacuum. So what you have done is provide some gripping depressions in the tough paint to simulate the pores in the etched concrete as best you can. BTW, I did EXACTLY the same thing for all the patched chipped and cracked areas for the same reason: smooth is bad, rough is good.
I hope this works. Granted, grinding the entire floor would be ideal but $2K to contract grinding is just not in everyone’s budget, certainly not mine.
Here are my comments/criticisms about applying Rustoleum Professional Grade Epoxy Shield garage coating followed by the associated professional shield clear coat to help bond the flakes better and add an antiskid element: (note: Due to the area being covered (slightly over 500 sf) I decided rather than waste 1/2 can I would spring for the double coat and apply 2 coats with 3 kits. )
1. Because the weather turned damp I was forced to delay the second coat for about a week. I used some old medium sand belts and scuffed up the first coat severely to aid in adhesion, vacuuming and rinsing clean the entire surface. This also helped to see where the second coat was being applied since it is a very glossy finish and a bit difficult to distinguish first coat from second coat easily even with plenty of shop lighting overhead.
2. I used the flakes in the second coat. I recommend starting in an area less noticeable initially since, like most artististic endeavors, achieving a pleasant appearance takes some practice throwing those flakes just right. Don’t worry about getting flakes at the very edge of the wet section (just roll right over them at overlaps) but avoid laying them on any unpainted areas.
3. I waited 30-35 hrs and then applied the clear coat. Here was the problem: even with 2 coats and the “freshest” one only 30 hrs old, the coverage was WAY WAY less than the 500 sf claimed on the product data (same rollers, brushes and technique as with the tinted paint coats). I estimate I got just over 300 sf coverage and even scraped both cans very clean with a rubber spatula. Fortunately, the store had plenty on hand so I was able to complete the clear coat the same day. But I lost the wet edge by stopping for a suplly run so the stop/restart point is quite noticeable. Doubling the cost of the clear coat doesn’t annoy me as much as that line about 2/3 across the floor. It’s fairly straight, but it’s THERE! Just wish the coverage posted on the package was more conservative since 2-car floor are quite common and need the second kit and I would have been prepared. Rustoleum folks: please take my evaluation to heart!
4. My wear assessment (obviously) is still pending but judging from how hard the rollers and brushes stuck to the used cans after a few days, this is REALLY REALLY hard epoxy. Be sure to clean spills, tool handles, clothes, hands, etc. IMMEDIATELY with xylene or it will not come off without a razor blade.
5. Another recommendation (tinted paint final coat) is to throw the flakes quickly after painting a small section (I worked in about 25 sf sections for all coats). I noticed that the edges of the larger flakes tend to curl slightly if not wetted properly, leaving a rough edge (no doubt the exposed edges will eventuially wear off, though). Funny thing is: each kit supplies 2 plastic bags of flakes and even with 500 sf I only used about 1/2 a bag and the decoration seems very nice to me, but I suppose some may prefer a more dense application than I used.
6. As far as the overall product application is concerned, once you can manage the ideal painting and curing weather slot properly, it all went down as detailed in the broshure (except for the bogus clear coat coverage, of course). Once I have assessed the durability over the next few years, I would certainly recommend the product to others and use it myself to coat other floors.
7. Good luck to all in your floor painting adventures! I hope these tidbits help others to decide how to handle their first icky, messy epoxy floor project.
I originally applied a stain and then Shield-crete acrylic clear coat to half of my garage. I got those products from Sherwin Williams. I spent hundreds of dollars and a lot of prep time. The acrylic was soaking into the concrete. I was very disappointed in the outcome. Today I applied the Rustoleum water based kit after etching, degreasing, and pressure washing the floor. I was able to remove a lot of the stain. I still have plenty of acrylic left since I bought extra on sale for the other half I never completed with the stain. Can that acrylic Shield-crete be applied to the epoxy coat?
Hello Allen. We don’t recommend applying an acrylic coating over an epoxy coating. The epoxy has much better chemical and scratch resistance than acrylic coatings. If you were to spill gas on the acrylic for example, it can eat through the acrylic finish and leave a mess on the epoxy. You would also have to sand the epoxy after it had fully cured in order to accept the acrylic coating. It’s just too much work for an inferior top coat in our opinion.
I used the rustoleum epoxy kit from Home Depot. I liked the results but noticed some spots that did not take on the gloss shine. Mostly my fault since these areas were lighter in color and probably would benefit from another epoxy coating. My question is down the line 2 to 3 years from now can I apply the rustoleum epoxy over the existing?
Hello Mike. Yes, you can apply more at a later date. We have an article here that covers just that.
Could you recommend a good concrete floor paint in an acrylic latex . I going to paint a basement concrete floor that has been painted a number of times and has a somewhat irregular finish on the concrete . The floor also had some asphalt tile on it which I have removed leaving traces of the adhesive which is black thank you for any information
A 1-Part epoxy paint is your best bet Don. It’s a latex acrylic that mixes and applies the same as standard latex, it just has some epoxy added to aid in adhesion and durability. We cover which ones we like here.
Just finished using the Rustoleum product and now have a problem with persistent ‘tackiness’. I put down two coats of the tan epoxy floor, applying the chips with the second coat. I noticed the the back corner of the garage wasn’t totally drying, despite waiting 48 hours. I figured with better mixing of the premium clear coat epoxy top layer that issue would be resolved. Now, 24 hours later, it is still extremely tacky with limited curing. Any thoughts on what I can do to help the process along? The humidity has been ~50%, though the air temperature was right around 60 degrees when I applied the second coat and the top coat. I know lower temperatures can slow the process, but I didn’t think it would stop. Is it hopeless or should I just wait for the weather to heat up in a couple of days?
Hi Corey. Did you wait the proper amount of time after mixing before applying it according to the induction time temperature schedules listed in the directions? If not it can take longer to cure. Not mixing fully and/or slower temps will slow the process down as well. Just wait it out and it should eventually cure hard.
I wanted to use a 1 part acrylic epoxy on a 20 yr old floor in a garage that will now be used for lawnmowers and other tools. It was smooth so I used a lot of muratic acid and scrubbing to etch the surface really well. I must done a good job because it took 2.5 gallons of SealKrete acrylic epoxy to cover the almost 400 sqft. However, the next day I noticed that there were some areas that were peeling (mainly around the edges. My question is can I spot fix those areas (after I figure out why they peeled) and then do another coat over the whole floor? It needs a second coat anyway. If not, what are my next steps? Also can I change color on the topcoat? (wife wants taupe vs armor gray). Thanks for your advice…
Hi Mike. You can definitely spot fix those areas and yes, you can go over the whole floor with a different color. Scrape the areas where the paint is peeling until you get a solid border where the paint is adhered well. Providing you don’t have any residue or sealer on the those areas of the floor, you may need to re etch those areas. If you have a small angle grinder, it would be quicker and less messy (except for some concrete dust) to lightly grind those areas with a concrete cup wheel.
The rest of the floor needs to be deglossed with some 150-200 grit sandpaper. It can be done quickly using a pole sander. You aren’t trying to remove any paint, just take the shine out and create a little bite for the next coat. Once the floor is ready, we recommend painting the repair areas first, let them dry a few hours, and then recoat the entire floor including the repaired areas.
Shea… So a couple items that I didn’t mention and not sure they are relevant or not. I did first coat yesterday so it has been only 20 hours and the first coat feels a bit like sand paper (rough and chalky). I did start to scrape using a drywall finishing scraper cause it is sharp. Weird but even areas that seems to be fine are coming up (sometimes is small sheets) around the peeling areas which are small in size. After I scrape, I feel the concrete underneath and it is rough still, so I think it was etched well. Do you see anything in this description that points to a solution? Is it the Seal Krete product?
Do I have to rent a concrete prep tool and start over? Do I just keep scraping, repaint scraped areas and then put 2nd coat on everything? Thanks.
Wow, sorry to hear Mike. Did you neutralize and rinse the surface real well? If not, you can still have a strong acidic base to the concrete that paint and coatings will not adhere to. That may explain why it seems to be coming up in sheets in some areas. Unfortunately you need to keep scraping until you get to solid paint or get to the point where you realize that you need to start over.
If you decided to start over, either scrape all the paint off and neutralize the concrete and rinse well or rent a grinder. We cover that here. If you do need to start over, we suggest either putting down Seal-krete LockDown primer first as they suggest or use a lower cost 2-part water based epoxy like Rust-Oleum’s EpoxyShield. It would give better protection and bond at about the same price as the LockDown primer and Seal Krete paint.
Shea, I have a problem. I have a small building of about 250 sq. feet. It has never been used nor will it be used for auto repair or anything of that nature. There currently is an old vinyl floor that has been there for years. To get this up would be a nightmare. It has been down so long it has warn down, but not thru to the concrete. Can I Epoxy over it, or is there something else I can do? It will be used more as man cave than anything else. Thanks.
Hello Greg. As long as the vinyl is adhered well and is not old enough to contain asbestos then yes, you can epoxy over it. We have an article about how to do that here. You may need to use a colored primer before applying the color coat to prevent shadowing from the vinyl. You can also cover the vinyl with interlocking tile or apply a peel and stick vinyl to it as well.
Hi Shea (or anyone!),
Please HELP! I had a “handyman” apply the rust-oleum garage floor epoxy kit from Home Depot to my garage floor. I believe he followed the instructions that came with the kit, but now it has been almost 3 weeks and I have noticed continued tackiness in some areas and I just walked on the garage floor with wet shoes and noticed that the epoxy paint has become wet where I walked and I am tracking the paint/epoxy into the house and the garage floor is looking smeared where i walked with wet shoes. Any suggestions on how to remedy this situation? Thank you.
Hello Mike. Wow, you do have a problem on your hands. It sounds like your handyman did not mix the epoxy paint properly or didn’t mix in the Part B activator at all. Low solids epoxy like Rust-Oleum EpoxyShield require 3 minutes of mixing. It then requires an induction time (rest period after mixing and before application) which varies depending on air temperature. This is all covered in the instructions. Once this induction time has been met, it needs to be mixed briefly again before being applied. If this was not done correctly then it can take a few days for the epoxy to cure, if at all. If it’s been 3 weeks and is smearing on your shoes, it’s not going to cure at this point.
Unfortunately, all you can do at this point is scrape it up and wipe off the remaining paint with MEK or Xylene. Once you get the floor all clean again you can reapply a new coating, paying close attention to the mixing instructions.
Hi Shea,
Thanks so much for the quick response. I was afraid I would get this response. Do you think there is anything else I can try before going to that extreme measure? Maybe put some fans and/or space heaters out in the garage to help cure/dry it? Or maybe add a clear coat sealant on top of the epoxy? It is baffling b/c it feels like it is dry, but only has has this reaction when water makes contact with it (The paint/epoxy becomes wet and rubs off). Any other potential options/solutions before stripping the entire floor and starting over? I also have a message out to Rustoleum Support Center to see if they can provide some advice…. Thanks so much, Shea.
You did the right thing by contacting Rust-Oleum Mike. How cold has it been in your garage? If the concrete has been at least 50 degrees then it should have cured by now. If it’s been colder, then that could be your problem. Heating the space up might help. Epoxy cures chemically and needs a minimum air and surface temp to do it properly. Fans won’t help and you can’t add a clear coat to it until it cures. Hopefully Rust-Oleum will have an answer for you.
I would like to use the Rustoleum Epoxy shield on my Garage Floor, the garage was built earlier this year and the floor is bare Cement, but it is rough, question is does it need to be smoothed out in order for the epoxy shield to work, beside the preparation work? I ordered the kit.
Hi John. It depends on how rough it is. A heavy broom finish for example is too rough and should be taken down with grinding. If it’s not that rough but still not as smooth as normal concrete, you will most likely need two coats to get the best coverage and consistent color with the EpoxyShield.