
When RockSolid introduced its new line of Polycuramine garage floor and interior coatings, we were left scratching our heads at first. After all, what in the heck is Polycuramine? We admit we had never heard of it before. Moreover, what happened to the old RockSolid Polyurea garage floor coating, and why the change? Furthermore, why is Rust-Oleum’s name on RockSolid’s product?
After being asked by more than one reader, we decided it was time to see what the Polycuramine fuss was about. We wanted to know if it’s better than garage floor epoxy as RockSolid claims. In addition, we wanted to know why Rust-Oleum is involved.
Lastly, we wanted to determine if the Polycuramine garage floor coating is better than the older Polyurea coating that it has replaced. As a result, we have done a deep dive into RockSolid to get a better understanding of what this coating is and if we recommend it.
This article was first published in July 2014 and has been updated to reflect the latest information. Please read the latest update near the end. It reveals the most common complaints and issues over the years that you need to be aware of.
What is Polycuramine?
To best describe what Polycuramine is, we need a brief history of RockSolid Floors. This will help explain why Polycuramine was developed and how Rust-Oleum became involved.
RockSolid Floors was established in 2007 as an affiliate of Citadel Floor Finishing Systems. Citadel is a well-established, 40-year-old plus industrial floor finishing manufacturer that specializes in polyaspartic and polyurea technologies.
Realizing that there was a DIY demand for polyurea coatings, RockSolid Floors was born to provide a friendlier DIY version of the commercial quality Citadel polyurea. The RockSolid brand is probably best known for providing the A and B components in ready-to-mix sealed burst pouches that do not require a mixing bucket.
In January 2014, Rust-Oleum acquired Citadel and thus inherited the RockSolid line of floor coating products. As a result, all RockSolid products now come with Rust-Oleum branding. All customer service inquiries for RockSolid go directly to Rust-Oleum as well.
Polycuramine is a newly trademarked product that was developed the previous year by Citadel and found its way into the RockSolid lineup. It’s a proprietary blend that is alleged to combine the best benefits of Polyurea, Polyurethane, and Epoxy.
The following is a quote from a RockSolid sales page:
RockSolid Polycuramine™ is the best of Polyurea, Urethane, and Epoxy chemistries. It combines these three chemistries and their key attributes into ONE indestructible, self-leveling, flexible, fast curing, high gloss coating system.
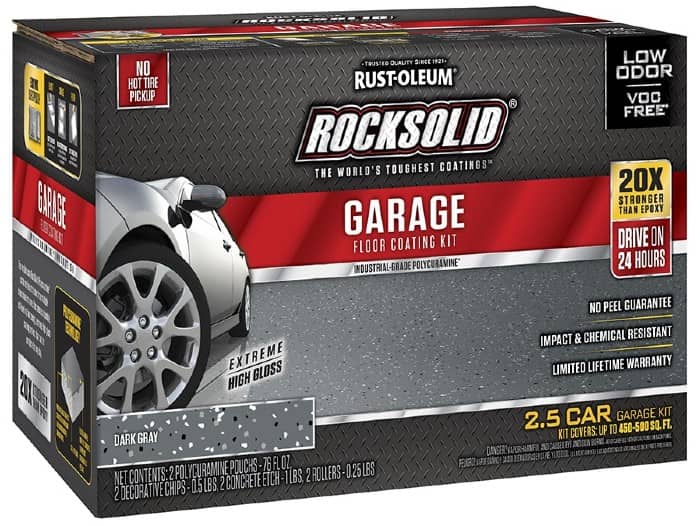
RockSolid states that its Polycuramine garage floor coating is 20 times stronger than epoxy paint. It has a 96% solids content, a high gloss finish, and is impervious to all chemicals. The coating can be installed in one day, walked on in 8 – 10 hours, and driven on within 24 hours.
It also has the added advantage of an installation temperature range of 40°F – 90°F. In addition, RockSolid has a low VOC content with minimal odor and a limited lifetime warranty as well.
Each Polycuramine Garage Floor Coating kit consists of one burst pouch of colored Polycuramine to cover up to 250 ft². Included are decorative color flakes, the required foam roller, concrete etch solution, and of course instructions. There are six colors to choose from as well – Black, Dark Grey, Grey, Tan, Mocha, and Modern Griege.
You can view their information page and color chart here.
Our evaluation of RockSolid Polycuramine Garage Floor Coating
We feel that this new lineup for RockSolid couldn’t have come at a better time. Though the Polyurea garage coat kit that it replaced was a fairly good product, many of the reviews for it by the average DIY installer were less than great.
There are many benefits to a polyurea garage floor coating, but the pitfalls for the old RockSolid polyurea DIY coating was is in the installation. As a result, there were numerous complaints about delamination and finish issues.
Many if not most of these issues were due in part to the limited application time available. Polyurea cures fairly quickly. If it wasn’t applied in 20 to 30 minutes, it would begin to thicken up and problems ensued. It just wasn’t that DIY-friendly.
For example, it would not have enough time to seep into the pores of dense concrete that was prepped by etching and not by grinding. This led to delamination issues of the coating. Secondly, if you didn’t get the product down fast enough, the finish would not be very glossy and could get bumpy or lose its smooth texture among other issues.
After doing a bit of research, we learned that these problems should be solved with the new RockSolid Polycuramine coating.
First, we called the Rust-Oleum tech line. They stated that the new RockSolid Polycuramine formula has superior wetting characteristics (similar to epoxy). As a result, it allows the coating to penetrate the concrete much better for superior adhesion. This is a big help for concrete that is etched instead of prepped by grinding.
In addition, we learned that you have 45 minutes to one hour to apply the Polycuramine. This should be more than enough time to apply up to 250 ft² of product. The longer pot life should alleviate many of the finish issues that resulted from the short installation window of before.
However, we do have to question some of RockSolid’s marketing methods. They claim that their new Polycuramine formulation is 20 times stronger than epoxy paint. Really? Their older polyurea product claimed it was only 4 times stronger.
Try as we might, we could not find an actual 2-part epoxy floor coating with only a 33% solids content as RockSolid compares it to. After digging a bit deeper, we discovered that what they are comparing it to is paint – 1 part epoxy paint that is (link). That is like comparing apples to oranges.
1-part epoxy paint is not an epoxy coating and the only product available with such a low solids content. We feel that this is misleading if not deceiving. They should be comparing it to a true 2-part epoxy. It’s tactics like this that create ruined expectations of garage floor coatings.
They also claim that the new Polycuramine blend combines the best of Polyurea, Polyurethane, and Epoxy. That isn’t necessarily true either. History has shown time and again for sealers and coatings that by combining the best of everything you will not get the best attributes of each ingredient.
Polyurethane for example is known for being very resistant to chemicals, has high abrasion resistance, and is U.V. stable. Though RockSolid Polycuramine has good chemical resistance, it is not U.V. stable and can yellow if exposed to direct sunlight for lengths of time – just as epoxy does.
It’s also not nearly as resistant to abrasion as most polyurethane or polyurea coatings. For example, the abrasion rate for Polycuramine is 40 mg. That’s about equivalent to a high solids epoxy and better than the inexpensive epoxy garage kits. However, a typical abrasion rating for polyurea is approximately 8 – 12 mg. You can find the RockSolid datasheets here.
This means that a polyurea coating would last much longer or wear many times slower than Polycuramine. We suggest reviewing how to read datasheets for coatings to learn more.
Another concern is that RockSolid Polycuramine is a thin coating. It has a dry film thickness of only 3 mils. That’s about half as thick as a typical polyurea coating. A high solids epoxy is approximately 8 – 10 mils thick for a DIY kit. Our guess is they need the coating to be thinner to get the coverage rate they require to keep the price point competitive.
As a result of the thin mil color coat, we recommend a second coat of clear Polycuramine to provide for an overall thicker coating. This will protect the color coat, and provide a deeper glossy look.
Would we recommend RockSolid Polycuramine?
With all that said, initial responses from consumers have been positive. Reports are that the new RockSolid Polycuramine garage coating formula is easier to apply DIY than the previous polyurea formula.
Few issues about the finish have been raised so far that we are aware of. In fact, it’s one of the most glossy coatings you can apply. Plus, the added benefit of being able to apply it in a wider range of temperature extremes is something you cannot do with epoxy garage floor coatings.
One nice advantage to the Polycuramine garage coat that we failed to mention is that it has a 7-day recoat window. This means that you can wait up to 7 days to apply another coat to the floor without having to prep it first. All that is required is to make sure it is clean.
This can be a great advantage to the average DIY installer who may only have a limited time to work on their floor. Most coating products have a recoat window of 24 hours or less.
Though the new RockSolid Polycuramine Garage Coat is only 3 mils thick, we feel this formulation is superior to that of comparable DIY coatings such as Rust-Oleum’s 2-part EpoxyShield product, Quikrete Epoxy garage floor coatings, or Valspar Epoxy Coatings as an example.
Yes, RockSolid Polycuramine is more expensive than these traditional DIY garage coat kits. However, the warranty is much better. Plus, it fills a void for the consumer who wants a quality DIY product that is easy to apply but may be intimidated by the cost and application of the thicker and more expensive multi-coat garage floor coatings.
RockSolid also has an easy-to-apply metallic garage floor coating which is now gaining some attention. It goes down twice as thick and has a very nice appearance.
This post may contain affiliate links. If you use these links to make a purchase, we may earn a small commission. As an Amazon Associate, All Garage Floors earns from qualifying purchases. You can read our full disclaimer here.
Where to purchase RockSolid Polycuramine products
We’ve had to update this section on multiple occasions since we first posted this article in early 2014. Rust-Oleum has since expanded the distribution of RockSolid and it is now available from most home improvement centers and online.

If you don’t have one of these stores near you, we suggest purchasing RockSolid Garage Floor Coatings here at Amazon. We have found that on many occasions it is available at a cheaper price.
In addition, you can find the optional RockSolid Clear Coat here.
Final thoughts
It’s too soon to know if RockSolid Polycuramine is the DIY wave of the future in garage floor coatings. However, it does appear to have much better performance and wear than the traditional DIY epoxy garage floor kits found at your local home improvement centers and auto stores.
Reviews so far have been positive and you can bet we will be keeping a close eye on the developments of this new product.
———- 2023 UPDATE ———-
It’s been over 8 years now since we first evaluated and wrote about the new RockSolid Polycuramine garage floor coating. To date, we have heard very few issues relating to the actual performance of the coating in terms of adhesion, hot tire pickup, and wear.
This is a strong indicator that it performs and lasts longer than the traditional low solids DIY garage floor coating kits such as EpoxyShield.
However, we have found that there is one primary flaw with RockSolid. Simply put, RockSolid does not provide enough coating material for the coverage rates they list. And this creates a couple of irritating issues that people are not happy about. The first is color uniformity and finish.
If you scroll down you will see that we have well over 900 comments for this article. A good percentage of these are questions or complaints regarding cosmetic problems with single-color coat applications.
These people have been reporting patchy areas or sections of the coating that appear less glossy and/or slightly different in color. Some have also complained about small spider cracks showing through.
The source of these issues is due to the coating being too thin in those areas. As with all coatings, if a single coat application on bare concrete is too thin, the appearance of the coating will not be good. The color tone and finish will change and lose gloss. It can even look slightly transparent with the concrete color showing through.
There is a reason why this happens with RockSolid.
As we originally stated, Polycuramine penetrates properly prepared concrete well – as it should. In addition, the density and porosity of a concrete slab can vary. This means that some areas of the concrete will absorb more coating than others. This is normal.
When RockSolid Polycuramine is applied to slabs that are less dense and/or more porous in areas, the limited amount of material (90 oz) provided in one burst pouch mix does not provide enough thickness at the recommended coverage rates to counteract the additional penetration and absorption of the material. As a result, the coating is too thin in those areas after it cures.
This isn’t necessarily a bad thing in terms of performance. You achieve a very good bond when the concrete absorbs the coating. However, this means you need to purchase and apply a second color coat to achieve the rich color, glossy finish, and durability that it should have. The first coat essentially acts as a primer coat.
The reason spider cracks tend to show through is due to the good penetration qualities of Polycuramine. It allows the thin cracks to absorb more material as it cures. As a result, the cracks show through and look dark. This can be avoided by properly filling spider cracks in the concrete (link) beforehand or by the application of a second coat.
The 250 ft² maximum coverage rate is only possible under ideal conditions consisting of newer concrete that is smooth, consistently dense throughout, and with no cosmetic defects. It can be obtained, however, when being applied as a second coat or over a previously coated floor that will not absorb the Polycuramine.
If you purchase RockSolid, we recommend a maximum coverage rate of no more than 200 ft² when applied to bare concrete. Slightly less is preferable. This should help provide for a thicker application. When it cures, it should be thick enough to provide a consistent color and glossy finish.
If you prep your garage floor concrete via grinding, then you will require a minimum of two color coats – period. The first acts as the primer coat and the second provides the required thickness to obtain the proper color and gloss.
There is something else to be aware of as well. RockSolid Clear Coat states that a single-car kit can be applied over the color coat of a 2.5-car kit – up to 500 ft². This makes the clear coat especially thin. Though consumers like the way the clear coat performs and looks, the number one complaint is that you need to use more than what Rust-Oleum RockSolid recommends.
The second big issue with RockSolid Polycuramine garage floor coatings is that it is more expensive than epoxy, particularly for what you get. And this is why we believe that Rust-Oleum RockSolid recommends the overly generous coverage rates. We are guessing that this was a decision that was made to try and keep the cost down to compete against epoxy kits.
To make things worse, Polycuramine has become even more expensive in the past few years. At the time of this update, you can purchase a much better commercial-quality single-part polyurea floor coating with the same coverage rates for less money.
These polyurea coatings are almost twice as thick as RockSolid. They have a very long pot life for easy application, they are U.V. stable, and have far superior abrasion ratings. Here is an example of a single color coat of AWF Polyurea that costs less for the same coverage.
The one consideration with these commercial quality polyurea coatings is that they are not low VOC coatings as RockSolid is. They should only be applied in a garage or similar environment and not inside a home such as a basement.
Our goal with this update is not to talk you out of purchasing a RockSolid Garage Floor Coating kit. However, what we are trying to do is inform and educate you about the issues you need to be aware of before making that decision.
Do we still think RockSolid is a good-performing DIY garage floor coating? Yes – if you follow our recommendations about coverage rates. However, there are now better performing easy-to-apply commercial-quality polyurea coatings that can be purchased for similar pricing.
Thanks for a great resource! We’re considering using this product in a church bathroom remodel and have some questions:
1-There’s a 30 year old tile floor there that is mortared down that will be removed. What is the best way to prep this floor? How do we address any chips or cracks we may discover under the tile?
2-Should we expect needing multiple coats?
3-concerned with a slippery-when-wet result which I’ve experienced with other epoxy floors even with the mild texture of color chips. How do we best avoid slippery-when wet?
Thanks for your help!
Hello Paul. If you are removing mortared tile then you will need to grind the surface in order to create the correct profile and to remove any remaining mortar on the surface. You can review how to repair cracks here.
We recommend two coats of RockSolid since you will need to grind the concrete. The first coat will act as a primer coat and penetrate into the concrete. It may look blotchy, but that is normal for a primer coat. The second coat will provide better color uniformity and a much nicer look. If you are concerned with it being slippery when wet, we recommend applying an anti-slip additive into the final coat to provide a non-slip surface.
Thank you for the helpful feedback. A follow up regarding the color chips, is it best practice to clear coat over the color chips to keep them sealed, bonded and clean long term or am I worrying about nothing?
A clear coat does just exactly as you say Paul. If you don’t clear coat you will lose some chips from sweeping, traffic and etc, but it’s not that bad. Mopping is not as efficient since the chips act as an obstruction depending, but again, it’s not too bad if you don’t have a lot.
This article was very helpful, but only have one concern, I am from Wisconsin and wondering how this holds up against road salt. I have heard in the past that the salt will eat away epoxy products causing them to chip. Just wondering if anyone has had this issue with this product or has it held up in salt conditions. Thanks for any insight.
Hello Nick. Though RockSolid does well for the average garage floor, it would not be our first choice for your conditions. There are a couple reasons for this. The first is that it goes down fairly thin. We would recommend two coats for the best protection of your concrete, providing that it’s in good shape to begin with. The second reason is that though it will seal the concrete, the glossy finish is not going to hold up very well to the chemicals from the road salts.
For your situation we would recommend a high solids or 100% solids epoxy coating with a high performance polyurethane or polyurea top coat. Unless you have a fairly new floor, most concrete that has been through a few winters in your area has developed a rougher surface texture and/or some mild pitting or imperfections. A high solids epoxy does a better job at filling these irregularities. The high performance clear polyurethane or polyurea also has much better chemical resistance than even the best epoxies and will stand up to numerous winters. This product by Roll On Rock is one of many examples of a higher performance system that would do a much better for the job.
This looks like a good product, its a little more expensive per sq ft but if im going to do anything I dont want to spend a lot of money just for it not to last, it seems with these garage floor coatings you get what you pay for, just like alot of things. I am building a new garage so it will have a new floor so I wont have to worry about it being damaged
Shea – I have the same concerns that Nick does. I have a few questions for you:
1.) I live in upstate NY and also have to deal with road salt in my garage. If I were to apply two coats of Rock Solid along with a clear coat do you think that I will be alright?
2.) When it comes to spreading the decorative chips – should I spread them with each coat or wait until I apply the second coat?
Thank you – your website is awesome and I am so glad that I founf it!
Hello Tony. For what it would cost to apply a total of three coats of RockSolid, you could install a commercial quality coating instead that will stand up to the road salts and harsh winters much better. RockSolid can be good choice for those who live in milder climates, but it may not be the best for where you live. We recommend that you contact ArmorPoxy and tell them we sent you. They are located in New Jersey and are very experienced with supplying proper coatings for your conditions. They can recommend a DIY system for you that would meet your needs and would most likely cost the same if not less. Tell them your requirements and what your budget is. Their customer service is good and you will find out that talking with an experienced vendor is extremely helpful.
Regarding color flakes, you always apply them immediately into your last color coat. Ideally you then lock them in with a high performance clear top coat.
Thank you Shea. One last question. I have about 4 inches of concrete that stick our past my garage door. Is that typically coated as well?
It depends Tony. Some coatings such as RockSolid will amber when exposed to the U.V. light outdoors. Any coating with epoxy will do that. After a few months or so you will notice the small strip outside looking more yellow than the rest of the floor. Some don’t like that and terminate the coating at the door and some don’t mind so much and carry it out. Other coatings such as polyurethane and polyurea do not amber and tend to do much better if exposed outside the garage door.
Used the clear coat on a colored concrete garage floor. Had some construction work in the house and when they were in the garage they dragged some equipment across the floor leaving scratches.
How can we repair the scratches?
Garage is 40’x50′ and do not want to grind and refinish the whole floor. Is it possible to re-coat the scratches?
thanks
You can repair the scratches in the clear Ed, but you will unfortunately need to purchase an entire kit to do so. RockSolid does not offer small samples or kits for repair work. The other issue is that the repair doesn’t blend in like a paint on a wall, however, you can make it less noticeable.
There are a couple of ways to tackle it. If it’s a general area, it’s best to sand out the scratches and surrounding area with 100 grit sandpaper. All you are doing here is deglossing the finish and taking any rough edges out from the scratches. Next you will need some MEK and a small 2″ chip brush handy. First mix up the RockSolid and then quickly brush the borders of the sanded area with some MEK. This will soften the edges a little bit and help to blend the new coat with the old. Once you brush the border with MEK, go ahead and apply the coating while trying to stay within the borders. If it’s just a few individual scratches, then you can treat each scratch in a similar fashion. Sand out the rough edge of the scratch, lightly brush on some MEK, and then use another brush to fill the scratch.
This all good information but it seems to focus more on the non-metallic version of this product. I bought the silver bullet metallic I was debating on renting a surface grinder, I’m glad I read this first. My floor has a good amount of oils but is pretty smooth. Iv purchase concrete degreaser in addition to the etching kit that comes in the kit. My question is: you’ve mentioned people are having coverage issues after grinding, would degreaser be enough to actually remove the oil and the etch be enough to sufficiently prep the surface? I use my garage as a work shop for motorcycles almost to the point of it being a second job, are these floors going to be durable enough? A aquaintance of mine that does concrete floors for a living has offered me access to his accounts to buy supplies, should I return this stuff and go for something more industrial?
Thanks!
-Murph
Hello Clinton. We actually have a link in this article that takes you to an article we did about a year ago on RockSolid Metallic. We just updated it recently with a one year review of a Silver Bullet coating that was installed by a reader. You can find it here. Regarding your question, if you can get the oil cleaned up then acid etching will be sufficient. If you are having a tough time with the oil stains, you may need to grind in order to attack those stains better.
In terms of durability, if you are using your garage as a busy workshop then this coating may not be the best choice for you – especially a metallic. The reason for this that metallics are extremely glossy and will show every little scratch it acquires. Though RockSolid is durable enough for most residential garages, we would recommend something more robust for your line of work. Nohr-S by Legacy Industrial, Roll On Rock by Versatile Building Products, EpoxyMaster, or Rust Bullet are all examples of more commercial strength coatings.
Hi – read every article and comment here before going ahead today with Rocksolid. Acid wash went well, and I decided before proceeding to get their fast repair kit and fill every hairline crack as I wanted it to look schmick.
As I applied the first half of the garage I realised that there were super fine cracks I didn’t even see when filling the other ones. It is 10 months since the slab went down and had hardly any cars parks on it. The fine cracks now look like massive black cracks that actually have almost repelled the product? The floor looks awesome (with exception to my sporadic decorative chip throwing – whatever). Any ideas why the cracks would come up looking so bad – especially as I never saw them prior? I am now seriously considering sanding/filling them and recoating again (probably at the expense of taking back the clear coat I also bought) so it looks significantly better.
Thoughts? Move on and accept that floors can’t be perfect? Or with what is going on with the cracks it will just repeat if I clear coat it and it will be an issue at some point?
Hello Leighton, we aren’t sure what you mean by massive black cracks. Cracks can’t get bigger from applying a coating. Also, did the coating change color where the cracks are? If so, it sounds like contamination from something in the cracks. It would help if you could send us a few pictures, preferably one close up. Our email is info@allgaragefloors.com.
Thanks Shea. Email sent.
Yes, I meant it has just emphasized the cracks, not actually made them larger!
I just completed my garage floor using the Rustoleum Rocksolid product in gray. I must say, the finished product was AMAZING !!! MY house is 50 years old, and IDK how many coats of old paint. It’s a 1 car garage and I sandblasted it to almost bare concrete. I bought the 1 car box and I barely finished half the garage. I bought another box to finish it and I wasn’t happy with end result. I called Rustoleum and Kevin Krause was the best. He said he would send me 2 more boxes so I could recoat it or mail me a full refund. After recoating the whole floor it’s like a showroom garage. Rustoleum impressed me and they stood behind their product and reputation
That’s great to hear Chuck. We have to hand it to Rust-Oleum, we have heard many great testements to their customer service. We are happy you like the way your floor looks!
Hi there
We just finished painting the garage floor a week ago and today was a rainy day as the car went in and out so the floor went wet .. the only thing is its way too slippery .. we already used 2 boxes on the floor and it feels so dangers to walk in the garage whIle a bit wet… what can we do?
Hello Nora. Yes, epoxy can be slippery when wet – especially a brand new floor with a glossy finish. You have two options. The first is to just wait it out for a couple of months and see if it gets better enough for you. A new floor will start to develop microscopic scratches and texture from natural wear and abrasion. This tends to improve the grip when wet, but it’s still far from being non-slip. The second option would be to apply a clear coat with an anti-slip additive mixed in. It will take some of the gloss out of the floor but it will much more manageable when wet. If you go this route you will need to degloss the surface first with 100 grit sandpaper before applying the clear.
We have a toy hauler and want to paint the floor. It needs to be anti-skid. We haul motorcycles and a golf cart. What is the best recommendation?
Also, the toy hauler is our living quarters after toys are unloaded. Need to make sure what we use is non-toxic.
One popular option that people have been using for their trailer floors Sylvia, is the roll on or brushable bed liner products. They are tough and provide a good non-skid surface. This here is an example from Amazon.
Just finished my shop 1080 sq ft. It took 4 2 1/2 kits. That’s 135 sq ft per pouch.
Thanks for the info Kelly. It sounds like quite a bit of product was lost to penetration into the substrate (actually a good thing). How did you prep the surface?
I just finished my 1600 sq ft hanger which took 19 single kits. Looked great until the next morning when it was cured out. Its a real mess with dime sized bubbles everywhere. It even appears the silver worked its way to the surface and created rough spots everywhere. I was careful not to bring the mixer to the top of the mixing bucket as i read somewhere this will create bubbles in the finish. So now with over 2500.00 invested im considering sanding it off if possible and going with the two part epoxy which ive had luck with in the past.
Any suggestions?
Yikes Mike, that’s a lot of square footage to have coating troubles with. Based on the square footage, number of kits, silver working its way to the surface and mixing in a bucket, we are assuming it was the RockSolid Metallic kits that you were using. Even if you did introduce air into some of the kits you mixed, you would not have bubbles everywhere. Did you prep the surface by etching? The reason we ask is that is sounds like you may have had a problem with outgassing. This occurs when water vapor escaping from within the concrete gets trapped by the coating as it cures. It can result in bubbles and/or craters (popped bubbles) in the coating. If your floor did not have ample time to dry, this could be the issue. Thin coatings sometimes can avoid this since the air bubble can escape. However, the thicker metallic coating will tend to hold the air much more.
The best way to tackle the problem is to sand the surface. A floor maintainer with an 80 grit sanding screen works well. This will degloss the surface and provide texture for a new coating to mechanically bond. Since outgassing is now physically blocked by the current coating, any coatings subsequently applied will not have this issue. We also recommend giving Rust-Oleum customer service a call and tell them about your problem. They helped customers in the past with discounts, free kits, and etc.
I have applied a number of coats of two part epoxy on my existing garage floor. What prep work would be required before applying the RockSolid Metallic coating on top of the epoxy coating>?
We have an article on that right here Ted. It requires sanding the old epoxy to create a mechanical bond for the new coating.
I did everything according to the directions when applying rustoleum rock solid clearcoat polycuramine and the next day (yesterday) and now brush marks are everywhere. How do I get rid of the brush marks.? Will a second coat self level so that they are eliminated?
Did you use a paint brush in these areas or the supplied foam roller John? Assuming your concrete is not a broom finish, did you try to touch up areas with a paint brush after the coating was applied? Or, did you re-roll these areas sometime after the coating was first applied?
If the coating has ridges left by the brush marks then you will need to sand those down first. If there are not ridges, then a second coat can be applied
over the first coat and should cover them up. RockSolid gives you up to 7 days to recoat before needing additional floor prep.
Great article. I’m leaning to the Rocksolid over the Epoxy Shield. Question: when you say multiple coats, you mean the Rocksolid product, followed by the clear coat to seal in the gloss and the chips? Also, if knowingly applying a second coat, should the chips not be sprinkled until the second coat?
Yes Saul, the RockSolid coverage rates are not very accurate. Unless you have fairly smooth concrete, most people who have reported back prefer the results of two color coats for best color uniformity. Apply the color flakes to the last color coat and then lock them in with a clear coat for the best results.
Just installed on a 45SqFt garage and it took three 2.5 garage kits to get coverage. This product suffers from severe false advertising. Also the color between kits is not very consistent so make sure to separate each of the part A’s and part B’s and mix before hand if you want the colors to match. Very poor quality control when it comes to the colors.
You are correct Nathan. Rust-Oleum has had issues with that. We have found though that Rust-Oleum has been doing a fairly good job of working with people who have had the color issues. If you are not happy with the way it turned out give their customer service line a call and they may send you more product.
Is it possible to use this product over indoor tile? I have a very old bathroom with small tiles embedded in concrete. The floor has some very large cracks.
No, it’s not a very thick coating for that Mary.
Thanks! One more question; with the second coat, will a clear top coat be needed to ensure gloss? $200 from the $98 standard epoxy shield is double the cost; so before I spend additional money, unless needed, I’m wondering about a top coat clear finish! Please and thank you!
What the clear coat does Saul is lock in the color flakes and protect the color coat. It won’t change the gloss much. It’s not required, but it is recommended for a variety of reasons if it’s in the budget. This article here explains why.
Thank you so much! I’m going to lay in the clear coat this week end! I opted for the Expoxy Shield and it seems great-lesson learned: I rolled the first bag too conservatively and ended up only exhausting 1 and 1/4 of the 2 bags provided. The last quadrant I rolled thick and while not noticeable to the naked eye, I can tell. Looks great overall!
Glad to hear Saul!
I used this product over Memorial day weekend. 2 car garage. The first bag cracked and the color is inconsistent. It also has some areas that did not dry properly, and the coloration is inconsistent.The second bag looks fine. Same method on both bags, following all instructions. Also, you can see the color difference where I started using bag #2. Is there any way to fix this floor? Tried calling Rustoleum’s customer service and they say they are closed in the middle of the day on Thursday… Any help would be great!
Well the good news is that you have 7 days to work on fixing the issue before you have to rough up the surface Brian. We suggest giving them a call again and explain the situation. Rust-Oleum has been fairly good about taking care of customer issues like yours from most reports that get back to us. If your floor needs two kits to cover the surface, there is a way to assure consistent color for the entire surface. What you need to do is purchase a couple measure mix buckets similar to this one. You then will need to cut off a corner of each kit that contains the colored resin and pour them into one bucket and mix it together with a paint stick. This will insure that the color between the two will be the same. Next, cut a corner off the hardener side of one kit and pour it into the other bucket and then pour half of the colored resin into that bucket. You will need to it with a paint stick the same amount of time that is required if they were in the pouch and then apply it to the floor. When you are ready for the next kit, cut off the corner of the hardener from the second kit and pour it into the remaining colored resin from the first bucket and mix accordingly. Do not reuse a bucket. This process is how a standard commercial coating is applied to assure color uniformity.
Hi Shea.I had some questions I was hoping that you could help with.I plan on revamping my garage floor soon and am stuck between products.After reading reviews I was set on Rust bullet because of the rave reviews and the generally low cost but have recently changed my mind because of the worry of the strong odor and having small children in the house.I really dont want to use an epoxy paint because of obvious issues and durability. Cost is an issue but I also dont want to do a job multiple times or have to refinish a floor again in the near future.Ive been contemplating going with Rock solid but Im concerned with the mixed reviews and lack of coverage/appearance.I have a 20×20 2 car garage thats 20 years old.The concrete is in fair shape with definitely no sealer because when I mop the water virtually disappears.There are some acid,oil/grease and gas stains but nothing overwhelming.So what Im wondering is if i prep the floor well, scrub with dawn and degreasers, powerwash a couple times and even rough up the oily areas with a pole sander would I have to use the citric etcher? Im not fond of using it plus I know a lot of the coverage issues have been because of how porous the concrete is and I know my floor is really porous.Ultimately I dont want to have to buy multiple kits and spend hundreds to make sure the floor is entirely covered.Also is there anything else to do to DryLok to aid in the durability? Any other tips Aside from putting a mat down where cars may travel? Thanks!
Hello Sean. 1-part epoxy paint is not going to last for years no matter which product you choose. If you don’t want to be repainting every couple years or so, then we don’t recommend it. Rust Bullet is an excellent product, but it does have one of the strongest smells due to the solvents evaporating while it cures. If you don’t want to deal with the initial strong smell, then that is out as well. In terms of RockSolid, you will most likely need two coats based on the description of your floor. Citric acid etches are fairly safe. Most of the big name companies that produce the epoxy kits that are purchased at home improvement centers like to use it. The reason is that it’s just strong enough to produce the results required for their kits and it’s eco friendly at the same time which helps to prevent law suits from user misuse. What do you want the coating to do for you? Do you just want a color coat and no clear top coat?
Hi Shea ,thank you for the response. Essentially I just want a clean finished surface to prevent dust and can be cleaned easily. Something that looks better and is more functional than what’s there now. There will not be a lot of traffic on the floor, only one car. I also will not be working on equipment or cars in there, it will mainly be storage. Thats kind of my dilemma and what I’m.worried about. If I have to do 2 coats of rock solid for the floor then I’ll probably be looking at $400 plus a good amount of prep work obviously. Thats not exactly a lower cost option. As far as the rust bullet goes, I really think this would be the best option for me cost and prep wise. Since youre very familiar with the product exactly how strong is the initial smell? I’ve read reviews where people said they could smell it upstairs in their bedroom. I have 2 garage doors and 2 windows in the garage would the smell still linger alot after it’s cured or dried? My concern as previously mentioned is the house ending up stinking with nowhere to go. Thanks Shea!!
Though Rust Bullet is a very durable coating, it has a very strong initial smell Sean. A respirator is recommended if working in a semi enclosed space. Regardless of that, have you read our article on Rust Bullet? I believe Rust Bullet will not fit in your budget since it’s a more expensive product and requires a minimum of two coats. Based on your requirements and budget, we would highly recommend that you consider the Rust-Oleum EpoxyShield Professional coating. Unlike the cheaper water based DIY epoxies, Rust-Oleum Professional is solvent based and much more durable. It doesn’t create near the odor of Rust Bullet as well. One coat should do the trick and the Professional series isn’t known as much for hot tire pickup like the cheaper water based versions. The price should fit your budget as well. You will need to etch your concrete. Just use Rust-Oleum’s eco friendly citric acid etch and you should be fine. Color uniformity is good as long as you don’t stretch it. Sometimes you can find it at home improvement centers, but you can easily purchase it online here from Amazon. There are plenty of reviews for it as well.
Thanks Shea.More recently I was considering the epoxy shield or epoxysheld professional.I definitely want the durability but was leaning toward the original epoxy shield because it is low voc and is a good price.I had originally ruled this out due to mixed reviews and videos but since reading your article on the unfair bad reviews and reading reviews from amazon and improvement centers my opinion was swayed a little.I think I will end up springing for the professional to try to get the best floor possible for the money.Thanks again Shea! Your website is unmatched and super informative.This has been a huge help.Keep up the good work!
You are welcome Sean.
Just finished applying RockSolid gray to my 4-car garage using two 2.5-car garage kits. It was just barely enough!
Parts of the garage look great. Parts don’t. Here are the issues:
1. Uneven tint
2. Rough spots
I see both batch-to-batch variation and user variation. My wife and I took turns rolling the paint. It appears that my coats are thinner. The rough spots are more severe in the lighter tint areas.
3. Cracks are really enhanced/highlighted. There’s a 1/16″ stripe on either side of the crack that is visually impacted. It looks similar to the other thin/rough spots. So perhaps the cracks sucked up more of the product. (My other theory is some kind of wetness issue since the cracks took longer to dry)
Is it ok to put on a 2nd coat if flakes are already down?
Yes, going down too thin is an issue with RockSolid Brad. If you can see the cracks then they should have been filled. Most likely the material was sucked down into the crack as you suspected. Your description is typical of that. Yes, you can put a second coat down over the color flakes. Once you toss more flakes on the coating you really won’t notice. Plus, the surface should look much more uniform with the second coat.
Thanks for the response Shea.
You know, we never really noticed the cracks before putting down the RockSolid. Now, I’m not sure whether to seal them between coats or leave them alone. I assume that the 2nd coat will hide them somewhat. If we go the sealing route, can you recommend a sealing product?
And do you have any guidance for how much product will be required for a 2nd coat? For our first coat, we covered 720 sq ft with two 2.5-car kits.
It depends on whether or not the coating actually filled most of the cracks Brad. If the coating is just thin in those areas and you can’t run your finger nail very far into the crack, then you should be fine. If you can stick a business card down into the crack then you may want to want to fill them. The dilemma with filling them now, however, is that the polycuramine is in the crack. You need to use an epoxy based crack filler, but it may or may not be compatible with the polycuramine. You would either have to test it first or to be safe, chase the crack to expose bare concrete and then fill them. After you fill the cracks you need to grind them smooth with the rest of the surface or the repairs will telegraph through the coating. The problem with that is you will be exposing patches of bare concrete again. Because RockSolid goes on thin, these areas may stand out with a slight color difference compared to the rest of the coating.
If you want to test a filler with the polycuramine, we recommend Simpson Strong Tie. It is a thinner viscosity and would be easier to fill small cracks. The home improvement centers only carry latex based fillers (which shrink) or flexible self-leveling fillers that are not sandable or paintable. The 2.5 car RockSolid kits cover 450-500 square feet so you have plenty with 2 kits for your garage. It will go on thicker since you will not be loosing product from penetration into the concrete. Keep your roller nice and wet to get a thicker and even coverage.
We decided to put on a 2nd coat without filling any cracks. We mixed Part A’s together from the various pouches and mixed up half batches. We also used some higher quality rollers instead of that cheap stuff that comes with the kits and falls apart. It looks immensely better. Uneven tint and rough spots are gone. Cracks look 80% improved. More flakes helps too! After the 2nd coat dried, we put on a clear coat. Again with half batches. It took three 2.5 car kits to do our 4 car garage.
This stuff really looks good in the end but it sure adds up.
I should also mention that i sent a help request to Rustoleum and they are going to refund the cost of the first coat!
Thanks for your help Shea!
Great to hear Brad! We are glad it came out looking nice in the end.
used your 2 car rock solid kit , 3 year old concrete, followed the directions. went down nice looked good, came back 2 hrs later and I have about 200 air bubbles or little bare pots all over. how do I fix this? thanks dennis.
Hello Dennis. Just so you are aware, we do not sell or manufacture RockSolid coatings, Rust-Oleum does. The bubbles are a result of outgassing. This happens when you don’t wait long enough for the concrete to completely dry before applying the coating. The water vapor within the concrete was still rising when you applied the RockSolid and got trapped under it. It formed the bubbles as it tried to make its way to the surface and escape. What you need to do is sand the surface with 80 grit sandpaper to smooth out all the ridges formed by the bubbles and then apply another coat.
I have the 2.5 stall kit. It looks like both sets of A&B pouches are identical but I thought one was first coat with color and the second was supposed to be clear coat. Am I missing something? Thanks
They are identical John. There is no clear coat in the kit. It takes two sets of A and B pouch bags to cover most 2.5 car garage floors. Each mixed pouch has a coverage rate of 225 – 250 square feet.
I applied Rocksolid Dark Gray and the color was inconsistent, with some patches of darker gray than others. How do I fix? Another coat?
Hi JJ. Yes, it will take another coat. Because RockSolid penetrates well and goes on thin to begin with, if you have areas of your concrete surface that are more porous than others or you tried to stretch the coverage rate, you get inconsistent color. A second coat will improve it immensely.
Can you lay over paint that won’t come up are prime first if I can’t get completely off
The general rule Robin is that a coating is only as good as what it is adhered to. If you apply it to a surface that has paint, the coating will only stay down as well as the paint does since the paint is adhered to the concrete. You can rough up the old paint and apply the coating to that if you want to take the risk that the paint will not peel up in the future.
Our new home is almost complete. We live in Florida and the garage will be 440 square feet. After reading all of the information on your website I am planning on doing the Eco etch to the brand new poured slab. Will that be sufficient? It is pretty smooth. I also wanted to ask if it’s ok to put down extra flakes for a full look? Then sweep and lightly scrape before following that up with the clear coat. And what is the recommended wait time before that clear coat?
Thanks so much
Randy
Actually Randy, RockSolid provides a concrete etcher and cleaner solution with their kits which will work fine. They are eco friendly as well. RockSolid is not a very thick coating so it’s not the best candidate for a full color flake application. We would suggest a higher solids epoxy for that. If you want a full flaked floor, we suggest that you contact Legacy Industrial and tell them what you want to do. They are located in Florida and provide a variety of high solids epoxy and high performance clear coats that would perform much better than RockSolid would for what you want to do. Their shipping is free as well. If you still want to use RockSolid, you can apply more flakes than usual, but don’t do a full flake as they will not hold well in the thin coating. You can apply the clear coat about 10 hours after the color coat. Unlike most other coatings that only have a 24 hour recoat window, RockSolid will allow up to 7 days before a recoat.
Live in MN. Just sealed concrete with moisture barrier. I had some spots where moisture was coming up through concrete so it was recommended I use this commercial sealer prior to filling cracks/leveling floor and before the epoxy coats go on. I’m looking to use epoxy shield but after reading more about rock solid I think I’ll do that. So is it safe to fill with fast setting concrete for pitted areas etc and then apply floor kit? I’d need a 2.5 car sized kit. Any advice would be helpful. Thanks!
Hello Derek. What product did you seal the concrete with? Most coatings cannot be applied with a sealer on the surface. The coating has to penetrate into the concrete in order to bond. If there is a sealer on the surface, the coating will peel right up.
Brand is “sealbest” concrete sealer from Menards. Was told it would work if I put a coat of it down and then was going to mix fast set concrete to fill pits/cracks/holes and then out down epoxy kit.
Ugh… This is it here, correct? We’re sorry, but who ever told you that was giving out the wrong information Derek. That’s the problem with home improvement centers and hardware stores when it comes to concrete coatings. What you applied is an acrylic film forming topical sealer. The issue is that the product did just as it stated. It sealed the surface with a film forming coating. This inhibits repair materials and coatings from penetrating the concrete surface in order to form a mechanical bond. One of the first statements you will find in most instruction sheets for coatings is to check for a sealer first. If a sealer is present, it must be removed via mechanical means. In order to do any repair work or apply any type of coating, you will need to remove the acrylic sealer first. Grinding is the best (and fastest) method. There are chemical strippers, but they are messy and more labor intensive.
If you have moisture issues, coatings are not always going to work. What should have been done is to apply a densifier (without sealer added) first and then moisture test. Densifiers are penetrating sealers that are not film forming. Providing it solved the moisture issue, you would then grind the surface, make your repairs, and then install a coating.
just got back from Menards. I told the same lady that helped me (told me wrong info) that if I buy the rocksolid kit and do the etching (included in kit) it will eat at the sealer I put down and the rinse and let it dry- then I will add my concrete to level and fill cracks/pitting…. THEN rocksolid kit. right?? where do I get the densifier?
No, the etching solution will not eat the sealer Derek. It’s just a citric based etcher and cleaning solution. Even a muriatic acid etch will not remove the coating. It may discolor it or possibly soften it a little, but it will not eat through or dissolve it. Acids need to come in contact with bare concrete (not sealed) in order to work. They react with the free lime at the surface. When an etch is applied to concrete with a sealer it will just sit at the surface and do nothing. The only thing that will remove the acrylic sealer is a chemical stripper for paint and/or acrylic coatings or by grinding. Removing the sealer by grinding will prep the concrete for the coating at the same time.
Instead of using a densifier, RockSolid does have a product called Moisture Stop that is compatible with their coatings. You would apply it to the concrete after it has been properly prepped for the repairs and the coating. You would do your repairs and apply the coating after the Moisture Stop.