
Garage floor coatings are one of the most durable, stain-resistant, and easy-to-clean decorative finishes available for garage floors and workshops today. They will protect the floor from the elements, instantly transforming your dull or ugly concrete surface into a professional-looking floor that combines beauty and functionality.
And since the garage has evolved beyond just a parking space, the benefits of concrete coatings have made them one of the most popular DIY garage flooring options today.
As a result, we will briefly explain what a garage floor coating really is. We will discuss the features, benefits, and how it is applied. More importantly, we will list the available coating options for DIY application, along with the pros and cons of each.
Additionally, we will provide excellent examples of where you can purchase quality coatings and DIY coating kits that we have reviewed and can recommend.
This article was updated in March of 2026 to reflect the most current trends and coating technology
What is A garage floor Coating?
A garage floor coating is a viscous thermosetting polymer resin that chemically crosslinks as it cures, creating a hard, durable, and chemically resistant wear surface. Epoxy, polyurethane, polyurea, and polyaspartic are the most common concrete coatings.
A catalyst activates the exothermic (releases heat) crosslinking reaction. For 2-part coatings, such as epoxy, the part-A resin/pigment is mixed with the part-B hardener, which serves as the catalyst. Moisture and/or oxygen in the air act as catalysts for single-part coatings.
Visit our Garage Flooring Gallery to view the various garage floor coating options.
Shop our collection of Pro-Quality Coatings from Top Vendors
Benefits of Garage Floor Coatings
Commonly used for both residential and commercial applications, a high-quality coating or coating system will protect the concrete from oil and related automotive fluids, stains, chemicals, spills, and other substances vehicles may track into the garage.
In addition, they seal the concrete to prevent liquids, deicing fluids, and road salts from penetrating the surface and causing damage.
Most notably, coatings are very easy to clean and to keep looking clean.
Commercial-grade coatings receive high reviews from home mechanics and hobbyists. They are popular in automotive and workshop environments where rolling floor jacks, jack stands, rolling toolboxes, and other mechanical equipment are used.
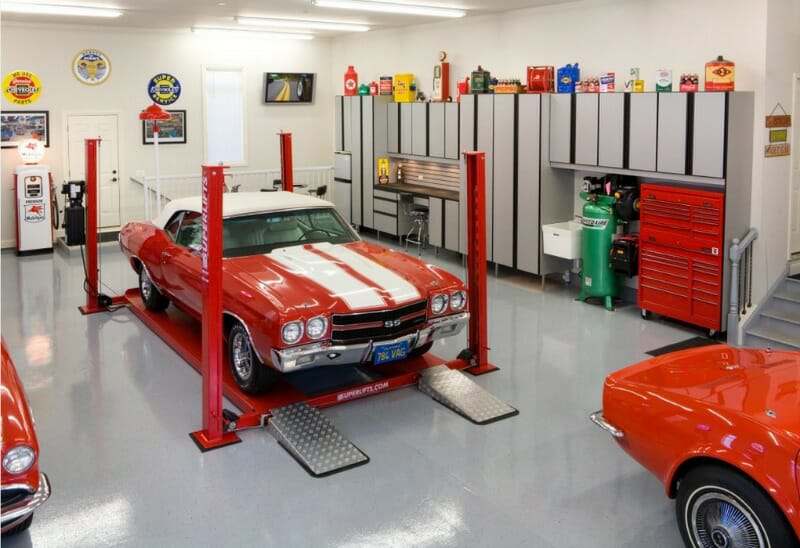
Furthermore, the high gloss and lighter colors of floor coatings reflect overhead and natural light. This results in a brighter work environment that makes more efficient use of available light.
Lastly, when applied to a properly prepared concrete surface, coatings can form a strong mechanical bond, making them highly resistant to peeling and hot tires. The overall result is a decorative, scratch-resistant surface that lasts for years.
Single Coat vs Multi-Coat Garage Floor Coatings
The most durable garage floor coatings are multiple-coat systems, and the industry standard for professional installers. They are also the most popular among DIY enthusiasts who want the best protection and value for their money.
These coating systems consist of a minimum base color coat, optional decorative color flakes, and a high-performance clear topcoat. The clear coat is essential for locking in the color flakes, protecting the color coat, and extending the coating’s life and durability.
Many times, these are hybrid coating systems. In other words, the base color may be a thick, high-build epoxy coat with a polyurethane, polyurea, or polyaspartic clear top coat.

Options may include an epoxy primer coat for highly porous concrete, high-solids epoxy base coats, or other coatings. They are also used as a primer color coat for very light (white) or very dark base coat colors to achieve proper color tone.
Lastly, some are specially formulated to provide moisture-vapor-barrier protection for concrete with moisture issues.
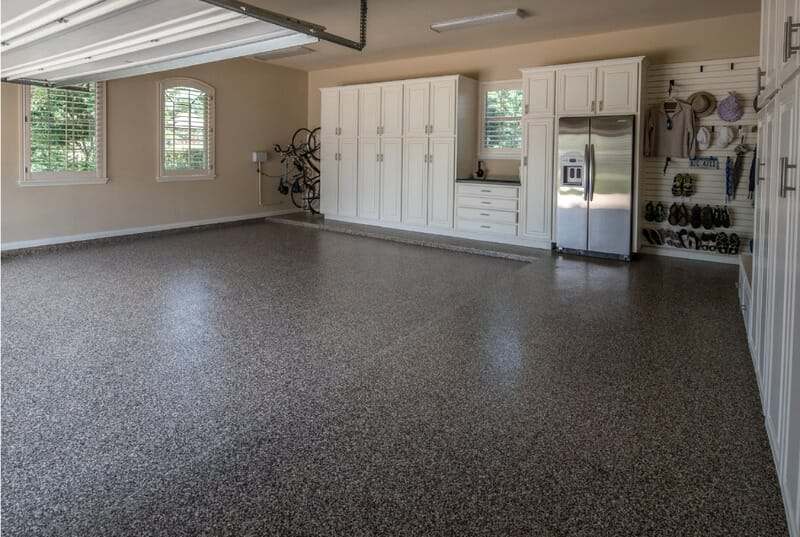
Tan, beige, and various shades of gray are the most common base coat colors because they hide dirt best. However, high-quality coatings offer a wider range of colors for the DIY installer to choose from.

Other options include metallics and custom color-flake blends that match your style, home, or even your favorite sports team.
A more budget-friendly option for the DIY installer is a single coat application. Examples include a single color coat or a high-performance clear coat that protects and highlights the character of bare concrete.
Single coat applications are not as durable as multi-coat applications. However, they are less expensive to install and still effectively protect and seal the concrete, including stain protection. High-quality single-coat applications will also provide longer wear than budget, store-bought options.
How Thick are Garage Floor Coatings?
The overall thickness of a garage floor coating varies and depends on many factors. These include the type of coating material used, the number of coats applied, and the choice between random or full color flake coverage.
A typical commercial-grade garage floor coating system averages 8-12 mils of dry film thickness. These coating systems typically include a base color coat, partial color flake coverage, and a single clear coat. A mil is 1/1000th of an inch. Standard copy paper averages 3 mils thick for reference.
A concrete coating system that consists of an epoxy primer coat, a high-solids epoxy base color coat, full color flake coverage, and the appropriate clear coats can average 15-25 mils or more in overall thickness.
In contrast, a lower-performing single-coat kit, such as EpoxyShield by Rust-Oleum, averages only 3 mils dry film thickness. You can expect an overall thickness of 4–4.5 mils when the optional EpoxyShield Clear Coat is applied.
Are Garage Floor Coatings Slippery?
Most floor coatings are not slippery when they are dry. However, epoxy and other coatings can become slippery when wet. Typically, the glossier a coating is, the slipperier it becomes when wet.
A heavy application of color flakes can add texture to a coating and reduce slipperiness, but it is not a substitute for a slip-resistant surface. An anti-slip media is typically mixed into the final coat to achieve a non-slip surface.
Are Coatings and Garage Floor Paint the Same?
Concrete garage floor paint and 1-part epoxy paint are not the same as thermosetting garage floor coatings and provide far less protection. They are thin, water-based acrylic polymer formulations containing pigments, binders, and additives.
When applied to concrete, they dry like paint on a wall. All will peel from hot tires, generally sooner rather than later. Furthermore, they are much less wear-resistant and are only available in a satin finish.
The primary reasons for their use in a garage environment include their low price point, ease of application, and deceptive marketing tactics that prey on the average consumer’s lack of knowledge about coatings.
Of the two, 1-part epoxy paint performs better and is worth the few extra dollars per gallon. It incorporates 2-4% epoxy ester resin as an additive to enhance durability over standard paint.
DIY Garage Floor Coating Options
The choice of concrete coating materials available for DIY application has expanded in the last decade. Epoxy is no longer the only player on the field.
Some are easier to apply than others, and each has its own benefits and drawbacks that you should be aware of.
Epoxy
Epoxy has been the most common garage floor coating material for decades. It is a 2-part coating consisting of part A, an epoxy resin, and part B, a hardener/catalyst. High-solids (>85%), commercial-grade epoxy is typically 8-10 mils dry film thickness.
High-solids to 100% solids epoxy has self-leveling properties, provides an excellent build coat, and is the best medium for receiving a full-color flake application.
Epoxy is popular for use in industrial applications, warehouses, garage floors, and workshops. Return-to-service times are longer due to slower cure rates. You can walk on it in 24 hours and drive on it in 72 hours.
Epoxy Pros
- Longer curing time allows for the best adhesion to concrete
- High solids epoxy (>85%) will not peel from hot tires
- Provides the thickest build coat at 8-12 mils DFT and greater.
- Self-leveling properties
- Good impact resistance
- Best at hiding surface repairs and concrete imperfections
- Best for receiving full broadcast color flake applications
- Offers the most color options
- Excellent chemical resistance
- Good wear resistance and stain resistance
Epoxy Cons
- Shorter working time of 25 – 55 minutes
- Limited application temperatures between 60° and 85°
- Not UV stable – develops a yellow tint with exposure to sunlight
- Does not flex, making it less resistant to cracking
- Longer cure and recoat requirements add to the overall installation time
- Has increased in cost over the years
Polyurethane
Polyurethane is a thin coating with an average DFT of 2-2.5 mils. It is available in single-part and 2- part (2K) formulations. With some exceptions, it is primarily used as a final clear or colored topcoat for other coatings, such as epoxy.
Before the advent of polyurea, polyurethanes’ UV stability and superior wear, stain, and scratch resistance made it the go-to high-performance top coat for epoxy on garage floors, workshops, and in industrial applications for many years.
Newer water-based versions with low to no VOC content have become popular for indoor applications. However, they are not ideal for garage floors. They are susceptible to tire staining and to some chemicals and solvents.
Polyurethane Pros
- Great topcoat for epoxy
- UV stable
- Excellent chemical, stain, and abrasion resistance
- High gloss appearance
- Ideal for high traffic areas
- High flexibility increases abrasion resistance and impact resistance
Polyurethane Cons
- Can be finicky to apply and leave roller marks if not careful
- Sensitive to moisture and high humidity during application
- Requires multiple coats for application over full color flake floors
- Can be high in VOCs
- Moderate resistance to tire staining
Polyurea
The characteristics of polyurea are similar to those of polyurethane, but with some distinct advantages. It adheres very well to properly prepared concrete surfaces, it cures faster, and it’s thicker at 4-10 mils DFT. Polyurea is also more resistant to moisture and extreme temperatures during installation.
It used to be that only 2-part polyurea was available as a concrete floor coating and was used strictly by professional installers. Its extremely short working time of 15-20 minutes and fast curing time of 2-3 hours enabled same-day installation.
However, the arrival of single-part polyurea has been a game-changer for DIY garage floor coatings. The easy application, long working times, no mixing of components, UV stability, and extended wear have made it a favorite over epoxy.
It’s our #1 recommendation for most DIY installers looking for an incredibly durable, easy-to-apply garage floor coating system.
Single-Part Polyurea Pros
- Multiple color choices
- Excellent, clear topcoat for bare concrete or epoxy
- No mixing of A and B components
- Long working time reduces installation anxieties over other coatings
- Adheres well to properly prepared concrete
- Faster cure times = quicker return to service
- UV stable
- Excellent chemical and stain resistance
- High abrasion resistance – wears longer than epoxy or polyurethane
- Excellent impact resistance due to flexibility
- Flexible and better withstands the expansion and contraction of substrates
Single-Part Polyurea Cons
- Higher VOCs during application – NIOSH-approved respirator recommended
- Not as thick as high solids epoxy
- Won’t hide imperfections in concrete as well as epoxy
- Cannot be shipped to the South Coast Quality Air Management District
Polyaspartic
Polyaspartic is essentially an advanced type of polyurea. 100% solids polyaspartic is harder than polyurea and typically provides the best chemical, abrasion, and UV protection. It is primarily used by professional installers as a clear topcoat due to its very short working time (15-20 minutes) and quick return to service.
DIY-friendly polyaspartics have 65-80% solids content and/or slow-cure options allowing for longer working times. Depending on the solids content, it can be applied thicker than polyurea, making it an excellent choice as a clear topcoat for full color flake and outdoor applications.
It is also the most resistant to tire staining. However, the abrasion and scratch resistance of DIY-friendly polyaspartics is slightly less than that of single-part polyurea.
Polyaspartic Pros
- Excellent, clear topcoat over epoxy, polyurea, and full color flake applications
- Best UV stability
- Excellent chemical and stain resistance
- Long wear
- 2-3 mils thicker than single-part polyurea
- Shorter cure time means quicker return to service
Polyaspartic Cons
- Does not adhere to bare concrete as well
- Can be high in VOCs, similar to those of single-part polyurea
- Higher cost than single-part polyurea
- Typically not found in kit form and must be purchased separately
Moisture-Cured Urethane
Though not as common as the previously mentioned coatings, moisture-cured urethane (MCU) concrete coatings are fairly new to DIY installers. They are thin, single-part, high-performance, industrial-grade floor coatings designed to deliver exceptional durability and chemical resistance.
MCUs cure by reacting with ambient moisture in the air, creating a dense, tightly crosslinked surface that bonds aggressively to properly prepared concrete.
Newer aluminum-metallic MCU concrete coatings with long working times are becoming increasingly popular in workshops and some garages. They have high heat tolerance, making them less susceptible to welding burns. They are ideal for garages and workshops where floors are exposed to vehicle traffic, hot tires, dropped tools, oils, fuels, and heavy equipment.
Some MCUs may not require etching of the concrete before application. DuraGrade Concrete by Rust Bullet is one such example.
MCU Pros
- No mixing of A and B components
- Shorter recoat times decrease overall installation time
- Quicker return to service
- Better UV resistance than epoxy
- Excellent resistance to abrasion, chemicals, fuels, and solvents
- Excellent impact resistance
- Aluminized MCUs have high heat tolerances up to 500 degrees
- Excellent adhesion to properly prepared concrete
- Can be less expensive than some commercial coatings
MCU Cons
- Thin dry film thickness of 2-3 mils requires two or more base coats
- Some can be high in VOCs – similar to single-part polyurea
- Sensitive to moisture and excessive humidity during installation
- Can be finicky to apply and leave roller marks if not careful
- Aluminized MCUs are not as decorative and glossy
How Garage Floor Coatings are Applied
Garage floor coatings can be professionally installed or done yourself. A DIY installation can save you quite a bit on labor costs and materials. It’s not that difficult as long as you make yourself familiar with all the steps required and plan accordingly.
The first and most important step for a successful coating is preparing the concrete surface. The process involves etching or grinding the surface to create the proper profile for the coating to adhere to.
Next, concrete cracks are repaired. This includes any surface damage, such as pitting or spalling. It is important to use the appropriate concrete repair materials.
Once repairs are complete, the base color coat is applied, followed immediately by the optional color flakes. The clear coat is applied within the recoat window, after the color coat has cured for the minimum required time.
Read our complete guide on How to Apply Garage Floor Coatings
Most coatings require 24 hours before they can accept foot traffic and 48-72 hours before they can accept vehicle traffic. Some exceptions apply.
Where to Buy Commercial-Grade DIY Garage Floor Coatings
Most commercial-grade DIY concrete coatings for garage floors and workshops are purchased online from professional concrete coating vendors. These vendors provide the knowledge and experience required to assist DIY installers with all their project needs.
At All Garage Floors, we make it easy for you to find these vendors and shop for the coatings that best meet your needs and budget. Just visit our Shop Page and select a coating category.
Shop our collection of Pro-Quality Coatings from Top Vendors
Home improvement centers, hardware stores, and most paint stores typically do not sell commercial-grade concrete coatings. The primary reason is that they do not employ staff with the experience, knowledge, and time needed to provide proper customer service for such coatings.
Drawbacks to Garage Floor Coatings
As tough as garage floor coatings can be, they are not resistant to everything.
Welding is hard on floor coatings and can create burn marks from the hot slag that falls on them. In fact, metal fabrication in general can be rough on floor coatings. This is due to the tendency of heavy, sharp objects to be dragged across the surface.
If you are interested in a more utilitarian coating that makes cleanup easier while also resisting hot slag and grinding sparks, we suggest an aluminized MCU coating.
Furthermore, coatings are not a good choice for garage floors and workshops that have moisture issues from below the slab. An excessive rate of moisture vapor transmission from beneath the slab can cause coatings to delaminate.
Final Thoughts
As we mentioned, a garage floor coating can completely transform the appearance of your garage or workshop floor. It’s durable, easy to clean, highly stain-resistant, and flat out looks great.
One important point we want to make is that you genuinely get what you pay for with concrete floor coatings. If you want a budget product, you will get budget performance and looks. If you spend a bit more, you will be rewarded with a much more durable coating that performs better, lasts longer, and looks fantastic.
In the long run, it will actually save you both time and money to purchase higher quality coating products – by far.
So, whether you are turning your garage into a man cave, a working shop for car repairs and projects, or just a place to park your cars, it’s hard to beat the benefits of a quality garage floor coating system.
Thanks for adressing hot tire pickup. That’s why a high quality topcoat is so
Important. Great informative article.
I would like a free estimate, to have an epoxy coating applied to my garage floor of 340 sq ft. Please call me to set up an apt for the free estimate at (520) 904-6248. Also, I’d like to see several coating samples.
Hello William. All Garage Floors is not a concrete coating contractor, retailer, or manufacturer. Our job is to provide information and reviews on garage flooring options, including coatings, that are otherwise difficult to find or cannot be obtained. We suggest you read our article here on how to find a good concrete coating contractor or company.
Can you use the epoxy coating on cellar floors?
Hello Joe. You can, but it’s imperative to check for moisture first. This article here about moisture testing will explain why.
I want to paint some lettering (letters are about 3 inches wide) on my basement floor. Can I apply epoxy over that? It’s a logo in the middle of the floor.
Yes you can, Greg. Prep the floor first for the epoxy and then paint your logo. Let the paint dry and then lightly rough up the surface of the painted logo with 150 grit sandpaper. Once you do that you can apply the epoxy to the entire floor.
Several years ago I had a contractor paint my garage floor. I don’t have the can so I’m not sure what type of paint was used. It was sprinkled after painted to give it a speckled effect. The paint has remained solid and in tact in the middle of the 2 car garage, with exce ption of the “hot tire marks”. One side of the garage has consistently peeled. My question is: should I paint the existing good area (what about the “hot tire marks”), and strip the one side of the loose paint and then paint with only the epoxy paint. Also, What would you suggest to strip/clean the bad wall?
Hi Clara. Paint is always considered a low budget option for a garage and it will always need constant attention. It will stay adhered fairly well to properly prepared concrete that sees mostly foot traffic. However, if the paint is exposed to automobile traffic or is applied to concrete that is too smooth, then it will consistently peel at some point. We don’t recommend trying to fix certain areas with an epoxy coating. It will create a patchwork effect that will need always need attention and more epoxy as the older paint peels or wears away. In addition, you can’t purchase epoxy in small amounts and you will encounter much waste every time you need to add more epoxy to a new area that has peeled. Our recommendation is to remove the paint completely from the entire floor before applying epoxy. The easiest way to do this is via grinding. The grinding will also properly prep the surface for an epoxy coating. If grinding is not feasible for you, then we would recommend continuing with regular maintenance of repainting the spots where the car tires sit including the area of the garage that is always peeling. To help prevent the peeling in that area, we recommend etching the concrete first so the paint can obtain a better bite.
First to comment on the plethora of information, WOW. Thank you for all this information on floor coatings.
I was looking at the Nohr-S and happen to run across another product they sell which is their polyaspartic. What is the difference between this and polyurea?
Hello Tim and thank you. Polyaspartic is a type of polyurea that is very fast curing (3 hours) and with a very short pot life. It’s usually applied by two people to get it down on time. It’s not recommended for the inexperienced. It’s typically used by professional installers who are apply coatings in a single day. We have an article about polyurea polyaspartics here.
We our building a new home and the garage floor was just cemented. When should we epoxy the floor and is there any preparation that should be done because it is new cement?
Hello Bill. You need to wait a minimum of 30 days for the concrete continue curing and releasing moisture before sealing or applying a coating. 99% of most coating products require a minimum of an acid etch prep in order to open up the pores and create the correct profile for the coating to mechanically bond. One of the few exceptions is a product by Rust Bullet called DuraGrade. You can read about it here. Even then, it stills needs to pass a water absorption test or the concrete will still need to be prepped as usual for a coating.
OK so this past weekend I ground my garage floor down and it actually looks great just the way it is, but I realize I have nothing to protect this new finish. So one drawback I have now realized with polyurea is it is quite expensive. What are your thoughts on using a product like rust bullet or hell fire coating in lieu of polyurea? Keep in mind this is a residential garage in Wisconsin that is susceptible to a lot of road salt.
Hi Tim. If you like the look of the bare concrete as is, then we would suggest a couple coats of a clear polyurea. We would recommend some anti-slip additive in the last coat. Two coats of just clear is not that expensive, relatively speaking, and it’s very easy to apply. There is a picture in this article of what clear looks like on bare concrete. If you don’t mind the look of HellFire, it will require three coats and cost slightly less overall. Both coatings are extremely resistant to salt, deicing chemicals, and petroleum products. They will completely seal your concrete and last quite a few years.
My garage has a plywood floor located over basement storage space. Rain water and snow coming off the car leak through to the storage space below. I would like to use waterproof paint on the floor but want to avoid the hot tire issue. Could I use epoxy on the wood floor? Or what other possible solution could you suggest to waterproof wood flooring?
Hi Colleen. Applying a coating to plywood floors to stop leaks is not always successful. Part of the problem is the joints. In addition, epoxy is extremely hard which makes it brittle if it flexes. You would need to use a coating with some flex such as polyurea. In order to accomplish your task, it would require sealing the joint that surrounds the wood floor where it meets the walls. SikaFlex could do that. Next, you would need to use a special epoxy bridging primer on the wood. This epoxy is designed to flex and help bridge gaps in the joints between plywood sheets. You would then need to apply a polyurea base coat after that since the epoxy primer is not designed specifically as a wear surface. After that, you will need to cross your fingers and hope it has sealed all the many joints that could possibly leak. People have done this successfully in the past, but it’s never guaranteed.
Hello, I’m hoping you can advise me…we used Haymes ultimate two pack epoxy part a and b for our garage floor with flakes applied heavily and pressed in with the foam roller (as per their specs…we watched a YouTube video for their application process) it looked great with the excess flakes but when it was dried off and swept we had several areas that had ‘roller marks’ and a lot less flakes had stuck to those areas (these areas were where each new band had been started and overlapped and obviously now we feel that the painted edge must have been drying out and wasn’t sticky enough to hold the flakes in place) once dry we applied more paint to those ‘bald’ spots and more flakes…and even though this has fixed the low flake area we now dark patches were the additional product was applied!! Can you advise me if this project can be saved at all. Thanks in advance Donna
Hello Donna. We moved this question from our article about curb ramps to our epoxy section. From your description it sounds like you pressed too hard with the roller which resulted in applying the coating too thin. That would explain the coloring differences, roller marks, and loss of flakes. The coating was not thick enough for the flakes to sink in and adhere properly. In addition, you are correct about not keeping a wet edge. Coatings do not blend like acrylic paint on a wall. Once they have begun to cure and you overlap with a fresh application, the color tone will look different and you can see the overlap marks. Unfortunately, you can’t do much about your issue without scraping all the semi loose flakes, sanding the surface to rough it up, and then applying a new coat with flakes to the entire floor. You may want to contact the manufacturer and see what they can do to help. We have found that some companies will offer discounts and sometimes even offer free product to solve a customer issue.
If i used this epoxy with the flakes on the wood floor of my car trailer do I need to apply the clear seal on top ?
Hello Dan. You don’t have to apply a clear coating, however, the flakes will be exposed. Dirt will tend to collect around the edges of the flakes and they will also tend to wear or get dislodged in high traffic areas.
I had my garage epoxied by professional contractor. now, almost a year later I have tire marks where the cars would sit after being driven. I’ve read about plasticization (sp?) and how it transfers from tires into the epoxy. My question is: how do I remove those tire marks? I’ve tried Goof Off and so far nada. Perhaps I need to let it sit longer or apply several time? any help is greatly appreciated.
Hello Berto. We have an article here that addresses tire marks as well as a product recommendation called NAB Black Streak.
Hi Shea, thank you so much for the insights and guidance you’ve provided regarding epoxy floors, I truly respect and appreciate your support to the community.
Currently I have a warehouse (1000m2) with ceramic tiles and one of my lift trucks (around 5 ton) has cracked a few of them. Its is impossible for me to move out the racks and break the ceramic tiles in order to install the epoxy floor; even though this would be the ideal. I was planning to apply the epoxy flooring on top of the ceramic tiles in the hallways and the main hall (where the lift trucks pass by)
Is this viable for the long term?
Giving my constraints, what would you recommend?
Have a good rest of your day and thanks for your help.
Hello Humberto. Yes, it can be done, but it’s not inexpensive. The ceramic tile takes longer to prep in order to provide the proper profile for adhesion. Any loose or missing tile would need to be replaced. The floor then needs to be coated with a 100% solids epoxy slurry coat first that will fill in all the grout lines and depressions. It is then prepped again and then the floor coating system of choice can be applied. It’s definitely a job for a professional and not DIY.
Shea, thanks for your comments.
What if instead of using epoxy flooring, I use the plastic interlocking floor or the GEMP epoxy floor (rolled sheet)?
If there is any other alternative I can use please let me know.
Once again, thanks for your help.
The GEMP flooring is still going to require an epoxy slurry be laid first, Humberto. It requires a very smooth surface free of voids, cracks, and etc. Interlocking tile will work, but it’s not designed for the forklift traffic of a warehouse if that is what you are thinking. What is the exact problem with the ceramic tiles that makes you want to replace them?
Actually the floor isn’t ceramic, it is terrazo.
I want to find a solution to the constant cracking on the warehouse’s floor without having to break all the terrazo tiles, hence the solution would have to go on top of the terrazo tiles.
OK, that makes a big difference. Terrazzo flooring should be smooth without grout line depressions and etc. If that is what you have, then it can be coated using quality epoxy primer first. It does require aggressive grinding of the surface to provide the proper profile and to remove any sealers that are typically used with terrazzo. However, the big issue is that the Terrazzo is constantly cracking where you have forklift traffic. What’s important to understand, Humberto, is that a floor coating is only as good as the substrate it is attached to. If the Terrazzon is cracking, so will the epoxy. In other words, it’s not going to reinforce it and make it stronger. The same goes for the GEMP flooring option. If the Terrazzo cracks and breaks apart, so will a coating and the GEMP flooring since it’s glued directly to it.
If the Terrazzo cracks, but does not crumble, one option for you may be industrial PVC interlocking tiles. These are used for warehouses, fire stations, forklift traffic, and etc. It’s a solid construction, yet flexible PVC tile that is made in different thicknesses depending on the use. I would recommend that you contact ArmorPoxy to discuss your situation. They have a product called SupraTile that is used for these purposes. I’m not sure if they ship to Costa Rica or not, but they may know of a distributor that does.
Appreciate your comments
I have a small patio storage area that I’m fixing up. Should I sheetrock the walls first or do the epoxy floors first and then walls? Thanks!
Hi Sandy. It’s always best to sheetrock, paint, and do any other construction related activities first before doing the floor. You can always tape off the lower 2-3′ of wall with inexpensive plastic drop cloths to protect the walls from the concrete prep.
We actually did the two-part epoxy with poor results. Within a couple of months the finish began to flake, then rub off under car tires and powder (caused by moisture in the concrete) routinely comes up through the finish. We followed all of the instructions and were very disappointed by the results. The system we used did not include an epoxy primer and was a one-coat system. Now we have quite a mess to clean up. What do you recommend we consider next? It seems like removing the remaining epoxy would be difficult, but the white powder makes be think the floor is not sealed (we live in a foggy moist area) so my inclination is the try and strip or sand it all off and start over with better preparation. But maybe tiling might be easier? I do work on my cars in the garage and so I need a surface that is easy to maintain with fluids and use of a floor jack.
Hello Tim. What you are describing sounds like you may have a moisture issue where water is being drawn up by the concrete from below the slab. Coatings do not tolerate moisture from underneath very well. Since coatings seal and do not breathe, moisture gets caught under the coating and causes the concrete that it is attached to to break down and crumble. This is the white dust you are referring to. What you need to do is remove the coating via grinding and then do a proper calcium chloride moisture test. Based on those results, you can determine if a coating can be applied or not. There are special moisture vapor blocking epoxy primers that are available, but you need to determine how much moisture the slab is creating first. Tiling is another option, but again, it would depend on the moisture issue.
Randomly came across your site — man what a bunch of great content. Just felt compelled to say thanks — amazing how engaged you are with the folks who ask questions/comment. No need to moderate this one in … just wanted to say thanks.
Thanks for the kind words, James. 🙂
If we use the semi-transparent stain on our interior kitchen floor and then cover it in a clear epoxy (do they make that in low luster), would that last a long time with people and pets, cleaning etc?
Hi Jim. Be careful about stains. True stains are not semi-transparent. What you most likely are considering is a tinted acrylic sealer. We discuss the differences here. These type of products are not designed to have coatings applied over them. If you want to use a tough coating that will stand up to heavy traffic and pets, then you will need to use a true stain. Though this article needs some updating, it talks about how stains work.
If you want something that is tough and low luster, then you may want to consider a water-based stain like Delta Dye. You could then apply a two or three coats of an acrylic polyurethane like this one that is very tough. It has definite matte finish to it. As long as your concrete absorbs water, no etching will be required with either product.
Thank you for the great advice so quickly given. It’s very appreciated.
Lots of Great Content here !
Question 1 . can u epoxy over wood such as plywood or a 2×6.. what is involved with that ? thanks
Question 2 . if use 100% solids epoxy as a base coat and then polyaspartic overtop of the flake will it still amber in the sun light
thanks
Hello Chad. #1 Yes, epoxy can be applied over wood. You need to rough it up with 60 grit sandpaper first. Make sure that it’s not for a surface than can flex. Epoxy does not flex and will crack if the surface flexes.
#2 If the flakes do not fully cover the epoxy, then yes, the epoxy exposed to the sunlight will eventually amber. Color flakes are acrylic and will not amber. If a full flake floor is done, then there is no chance of ambering with a polyaspartic top coat applied since the epoxy is not exposed.
After reading through your blog, I’ve decided to go with a local professional epoxy installer with stellar reviews. He is doing everything you are preaching; Grinding+Priming+100% solid epoxy with flakes + polyaspart top coat. And no anti skid because we are doing flakes.
However he is saying I’ll need a moisture vapor barrier because my concrete is 40 years old… I do not know what that is and I could not find it here being talked about. Can you please comment on what this is, and what is does and at which point it is applied? And one more thing, my concrete is sealed (per the water beading test) so when do I do the moisture test before or after grinding?
Hello Abe. Moisture vapor barriers are installed before the concrete is poured. It’s essentially a very thick piece of plastic sheeting that is laid down on the bare ground with the edges turned up and sometimes attached to the bottom of the forms. This prevents the slab from absorbing and transferring moisture vapor or actual water to the surface. It’s a common installation for basement slabs or slabs below grade. Was the installer possibly referring to a moisture vapor barrier blocking epoxy primer? Does your slab have a history of moisture issues or is it below grade? The only reason to use a moisture blocking primer is if the slab has moisture issues or it has been confirmed through testing. If moisture is present, it’s important to perform a calcium chloride test (or similar) in order to know how much moisture (expressed in #’s/24hrs/1000 ft2) is present in order to know what type of moisture blocking epoxy primer be used. Concrete treated with a penetrating sealer will breathe and allow moisture transmission, so it can be tested with the sealer present.
Hey Shea
They replied to my moisture vapor barrier question. He’ll be using it instead of a Primer! And this is the material he’s using https://www.apfepoxy.com/category-moisture-remediation-system
What say you?
I am planning to do the moisture test as soon as I receive the kits.
One more think, the final thickness of 28-32 MIL, is that good? Does thickness make a difference?
thanks
Hi Abe. Arizona Polymers makes good product. The VaporSolve 100 LP is an epoxy primer used specifically to remedy moisture issues. So no issues there using it as a primer. It’s also more expensive than a typical epoxy primer. Our questions is; why do they feel the need to use such a product? Do you have obvious moisture issues or signs of it? Are they guarantying your coating against peeling due to moisture if they use this product?
Yes, 28-32 mils is a good thickness. Thickness increases impact resistance and also helps to hide imperfections in the concrete surface.
Hi
I decided to order Rust-Olium Epoxyshield Professional from Amazon.
Should I prime the garage floor first after clean and grind? If so, which primer product I can get from Home Depo or Lowe?
Will it be better if I do 2 coats of Epoxyshield Professional? If so, how long do I wait before the first coat? And do I only apply the chips after the second coat?
And finally, should I apply a clear coating after the Epoxyshield? and which clear coating product may I get from the local store.
Thank you for your help.
Hello Andy. The proper primer for a coating is an epoxy primer. The home improvement centers do not sell such products. A concrete paint primer (acrylic latex paint) is not a coating primer and is not compatible. It does not adhere half as well as epoxy and epoxy will not chemically bond and cure to it. This article about primers explain how they work and it addresses the issue about one coat kits such as Rust-Oleum near the end.
If you want to ensure good color uniformity and a higher build, then you can do two coats of the EpoxyShield. Rust-Oleum generally allows for up to three days to recoat without further prep. Clear coats are always recommended since they will lock in and protect the color flakes as well as the color coat. Rust-Oleum sells EpoxyShield Clear Coat as well.
Thank you Shea for the response.
Between EpoxyShield Professional and RockSolid, which one is the preferred product? I now have second thought of using RockSolid instead even though I have ordered EpoxyShield professional.
RockSolid is much more glossy than EpoxyShield. If you apply it you will need two color coats for sure due to the grinding. It’s a thin mil coating that penetrates concrete well and as a result rarely achieves it’s stated coverage rates. The biggest complaint from people is that the color tone changes and looks less glossy in areas because it cured too thin due to penetration and trying to achieve those stated coverage rates. Apply the first coat as the primer and the second color coat will look good.
To be honest, neither of these two choices would make our list of good coatings that you want to last for years and years after grinding and doing all the floor prep. They are residential quality DIY coatings and do not perform nearly as well as the commercial quality products available from concrete coating vendors. They are less expensive though so we can understand their appeal in that regards.
Thank you Shea. Any Coating Vendors close to California that can ship commercial quality product pretty quickly.
My floor is ready to apply the coating and I don’t want to wait too long with all the stuff seating outside the garage.
EpoxyShield Professional arrived yesterday.
There is Versatile that sells the Roll On Rock coating systems. They are located in Los Angeles. You can read the article about their system here, which includes a link to pricing. I would suggest giving them a call first to check on availability and shipping. If you are close, you may be able to will call.
Thank you Shea
It turns out that Versatile location in Anaheim is very close to me and I will be able to pick up from their location.
Watching their video, they apply lots and lots of chips then scrape them before applying the final coat.
Do you think it will work if I apply less chips and avoid scraping?
That is called applying color flakes to full refusal, Andy. It creates a thicker overall coating, provides more protection due to that thickness, and because the epoxy is completely covered, there is no worry about the epoxy color coat ambering (yellow tint) from sun exposure. You don’t have to apply that many chips though if you don’t want to. It’s up to you. However, the advantage of color flakes to full refusal is that you can create any color palette of chips that you want to achieve a custom look. It will also hide any cosmetic application mistakes that might be made with the epoxy as well as help to hide imperfections in the concrete or concrete repairs.
Hello Shea
I completed the Versatile roll on rock using their DIY kit. However, I feel the floor surface it is not as smooth as I would like and have some rough chips/flakes edges, it looks like the clear coat did not completely cover the chips/flakes, maybe I did not scrape them down enough. Will another clear coat make it floor smooth? How long do I have before apply another clear coat and what product can I use.
Thank you for all your help.
Yes, it sounds like you didn’t scrape the color flakes well enough, Andy. Most commercial coatings require a recoat within 24 hours or the floor will need to be roughed up with 120 grit sandpaper first. We highly recommend using the same product. It’s a high performance clear coat and you don’t want to apply anything less. If you have flakes sticking up through the clear coat, then you are going to want to sand the surface anyways to smooth things out. I would recommend giving Versatile a call in the morning to discuss.
Thanks for wonderful articles. I was researching Epoxy coat from last week and really found your articles and comments helpful. I understood the importance and process of floor prep however i am still struggling to decide the product which suits my budget and perform better , remain durable. My confusion is between Sherwin-Williams H&C Shield Create and Rust-Oleum products. I am a fan of SW when it comes to paint but unable to find any review on their water based Epoxy (may be because they only sell in SW store). Do you have any feedback on SW product? If you answer me to go with Rust-Oleum, my next question would be EpoxyShield vs Professional. All of these are almost same the price. Can you help me with choosing the product. I think Professional is not water based?
Hi Amit. H&C Sheild-Crete by Sherwin Williams is a water-based, low solids (thin mil) coating that is very similar to Rust-Oleum EpoxyShield water-based coatings. They are the least expensive and low performance choices for epoxy coatings. This article here explains more about these type of coatings and what to expect. As a comparison, the Epoxy-Coat product you were reading about is a commercial quality 100% solids epoxy that is approximately 3X thicker per coat. It will not suffer hot tire pickup and will last years longer. If you need to choose a lower budget epoxy, we would recommend the Rust-Oleum Professional EpoxyShield. It is as solvent-based epoxy and will last longer than the water-based version.
Thanks. I ordered the professional version of rust Oleum today. For top coat can I use Rock solid clear coat instated of Epoxy shield clear coat ? Do you think that would be more Durable?
Hello Amit. We recommend staying with the Rust-Oleum Professional Clear Coat since it is compatible. You would need to check with Rust-Oleum customer service to see if RockSolid will chemically bond with the Rust-Oleum Professional.
Thanks Shea for prompt response . I am going with Your advise .
I am wondering if I shall do 2 coats of Rust-Oleum professional epoxy followed by clear coat … that will make it 3 coat in total and probably good thickness . What is the re- coat window you will recommend ?
Hi Amit. What you are proposing will hold up fairly well. Honestly though, if you are going to spend the money for a total of three coats, then we would recommend that you look into the cost of applying a commercial quality coating system if the budget allows for it. The Epoxy-Coat product you were looking at is one example. Rust-Oleum EpoxyShield coatings are not glossy (satin gloss) and they can amber (yellow tint) if exposed to direct sunlight or strong indirect sunlight after a period of time. Another example of quality kit would be Roll On Rock. It would be approximately 3 times thicker than the three coats of Rust-Oleum. It would also allow you to choose how you want the floor to look since it’s full flake coverage with custom colors that you can choose. Plus, it includes a polyurea top coat that is more abrasion resistant and chemical resistant than epoxy. Lastly, it will not amber in direct sunlight. I’m just trying to let you know what your options are if it’s in the budget since we get so many emails from people who state they would have applied a better coating if they had known about it.
Thanks again Shea . I understand what you are saying but actually I ordered 2 kit rust oleum professional for my 2.5 car garage and my friend gave me one 1 car kit in spare hence I am planning to do 2 coat and 1 clear . But I understand what you are saying and looked the options but it is still doubling the cost . However I want to understand from you on how long shall I wait for 2 coat (with flakes )…? I have prepared my floor very well in last several days .. 3 times with degreaser and 2 time acid etched .. I am planning to let it dry for 2-3 days and will vacuum and clean with swiffer spray mop just before applying first coat of epoxy … does it sound good or I shall plan anything differently ?
RockSolid requires that you wait a minimum of 8-12 hours before recoating. You have up to 7 days to recoat before additional prep is required. Letting the concrete dry for 2 or 3 days is good. DO NOT use a Swiffer spray mop on the concrete just before application. No contaminants or moisture should be introduced. Just vacuum if necessary and then apply the coating.
I have a garage that has been acid washed. Is it possible to epoxy over it?
Thanks in advance.
Hi Mark. If the concrete has been cleaned and acid etched properly, then it can take an epoxy coating.
Hi Shea,
I have read this article a couple years ago when you just wrote it, and then today, after many years I stumbled upon it again. Thanks twice mate 🙂
I am sorry asking so many questions but you were so helpful and I don’t find anything anywhere to my next problem so checking with you . I acid etched , neutralized , rinse and pressure washed my floor yesterday but today when it dried I see my shoe foot prints.. is this something to worry about and if so what shall I do ? So far I was very happy with floor prep but after seeing my shoe foot print , I am little worried
Hi Amit. No, that should not be a problem. Unless there is heavy white residue on the shoe print that you can can wipe up with your fingers, you will be fine.
Yes … I am able to wipe out from my finger ( I am happy it is not due to acid) and it only one part of my garage (neat garage door ). So I should pressure wash the particular area one more time today to remove the dust?
Try scrubbing it with a brush first before using a pressure washer, Amit. Pressure washers drive water much deeper into the concrete and require that you wait longer for it all to dry out. If the water in the concrete has not evaporated out, it will form bubbles in the coating shortly after it is applied.
Shea,
I am in the process of building a new home that will have two two car garages (one for work truck/tools, etc.)
As I plan to coat the floors in both, the concrete guy suggested finishing with a broom/brush after pour. Would this be a good idea or is it better to have a smooth finish to the concrete?
Hi Sman. No, you do not want a broom finish. Have the concrete hard troweled or power troweled for a standard smooth finish. Broom finishes create weak ridges for the coating to adhere to and make is susceptible to chipping. In addition, it takes quite few coats to get enough coating on the surface to smooth things out. Concrete with broom finishes have to be treated to grinding to smooth out the surface and provide the proper profile. It’s a lot of work. Standard smooth finishes can accept acid etching in lieu of grinding for most coatings.
Also, make sure they do not apply a “cure and seal” product to the surface. If they do, you will need to grind in order to remove the sealer before applying a coating.
Hello Shea, I have hard time on choosing between 2 Rustoleum epoxy coat vs 1 epoxy coat + the clear finish from the same product line if I only have the budget to choose one of those, I would like to ask what’s you point here, thanks
Hi Frank. If you make sure to stay within the coverage rate of the epoxy in order to create even color uniformity and thickness, then one color coat and one clear coat is the optimal choice. The clear acts as the sacrificial coat and protect the color coat. In addition, it provides a glossier look for better light reflection and it will show scratches less.