
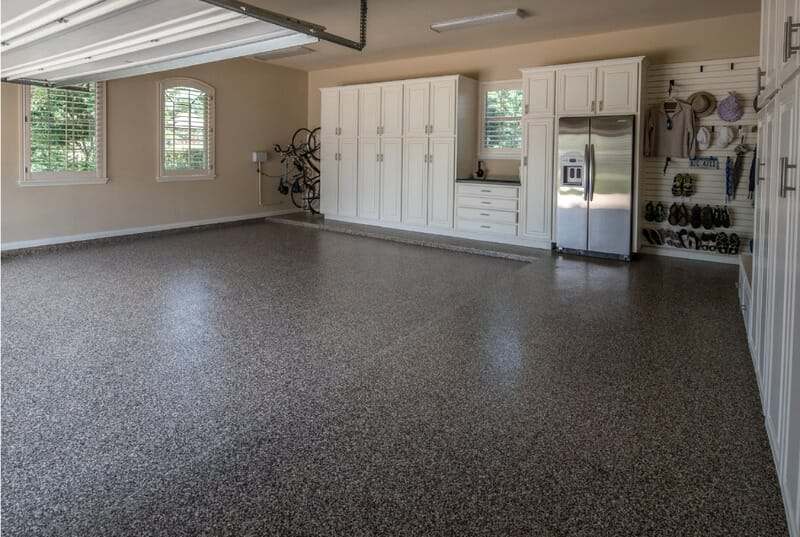
Garage floor coatings are one of the most durable, stain-resistant, and easy-to-clean decorative finishes available for garage floors and workshops today. They will protect the floor from the elements, instantly transforming your dull or ugly concrete surface into a professional-looking floor that combines beauty and functionality.
And since the garage has evolved beyond just a parking space, the benefits of concrete coatings have made them one of the most popular DIY garage flooring options today.
As a result, we will briefly explain what a garage floor coating really is. We will discuss the features, benefits, and how it is applied. More importantly, we will list the available coating options for DIY application, along with the pros and cons of each.
Additionally, we will provide excellent examples of where you can purchase quality coatings and DIY coating kits that we have reviewed and can recommend.
This article was updated in March of 2026 to reflect the most current trends and coating technology
What is A garage floor Coating?
A garage floor coating is a viscous thermosetting polymer resin that chemically crosslinks as it cures, creating a hard, durable, and chemically resistant wear surface. Epoxy, polyurethane, polyurea, and polyaspartic are the most common concrete coatings.
A catalyst activates the exothermic (releases heat) crosslinking reaction. For 2-part coatings, such as epoxy, the part-A resin/pigment is mixed with the part-B hardener, which serves as the catalyst. Moisture and/or oxygen in the air act as catalysts for single-part coatings.
Visit our Garage Flooring Gallery to view the various garage floor coating options.
Shop our collection of Pro-Quality Coatings from Top Vendors
Benefits of Garage Floor Coatings
Commonly used for both residential and commercial applications, a high-quality coating or coating system will protect the concrete from oil and related automotive fluids, stains, chemicals, spills, and other substances vehicles may track into the garage.
In addition, they seal the concrete to prevent liquids, deicing fluids, and road salts from penetrating the surface and causing damage.
Most notably, coatings are very easy to clean and to keep looking clean.
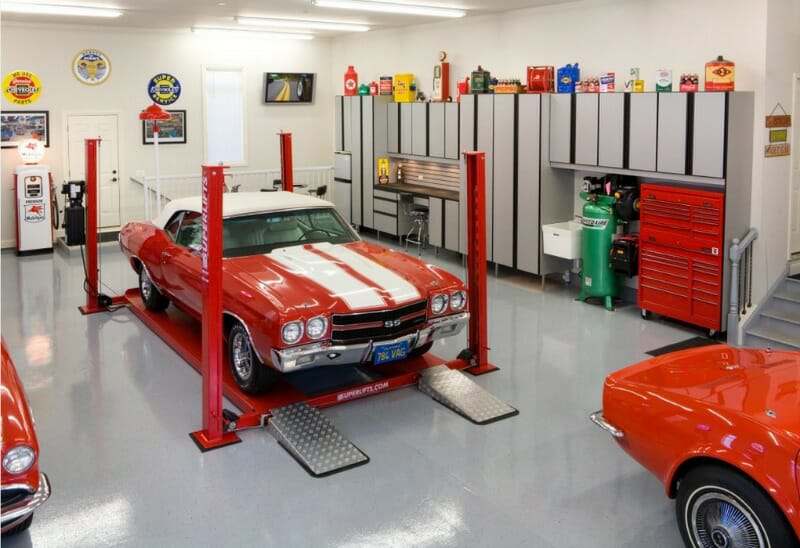
Commercial-grade coatings receive high reviews from home mechanics and hobbyists. They are popular in automotive and workshop environments where rolling floor jacks, jack stands, rolling toolboxes, and other mechanical equipment are used.
Furthermore, the high gloss and lighter colors of floor coatings reflect overhead and natural light. This results in a brighter work environment that makes more efficient use of available light.
Lastly, when applied to a properly prepared concrete surface, coatings can form a strong mechanical bond, making them highly resistant to peeling and hot tires. The overall result is a decorative, scratch-resistant surface that lasts for years.
Single Coat vs Multi-Coat Garage Floor Coatings
The most durable garage floor coatings are multiple-coat systems, and the industry standard for professional installers. They are also the most popular among DIY enthusiasts who want the best protection and value for their money.
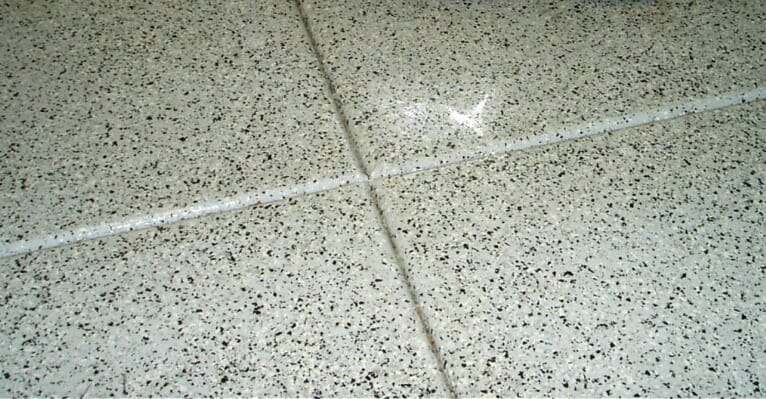
These coating systems consist of a minimum base color coat, optional decorative color flakes, and a high-performance clear topcoat. The clear coat is essential for locking in the color flakes, protecting the color coat, and extending the coating’s life and durability.
Many times, these are hybrid coating systems. In other words, the base color may be a thick, high-build epoxy coat with a polyurethane, polyurea, or polyaspartic clear top coat.

Options may include an epoxy primer coat for highly porous concrete, high-solids epoxy base coats, or other coatings. They are also used as a primer color coat for very light (white) or very dark base coat colors to achieve proper color tone.
Lastly, some are specially formulated to provide moisture-vapor-barrier protection for concrete with moisture issues.
Tan, beige, and various shades of gray are the most common base coat colors because they hide dirt best. However, high-quality coatings offer a wider range of colors for the DIY installer to choose from.

Other options include metallics and custom color-flake blends that match your style, home, or even your favorite sports team.
A more budget-friendly option for the DIY installer is a single coat application. Examples include a single color coat or a high-performance clear coat that protects and highlights the character of bare concrete.
Single coat applications are not as durable as multi-coat applications. However, they are less expensive to install and still effectively protect and seal the concrete, including stain protection. High-quality single-coat applications will also provide longer wear than budget, store-bought options.
How Thick are Garage Floor Coatings?
The overall thickness of a garage floor coating varies and depends on many factors. These include the type of coating material used, the number of coats applied, and the choice between random or full color flake coverage.
A typical commercial-grade garage floor coating system averages 8-12 mils of dry film thickness. These coating systems typically include a base color coat, partial color flake coverage, and a single clear coat. A mil is 1/1000th of an inch. Standard copy paper averages 3 mils thick for reference.
A concrete coating system that consists of an epoxy primer coat, a high-solids epoxy base color coat, full color flake coverage, and the appropriate clear coats can average 15-25 mils or more in overall thickness.
In contrast, a lower-performing single-coat kit, such as EpoxyShield by Rust-Oleum, averages only 3 mils dry film thickness. You can expect an overall thickness of 4–4.5 mils when the optional EpoxyShield Clear Coat is applied.
Are Garage Floor Coatings Slippery?
Most floor coatings are not slippery when they are dry. However, epoxy and other coatings can become slippery when wet. Typically, the glossier a coating is, the slipperier it becomes when wet.
A heavy application of color flakes can add texture to a coating and reduce slipperiness, but it is not a substitute for a slip-resistant surface. An anti-slip media is typically mixed into the final coat to achieve a non-slip surface.
Are Coatings and Garage Floor Paint the Same?
Concrete garage floor paint and 1-part epoxy paint are not the same as thermosetting garage floor coatings and provide far less protection. They are thin, water-based acrylic polymer formulations containing pigments, binders, and additives.
When applied to concrete, they dry like paint on a wall. All will peel from hot tires, generally sooner rather than later. Furthermore, they are much less wear-resistant and are only available in a satin finish.
The primary reasons for their use in a garage environment include their low price point, ease of application, and deceptive marketing tactics that prey on the average consumer’s lack of knowledge about coatings.
Of the two, 1-part epoxy paint performs better and is worth the few extra dollars per gallon. It incorporates 2-4% epoxy ester resin as an additive to enhance durability over standard paint.
DIY Garage Floor Coating Options
The choice of concrete coating materials available for DIY application has expanded in the last decade. Epoxy is no longer the only player on the field.
Some are easier to apply than others, and each has its own benefits and drawbacks that you should be aware of.
Epoxy
Epoxy has been the most common garage floor coating material for decades. It is a 2-part coating consisting of part A, an epoxy resin, and part B, a hardener/catalyst. High-solids (>85%), commercial-grade epoxy is typically 8-10 mils dry film thickness.
High-solids to 100% solids epoxy has self-leveling properties, provides an excellent build coat, and is the best medium for receiving a full-color flake application.
Epoxy is popular for use in industrial applications, warehouses, garage floors, and workshops. Return-to-service times are longer due to slower cure rates. You can walk on it in 24 hours and drive on it in 72 hours.
Epoxy Pros
- Longer curing time allows for the best adhesion to concrete
- High solids epoxy (>85%) will not peel from hot tires
- Provides the thickest build coat at 8-12 mils DFT and greater.
- Self-leveling properties
- Good impact resistance
- Best at hiding surface repairs and concrete imperfections
- Best for receiving full broadcast color flake applications
- Offers the most color options
- Excellent chemical resistance
- Good wear resistance and stain resistance
Epoxy Cons
- Shorter working time of 25 – 55 minutes
- Limited application temperatures between 60° and 85°
- Not UV stable – develops a yellow tint with exposure to sunlight
- Does not flex, making it less resistant to cracking
- Longer cure and recoat requirements add to the overall installation time
- Has increased in cost over the years
Polyurethane
Polyurethane is a thin coating with an average DFT of 2-2.5 mils. It is available in single-part and 2- part (2K) formulations. With some exceptions, it is primarily used as a final clear or colored topcoat for other coatings, such as epoxy.
Before the advent of polyurea, polyurethanes’ UV stability and superior wear, stain, and scratch resistance made it the go-to high-performance top coat for epoxy on garage floors, workshops, and in industrial applications for many years.
Newer water-based versions with low to no VOC content have become popular for indoor applications. However, they are not ideal for garage floors. They are susceptible to tire staining and to some chemicals and solvents.
Polyurethane Pros
- Great topcoat for epoxy
- UV stable
- Excellent chemical, stain, and abrasion resistance
- High gloss appearance
- Ideal for high traffic areas
- High flexibility increases abrasion resistance and impact resistance
Polyurethane Cons
- Can be finicky to apply and leave roller marks if not careful
- Sensitive to moisture and high humidity during application
- Requires multiple coats for application over full color flake floors
- Can be high in VOCs
- Moderate resistance to tire staining
Polyurea
The characteristics of polyurea are similar to those of polyurethane, but with some distinct advantages. It adheres very well to properly prepared concrete surfaces, it cures faster, and it’s thicker at 4-10 mils DFT. Polyurea is also more resistant to moisture and extreme temperatures during installation.
It used to be that only 2-part polyurea was available as a concrete floor coating and was used strictly by professional installers. Its extremely short working time of 15-20 minutes and fast curing time of 2-3 hours enabled same-day installation.
However, the arrival of single-part polyurea has been a game-changer for DIY garage floor coatings. The easy application, long working times, no mixing of components, UV stability, and extended wear have made it a favorite over epoxy.
It’s our #1 recommendation for most DIY installers looking for an incredibly durable, easy-to-apply garage floor coating system.
Single-Part Polyurea Pros
- Multiple color choices
- Excellent, clear topcoat for bare concrete or epoxy
- No mixing of A and B components
- Long working time reduces installation anxieties over other coatings
- Adheres well to properly prepared concrete
- Faster cure times = quicker return to service
- UV stable
- Excellent chemical and stain resistance
- High abrasion resistance – wears longer than epoxy or polyurethane
- Excellent impact resistance due to flexibility
- Flexible and better withstands the expansion and contraction of substrates
Single-Part Polyurea Cons
- Higher VOCs during application – NIOSH-approved respirator recommended
- Not as thick as high solids epoxy
- Won’t hide imperfections in concrete as well as epoxy
- Cannot be shipped to the South Coast Quality Air Management District
Polyaspartic
Polyaspartic is essentially an advanced type of polyurea. 100% solids polyaspartic is harder than polyurea and typically provides the best chemical, abrasion, and UV protection. It is primarily used by professional installers as a clear topcoat due to its very short working time (15-20 minutes) and quick return to service.
DIY-friendly polyaspartics have 65-80% solids content and/or slow-cure options allowing for longer working times. Depending on the solids content, it can be applied thicker than polyurea, making it an excellent choice as a clear topcoat for full color flake and outdoor applications.
It is also the most resistant to tire staining. However, the abrasion and scratch resistance of DIY-friendly polyaspartics is slightly less than that of single-part polyurea.
Polyaspartic Pros
- Excellent, clear topcoat over epoxy, polyurea, and full color flake applications
- Best UV stability
- Excellent chemical and stain resistance
- Long wear
- 2-3 mils thicker than single-part polyurea
- Shorter cure time means quicker return to service
Polyaspartic Cons
- Does not adhere to bare concrete as well
- Can be high in VOCs, similar to those of single-part polyurea
- Higher cost than single-part polyurea
- Typically not found in kit form and must be purchased separately
Moisture-Cured Urethane
Though not as common as the previously mentioned coatings, moisture-cured urethane (MCU) concrete coatings are fairly new to DIY installers. They are thin, single-part, high-performance, industrial-grade floor coatings designed to deliver exceptional durability and chemical resistance.
MCUs cure by reacting with ambient moisture in the air, creating a dense, tightly crosslinked surface that bonds aggressively to properly prepared concrete.
Newer aluminum-metallic MCU concrete coatings with long working times are becoming increasingly popular in workshops and some garages. They have high heat tolerance, making them less susceptible to welding burns. They are ideal for garages and workshops where floors are exposed to vehicle traffic, hot tires, dropped tools, oils, fuels, and heavy equipment.
Some MCUs may not require etching of the concrete before application. DuraGrade Concrete by Rust Bullet is one such example.
MCU Pros
- No mixing of A and B components
- Shorter recoat times decrease overall installation time
- Quicker return to service
- Better UV resistance than epoxy
- Excellent resistance to abrasion, chemicals, fuels, and solvents
- Excellent impact resistance
- Aluminized MCUs have high heat tolerances up to 500 degrees
- Excellent adhesion to properly prepared concrete
- Can be less expensive than some commercial coatings
MCU Cons
- Thin dry film thickness of 2-3 mils requires two or more base coats
- Some can be high in VOCs – similar to single-part polyurea
- Sensitive to moisture and excessive humidity during installation
- Can be finicky to apply and leave roller marks if not careful
- Aluminized MCUs are not as decorative and glossy
How Garage Floor Coatings are Applied
Garage floor coatings can be professionally installed or done yourself. A DIY installation can save you quite a bit on labor costs and materials. It’s not that difficult as long as you make yourself familiar with all the steps required and plan accordingly.
The first and most important step for a successful coating is preparing the concrete surface. The process involves etching or grinding the surface to create the proper profile for the coating to adhere to.
Next, concrete cracks are repaired. This includes any surface damage, such as pitting or spalling. It is important to use the appropriate concrete repair materials.
Once repairs are complete, the base color coat is applied, followed immediately by the optional color flakes. The clear coat is applied within the recoat window, after the color coat has cured for the minimum required time.
Read our complete guide on How to Apply Garage Floor Coatings
Most coatings require 24 hours before they can accept foot traffic and 48-72 hours before they can accept vehicle traffic. Some exceptions apply.
Where to Buy Commercial-Grade DIY Garage Floor Coatings
Most commercial-grade DIY concrete coatings for garage floors and workshops are purchased online from professional concrete coating vendors. These vendors provide the knowledge and experience required to assist DIY installers with all their project needs.
At All Garage Floors, we make it easy for you to find these vendors and shop for the coatings that best meet your needs and budget. Just visit our Shop Page and select a coating category.
Shop our collection of Pro-Quality Coatings from Top Vendors
Home improvement centers, hardware stores, and most paint stores typically do not sell commercial-grade concrete coatings. The primary reason is that they do not employ staff with the experience, knowledge, and time needed to provide proper customer service for such coatings.
Drawbacks to Garage Floor Coatings
As tough as garage floor coatings can be, they are not resistant to everything.
Welding is hard on floor coatings and can create burn marks from the hot slag that falls on them. In fact, metal fabrication in general can be rough on floor coatings. This is due to the tendency of heavy, sharp objects to be dragged across the surface.
If you are interested in a more utilitarian coating that makes cleanup easier while also resisting hot slag and grinding sparks, we suggest an aluminized MCU coating.
Furthermore, coatings are not a good choice for garage floors and workshops that have moisture issues from below the slab. An excessive rate of moisture vapor transmission from beneath the slab can cause coatings to delaminate.
Final Thoughts
As we mentioned, a garage floor coating can completely transform the appearance of your garage or workshop floor. It’s durable, easy to clean, highly stain-resistant, and flat out looks great.
One important point we want to make is that you genuinely get what you pay for with concrete floor coatings. If you want a budget product, you will get budget performance and looks. If you spend a bit more, you will be rewarded with a much more durable coating that performs better, lasts longer, and looks fantastic.
In the long run, it will actually save you both time and money to purchase higher quality coating products – by far.
So, whether you are turning your garage into a man cave, a working shop for car repairs and projects, or just a place to park your cars, it’s hard to beat the benefits of a quality garage floor coating system.
We applied the first coat of epoxy on our garage floor and had a sudden storm come up. It blew in leaves and also bugs , etc. Rain did not co e in…luckily… How do we prep for the second coat? Can we sand?
Hi Marie. Yes, let the epoxy cure for a few days and then sand it with 100-150 grit sandpaper. Sweep or vacuum up the debris and then wipe the surface down with denatured alcohol. After that it will be ready for another coat.
Our pets have not been kind to our indoor flooring…carpet, tile, laminate. I am desperate for another option. The pets are indoor and often have accidents on the floor, regardless of how many times we walk them each day! Is an epoxy floor a reasonable option for us?
That depends on what you are willing to accept for indoor flooring Kathryn. Commercial quality epoxy systems are installed all the time for indoor professional kennels. Clean ups are a breeze and it doesn’t stain the finish. The inside of your home will take on a completely different look however.
Hi Shea, I live in Minnesota and am wondering if an epoxy coating will withstand the salt and other chemicals used during the winters.
Yes it will Jen. As long as you install a commercial quality system it will last for many years and protect your concrete from the elements. The home improvement center kits a single coat system and of lessor quality. They may only last a few years.
i had an epoxy floor installed in jan, now in early july is starting to yellow very bad.any ideas what happeded or what i can do? this installer does lots of floors.
thanks, jim
Hello Jim. Epoxy will yellow if exposed to U.V. light (sun). Do you keep the garage door open much, have windows, or a southern exposure? Did they use an epoxy clear coat instead of polyurethane or polyurea? Polyurethane and polyureas are not affected by sun. Clear epoxy will show the yellowing much faster than the color coat. There isn’t anything you can do about it except apply the appropriate color coat and clear coat over it.
Hi Shea. We are giving our 23 year old garage a facelift. Now we are considering doing epoxy floor coating ourselves. After much debate and research on the subject, I think Roll on Rock is the front runner. Any experience with their product?
We live in Alabama and right now we are hovering in the high 90s with about 80% humidity. With these weather conditions is floor coating now a wise idea? Would grinding the floor in the day and apply the coating at night be the best option?
Thanks
Lynn
Hi Lynn. The Roll on Rock is a great DIY product. When it comes to pushing the envelope regarding temperatures and humidity, we always recommend giving the vendor or manufacturer a call and talk to them as each product is a bit different. They can tell you exactly what to do in terms of application or just waiting for better weather. Garagefloorcoatings.com has a toll free number at the bottom of their website that you can call and ask.
My town is looking to redo the concrete floors in our community center. I was trying to find more information on how long the epoxy flooring would last and a cost of hiring a company versus do it yourself. Is there a number or a way to e-mail someone to find out more information?
Lauren, are the concrete floors indoors and what are they used for?
Two questions, 1) Is there a window between application of a water-based clear coat over a water-based epoxy? 2) If the floor is keep clean in between application of the clear coat, do I need to do any prep work?
Hello Aaron. Generally the recoat window is 12 to 24 hours after application, temperature dependent, in order to develop a good chemical bond. Over 24 hours will require roughing up the surface before application in order to apply an additional coat. Some of the lesser quality DIY epoxy kits have recoat windows that are a little longer.
I own a small convenience store that has peel and stick tile for flooring. I want to paint the floor with epoxy garage covering. Will it stick to the tile?
No, epoxy will not stick well to peel and stick tile flooring Michael. You will need to pull the tile up and prep the concrete properly in order to apply epoxy.
New concrete floor poured 2 years ago. Any concerns or wait time required before applying epoxy coatings? How do you deal with the contraction joints, fill or no fill, before surfacing?
Hello Kevin. You need to wait a minimum of 30 days after a slab is poured, so you are fine in that regards. The contraction joint conundrum is really up to you. Traditionally, you leave the contraction joints alone and just run the epoxy down in the joint to make sure it is coated. However, some people like the look of no contraction joints and elect to go with the seamless looking option. It is more expensive, however, as you need to fill the contraction joint with the proper material.
We are thinking of this type of flooring on our back patio – we want a different look. Will it be okay with the southwest sun on it? We would need the anti-slip because we do not want it too slick if rain or something happens – again, will that be okay with the floor outside?
Hi Suzanne. No, epoxy is not designed for the outdoors. It will amber (turn yellow) in the sunlight and can develop adhesion issues with the concrete as it absorbs moisture from the outdoors. What you need to look into are pool deck coatings which are also used for patios. These are thin polymer-modified cement overlays that are colored and can be textured as well. They are extremely durable, can be made non-slip, and will last for years.
I have many cracks in a poor concrete job which I wanted for my auto workshop and am looking for something to fill these cracks.
Can you help?
Hello Charles. Can you be a bit more descriptive of the kinds of cracks you have? Is the surface smooth but has many cracks, are the edges crumbling or sharp? We have an article here on crack repair that may help as well. We ask these question because cracks are repaired a variety of ways depending on the type of cracks and what you plan to do with the concrete if anything.
I know it is not the proper way to do this but does epoxy coating really work for covering asbestos tile before putting down different flooring?
Hello Angela. Traditional epoxy coatings will not work for asbestos. The reason is that the surface of the tiles would have to be sanded in order to create bite for the coating. This is a big no-no when dealing with asbestos. There are some self-leveling epoxy related products that are used to encapsulate asbestos tile, but it’s best done by a professional. It’s a minimum two man job and requires experience to do right. We suggest contacting a contractor who has experience with encapsulating asbestos.
Hello, I attempted to send this comment in a few days ago but perhaps I botched it – forgive me if this ends up a duplicate. First – great site – thank you for the excellent trade-off information. One thing I can’t quite decipher yet – how the final results compare for a primer-epoxy-polyurethane floor vs a primer-epoxy-polyurea/polyaspartic floor. You have highlighted very well the trade-offs in applying polyurethane vs polyurea/polyaspartic but I can’t quite tell if you mean to imply that the gold standard for long term durability and looks is an epoxy-polyurethane combo, everything else is less durable in the end? I am doing a garage and I want something very durable against hot-tire pickup, chemicals, and abrasions.
I was considering the “roll on rock” product, especially because it looks like I can choose between both top-coat types. However, contrary to your recommendations they don’t recommend a primer – concerning as I don’t want any de-lamination. I was also fascinated by the Nohr-S product but it’s new enough that hot-tire pickup may be an unknown?
In the end, I can weigh all of the application trade offs for my situation, but I’d like to have an idea of the performance trades I am making, is Polyurethane twice as good, 10% better, or about the same as polyurea/polyaspartic in the post application performance of durability, longevity, and appearance?
Appreciate your help.
LW
Hello LW. Polyurethane and polyurea are very similar in performance since polyurea is a subgroup of polyurethane. Either are excellent when dealing with the high performance formulas and it really comes down to preferences and sometimes cost considerations. Some differences between the two – polyurea can be a bit glossier than polyurethane and dry film thickness is usually twice that of polyurethane. Polyurea can be more slippery when wet compared to polyurethane. What you have to consider, however, is that not all polyurethane and polyurea coatings are the same. It really depends on the formula used, particularly for polyurea. Polyurea can lose some of it’s performance advantages when it is adjusted for easier application and longer pot life. High performance polyurethanes can vary as well, though not as much as polyurea. This is why if you are comparing two different brands of coatings or comparing options within a particular line of products, it’s important to review the data sheets. Compare the Regent ratings for chemical resistance as well as ratings for abrasion resistance. It also helps to call the vendors of these products and talk with them. They can be very helpful with choosing the best performing product withing their own line.
Roll On Rock doesn’t use a primer because the epoxy is not 100% solids. It is a high solids, high performance coating though that gets good penetration. One thing to remember is that most companies want to keep pricing down, so advertising a product that does not require a primer is advantageous. It doesn’t mean that you would get just as good performance as a system with a primer however. What we can tell you is that both systems you are looking at are high quality. Hot tire pickup should not be a factor with proper prep. Nohr-S is a better system if comparing the two head to head, but it will cost more.
Just wondering which is better between Roll On Rock and Nohr-S. Wanting to put in the time to do great prep, and then want the product to stand up once it is applied. Nohr-S sounds amazing, but in the pictures on Legacy Industrial’s Facebook page, the flakes are few and far between. Roll On Rock, on the other hand, seems to layer the flakes on. Your professional thoughts would be super helpful! Thanks in advance!!!
Hello Ben. The amount of color flakes in these systems is dependent on you. You are given the option with these floor coatings to apply as much color flake as you want. You can choose a sparse look or a full color flake system. It really is user preference.
Are there any issues with applying an epoxy coating after having a garage floor slab jacked?
No really Mary. We would not recommend filling your contraction joints in order to get the seamless look though (assuming you contraction joints). If you get any slab movement from settling it may cause the epoxy over the joint to crack.
I heard somewhere that cider vinegar will work to etch a garage floor, as a safer alternative to muratic acid.
Have you any knowledge if this works?
No, it won’t work for etching concrete Paul. A cup to a gallon of warm water works well for cleaning coatings however.
We have an article on safe alternatives that work well. You can find it here.
I also have pets. And they stay in my basement when it’s to hit for them outside my floor is concret and they occasionally pee on it just wondering if this opoxy would be a could use to put on the floor for easier clean ups or would it not with hold the urine or do you know if any other floor products to lay down to help with it
Quality epoxy coated floors is what many kennels and pet facilities use for their flooring Antonio. The proper system makes for very easy cleanup with no stains and no odors left behind.
I just bought a Model home where the offices were built in the garage and sample Hardwood flooring was installed on the garage floor. When they tore up the office space and flooring, it left a lot of little chunks taken out of the concrete. They filled in the holes in the cement flooring with concrete and let that dry a few days. Then applied a skim coat of cement to cover up the difference in color in the flooring. We want to put down a good quality epoxy covering. Is this a good idea with the skim coat and if so, how long do we need to wait before we install the epoxy finish?
It depends on the type of skim coat they put down Scott. Some are designed to accept a coating while other manufacturer’s recommend against it. We suggest you find out what product that was used and then call the manufacturer for guidance. Assuming you can apply a coating, you will need to grind the surface to profile it correctly to accept a coating. Acid etching does not work with skim coats due to the low lime content and modifiers used. It will need to cure for a minimum of 28 days before applying it.
I live in Calgary and got commercial grade epoxy coating professionally installed in my garage in April. Will the flooring sustain any discoloration along the tire tracks over the winter months with all the salts, sands and slush?
We can’t say for sure Johnson without knowing what product was used. However, if it was a reputable garage flooring company using commercial product then chances are the floor will look just the same in the spring time as it did before winter rolled in.
In your article, you stated that used for both residential and commercial applications, epoxy will give your garage or shop floor that showroom shine that says “look at me!” My wife has been complaining that our garage is always so dirty and wants something done. Is epoxy the most requested material for garage floors? Finding a flooring company to put this in our garage could be a good option.
Yes, quality epoxy floor coatings as well as polyaspartic polyurea coatings are more popular today than they ever have been. There are many good garage floor coating companies and contractors available who can install such a system.
Can I apply epoxy to a new garage floor
Yes you can Martha. Just make sure it has cured for 30 days if it’s a brand new pour. Also, even though it is new, you still will need to profile it correctly by either grinding or acid etching the surface before applying a coating.
Ive got a 24×24 attached garage (unfinished) floor that has had some cracks and the saw cuts filled in with a some sort of crack filler. This crack filler is even on the some of the surface of the floor near the cut in the floor. Im unsure of what was used but I can say without a doubt it doesn’t want to come out. Its light gray in color and very flexible. Some of the filler has what appears to have some air bubbles that has raised up higher than the surface of the floor. I bought a epoxy floor coating kit and was just going to apply the coating over the filled cracks and saw cuts but don’t want to take the chance of the epoxy cracking at the cuts and cracks. Wll the epoxy adhere to the crack filler? What do you suggest I do? I thought I could just pull this crack filler out of the cuts/ cracks in the floor but its not as easy as I thought it was going to be. Ive tried cutting it out, tried using a wire wheel etc.. Is there a better way of getting the crack filler out? Maybe a chemical? Pressure washer ? Im not concerned with having visible cuts but want to hide the cracks of course. Can I leave the this stuff in the small cracks and on the surface of the floor? Thanks
Hello Dan. It sounds like the joints and cracks were filled with a self-leveling polyurethane sealant like SikaFlex or an equivalent. If so, epoxy does not want to adhere to it very well. Plus, for wide gaps such as expansion joints you run the risk of the epoxy cracking under weight. The reason for this is that epoxy is not flexible at all. If the filler flexes under weight, then the epoxy will crack first before flexing.
The best way to remove it is to use a crack chasing wheel that is attached to a 4″ angle grinder. Here is an example of the wheel. This video shows how they work. Once you clean out the cracks and joints you can then fill them with the appropriate material. One option would be to leave the contraction joints alone and epoxy up to the filler, but you would still need to fix the crack issues.
Hi, I try to decide either solvent based epoxy vs. rustoleum rocksolid product for my garage floor grinded last week. Can you please tell me which product will last longer and also stronger? In addition, would you recommend the second coat for either option? If that is the case, should I apply the chips after the clear coat?
Thank a lot for your time and comments.
Hello QL. Rust-Oleum Professional solvent based epoxy has a long history of holding up well for its price point. It’s always been a solid performer in the DIY kit category. RockSolid polycuramine (also by Rust-Oleum) is still fairly new, but so far it seems to be doing well. One difference between the two is that RockSolid lists some of the basic performance test numbers for their product. The abrasion resistance and shore hardness ratings are actually quite good for this product, indicating that it should hold up well. Most DIY kits in this category do not list performance test numbers since they are known by the manufacturer not to stand up well to commercial quality product. Keep in mind, neither of these kits compare to the multiple coat, high performance product that is generally installed professionally or by avid DIY enthusiasts.
Another difference between the two is preference in cosmetics. The Rust-Oleum Professional solvent based has a semi-gloss appearance while the RockSolid has a very high gloss appearance. One thing to keep in mind with RockSolid, however, is that there have been known issues of poor coverage rates and a splotchy appearance with just one color coat. Most of these issues are attributed to good penetration of the product to some concrete surfaces. A second coat fixes the problem and creates good color uniformity. If you plan on using just one color coat, we suggest you reduce RockSolid’s stated coverage rate by 15%.
If you plan on applying a clear coat, you will want to broadcast the color flakes into the color coat immediately after it is applied. You then lock in the color flakes by applying the clear coat over them.
Shea,
Thank you for your reply. Very helpful. I decided to go with solvent based epoxy last week and received the product yesterday. However, checking the weather in the next 10 days, although the highest is mid 60s, the lowest is down to upper 40s and low 50s. I called rustoleum today and they told me that minimal temp is 55F for 3 days around application and has to be above 55F all the time after I coat the floor. Otherwise, epoxy may not cure. Is that really true?
If that is the case, does that mean I have to wait until next May/June? I have grinded the floor and the pore is open. Then return next year, do I have to start from scratch again ie. clean, grind etc? I do not mind to degrease the floor again, but grinding again is intimidating for me…
Thanks a lot!
Yes, it’s true QL. Temperature as well as humidity play a big role in the successful outcome of coatings. Just to clarify, they require a minimum of 55 degrees for a few days after it is applied. The temps can drop there after. If you don’t foresee that minimum temperature range happening for a few days or so in the near future then you will have to wait. You will not have to grind, but you will need to clean the surface real well. We recommend sending the product back and not hold on to it for that long as well. There are some tricks to applying epoxy in colder temps which we have listed here.
I know you were debating between RockSolid and the Professional series Rust-Oleum. The RockSolid polycuramine coating has a lower temperature restriction of 40 degrees and could be applied in your current conditions. Just something to consider.
We have just built a new home with attached garage, and radiant heat in the garage floor. Can we install an epoxy floor over the heated floor?
Thank you
Yes, it’s actually very common. The heat will not affect the coating in any way.
We r working on setting up a design studio in a garage on a home that was built approximately eight years ago.
It has minor crack lines and looks like they did a light treatment to the garage floor.
I want to make sure that the flooring that is done in the garage now will cover cracks. These are thin lines.
Please advise if this product will work and if you have solid elegant colors within ur line.
Thank you
Hello Mai. If you can stick a playing card in the crack then it needs to be filled first. Anything thinner and you are OK to coat over it. We are not a retailer or online vendor so we do not offer product.